I’m in a work rush with a close deadline on a book that I’m indexing and that means that any heavy duty cooking (anything that requires turning on the stove, or pushing a button on the microwave) is out for the next few days. In need of lunch, I perused the fridge contents.
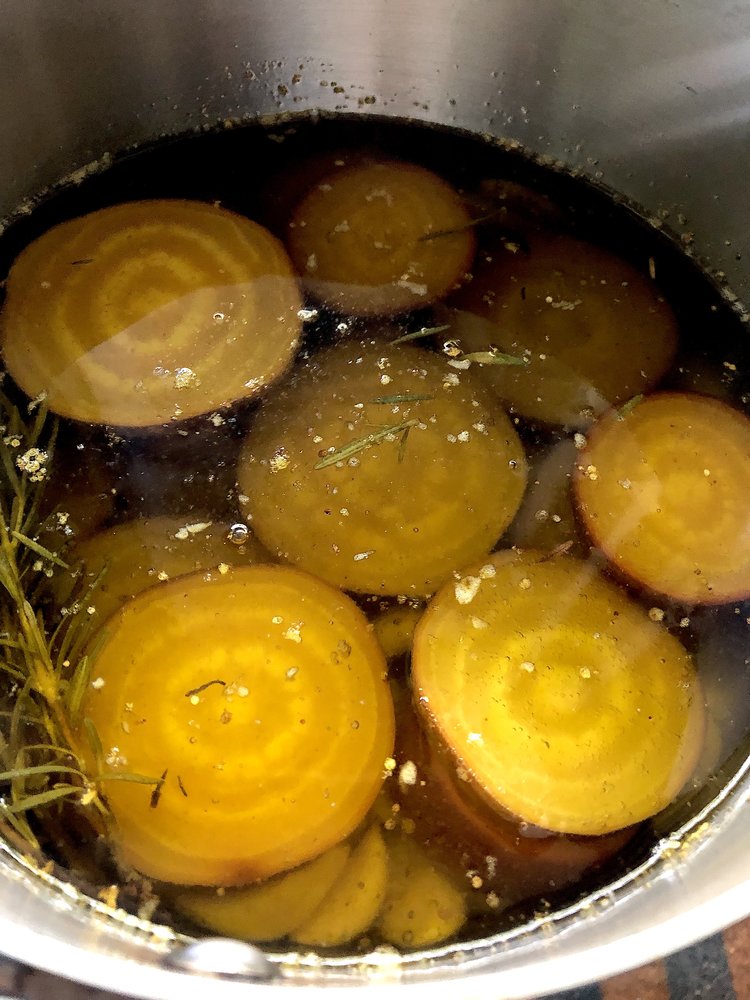
There was a package of Melissa’s Produce steamed, peeled, baby beets that I brought home from the supermarket produce section; toted home and put in the vegetable bin (sometime ago, and not yet used) so I made the easy beet salad from Chef Mimi’s blog this afternoon. This was a great light, quick, warm-day lunch.
The beets are vacuum sealed in heavy plastic. The texture is perfect–just like I’d steamed and peeled them myself–and they have a long shelf-life so I can always have them around without feeling that I absolutely HAVE to have beets today, or even tomorrow.
It’s not that cooking beets is difficult, but when there’s a really pressing deadline and I need lots of work time, I go for convenience and speed but I don’t want to sacrifice taste. That usually rules out canned vegetables (except for beans and tomatoes) though I admit to not have checked out canned beets in ages because I really never liked the taste; I can see that I need to revisit the canned ones again, too.
These vacuum packed ones just moved beets right up with canned beans as a convenience item in my pantry.
(Let me be clear about my comments on any products mentioned in my posts: I have no connection (except as a consumer) with Melissa’s Produce, nor with Stahlbush Island Farms (mentioned below. I get no remuneration for comments or use of these products.)
Now, I tasted the beets straight from the package and then made my salad. I didn’t spiralize them, so my salad wasn’t as pretty as that pictured on Cher Mimi’s blog, but it was tasty. I doubt that I could tell those vacuum-sealed, pre-cooked beets from ones that I had steamed and peeled myself (unless I looked at the color of my hands). You could put those in a bowl and serve as a vegetable without anything except warming them and adding seasoning of your choice.
I have one more “convenience” product that I want to check out: Stahlbush Island Farms sliced frozen beets that I found in the frozen food section at my local Harris Teeter. I didn’t go to the frozen foods section expecting beets (probably the farthermost thing from my mind just then–I was looking for chopped kale) but right next to the Stahlbush Island Farms chopped curly kale, were sliced beets. As  you’ve probably gathered, I’m incapable of leaving something like that in the store. So, I have those in the freezer to try next.
One of my other summer favorites is beet soup. I can certainly speed up making that if I use one of these products! I can replace the beet greens with Swiss chard–maybe even find it frozen as well.
One of the appealing things about the frozen beets is that I can use some and put the remaining ones back in the freezer without having leftover veggies. Since they are sliced, but uncooked, I have more flexibility. With the vacuum packed ones or a can, you have to do something with the rest of the beets so that they don’t linger too long in the fridge and grow interesting colors of mold, and eventually find the way to the garbage.
My only “regret” with the Melissa’s beets was that I really like beets roasted instead of steamed. The first way I’ll try the frozen ones is roasted as suggested on the website.
ÒΔÓ
Until I found these products in the frozen food section, I’d never heard of Stahlbush Island Farms, but after looking at the website and the products, I’ll certainly follow up to check out some of the grains and legumes that are frozen, as well as fruits. (Again, no connection, except as a consumer, and picky at that.)
I noticed black raspberries on the product list. I’m a fanatic about black raspberries–there’s a big difference in flavor from the red ones that we see in the stores, not that those aren’t good, but black raspberries are what I grew up with, and thus my idea of what raspberries should be.


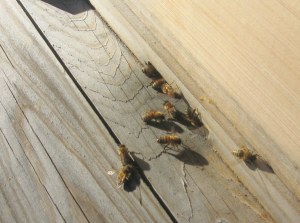 Finally a let up in rain and warm enough for me to play at the hive. There’s still traffic in and out of the hive, but less than during warmer weather when there was nectar and pollen in more plentiful supply. I didn’t see much pollen coming in at all. When I removed the syrup feeders, there were lots of the girls up there slurping up syrup.
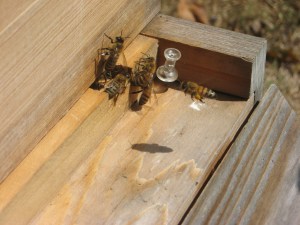 once I get it cut down to 8-frame size.
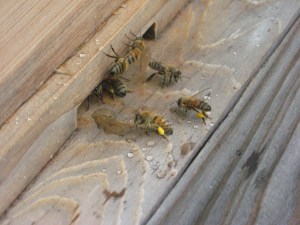 So–do I place an Imrie shim to keep an upper entrance? Or am I going to have to lift the bottom box and change the orientation of the entrance reducer, or just substitute the mouse guard. I miss having the class before the bees arrived; however from the looks of the colony, they are training me pretty well. From
 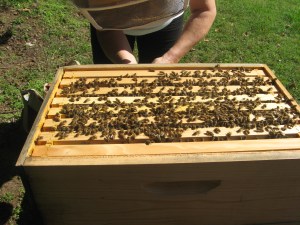 All my questions aside, it was good to see so many bees working in the honey super and drawing and filling even the outermost frames. They’ve obviously been busy since my last inspection. That should give them a good honey supply for the winter. Being the “newbee” that I am, I am glad that the candy-board is on the hive. Much better safe than sorry come spring.