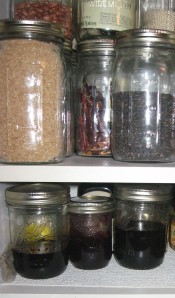
Storing things….

One of the problems that single-serving cooks continually face is things that change texture and colors as they languish in the refrigerator.  These are not always leftovers from the meal you cooked a week ago, or the little box you brought home from the restaurant when you couldn’t clean your plate (even though you knew then it was unlikely that you’d actually eat what was inside).  Having things “go bad” is a perpetual problem for those of us cooking for one…that head of celery, that whole head of romaine lettuce….

There are lots of tips, tricks, and suggestions that I’ve found about how to store things that plague the single-serving cooks but I’m always looking for better ways to store those bits and pieces until I can use them.   I’m always on the lookout for things that actually do work.

Ball-Mason jars for storageOne of my favorite sources for information like this is Cook’s Illustrated because they actually do experiments to find out what works and what does not.  This doesn’t seem to lend itself well to a post for each suggestion, so I thought I’d add a reference page on Storing Stuff as a place to collect information about storage methods for the things that you are likely to use as a single-serving cook.   If you have a successful method that you use as a solo cook, please post it.

Cold beet soup

I’m back from the Durham Farmers’ Market–it was a great day, even though the market is not in full summer swing yet.  The Piedmont BioFarm’s booth, which was right next to mine, had absolutely gorgeous beets. Unfortunately, they  sold quickly so  I didn’t get any today, but I’m told that there will be more next week, so I’m planning to bring some home with me then.

beets with tops from Johnny's Select Seeds.The sunshine and warm weather made me think about beet soup.  This recipe was given to me years ago by a good friend, and it’s become one of my favorite summer things to have in the refrigerator for hot weather.  It’s cool and refreshing, yet very satisfying.

I first experienced this soup when Casey brought me some, just when it was most needed:  I was moving–in extremely hot, humid weather–from one apartment to another in the same building, so it was mostly carrying boxes and lugging furniture, all very hot sweaty work.  Air conditioning was out of the question with the constant coming and going, with the doors open.

Cooking was also out of the question–mostly for reasons of fatigue, sore muscles, disruption of the kitchen, and the heat, and maybe even a dollop of laziness thrown into the mix.   That soup was the most wonderful treat, particularly under those circumstances; I’ve made it many times since and it’s at least as good, if not even better, when had in much less dire straits.

It’s not a small recipe, but it holds very well in the refrigerator;  a “left-over” taste is not a problem–and I think that the flavors actually blend and grow with standing.  I suppose you could always halve the recipe, but it’s so good that I’ve never done that–I can easily enjoy  it several days in a row!

Šaltibaršciai (Casey’s Cold Beet Soup)

Ingredients

  • 1/2 medium-size onion, finely chopped (preferably Vidalia or Walla Walla sweet onions)
  • 1 tablespoon salt
  • 6-10 (depending on size) boiled, peeled, and grated beetroot
  • 2 cups water in which the beets were boiled.
  • Chopped stems and greens from the beets, steamed 3-5 minutes
  • 2 large cucumbers peeled, seeded, and chopped
  • 2 handfuls of fresh dill, finely chopped
  • 1 bunch of green onions, sliced thinly
  • 5-6 hard-boiled eggs, chopped
  • 1 cup of sour cream
  • 1/2 gallon buttermilk
  • 2 cups water from cooking the beets (cooled)
  • red wine vinegar (0 -4 tablespoons) to taste.

Assembly

  1. In a large bowl, place the 1/2 medium onion and about 1 salt. With the back of a wooden spoon, grind together the onion and the salt to draw out the onion juice. (You really need to do this “muddling” process–you don’t get the same “blend” of the onion flavor if you simply add minced onions.)
  2. Add the remainder of the ingredients to onion in the bowl and stir well.  Adjust the flavor balance with additional salt if needed, and a wine vinegar to taste.  Add more liquid if needed for the consistency you prefer.
  3. Chill thoroughly.  Serve with boiled or steamed potatoes, chilled.  (You want boiling potatoes, not baking potatoes for this; red or Yukon gold work well.)

Wine suggestions, courtesy of Casey, were as follows:

  • Sauvignon Blanc is excellent.  The soup needs a wine with more fruit and not too herbal or grassy.
  • A white Corbières was too herbal–it accentuated the dill in the soup until it was just overwhelming.

I did not try the Corbières; overwhelming dill did not strike my fancy and I trust this recommendation.  I can attest that Sauvignon Blanc is excellent with the soup.  I’ve probably eaten this for breakfast, lunch, and supper, with wine, and without.  It’s well worth the effort of making and it may well improve with standing a few days.

I have to confess that is a spate of utter laziness, I have replaced the potatoes with cubed extra-firm tofu with a very satisfying result.  I have always thought that it’s the eggs and the potatoes that make this such a satisfying, but cool, meal.  And, it a marvelous color, too–definitely shocking pink.  I’ve not tried it with the orange beets, but that might be interesting, too.

Think it looks like a lot? Well, invite a friend. Friends are usually glad to help in cases of an excess food crisis!

A son goût!

A sweet treat

Holiday time is coming up so I want to introduce you to something special that you can do, even for one:  brioche filled with chocolate ganache.  While it’s baking, you home will smell like a bit of heaven.  I’m going to share with you a recipe that I will abridge and paraphrase from Artisan Bread in Five Minutes a Day by Jeff Hertzberg and Zoë Francois to demonstrate the range of recipes available in their books, and how adaptable they are to cooking for one. The full recipe (well worth having) is found on page 189 of the book. It’s a recipe that is easily doubled or halved.

Brioche (unfilled)

Ingredients: Makes four 1-pound loaves.

  • 1-1/2 cups lukewarm water
  • 1-1/2 tablespoons granulated yeast
  • 1-1/2 tablespoons (kosher) salt
  • 8 eggs lightly beaten
  • 1/2 cup honey
  • 1-1/2 cups (3 sticks) unsalted butter, melted
  • additional butter for greasing the pan
  • 7-1/2 cups unbleached all-purpose flour
  • egg wash (1 egg beaten with 1 tablespoon of water)

Assembling the dough:

  1. Mix the yeast, salt, eggs, honey, and melted butter with the water in a 5-quart bowl (or lidded, but not air-tight) food-grade container. (You will store the dough in the refrigerator in this.)
  2. Mix in the flour without kneading, using a wooden spoon. You may need to use wet hands to fully incorporate the last bit of flour.  The dough is loose but will become firm when chilled.  You should not try to work with it until it has chilled for 24 hours.  There may be lumps in the dough, but they will (mine did though I was uneasy about this on the first batch).
  3. Cover (not airtight) and allow to rest at room temperature until the dough rises and collapses or at least flattens on top.  This takes about 2 hours.
  4. Refrigerate in the container; it can be used over the next 5 days; for longer, you should portion and freeze the dough.

Baking the brioche:

  1. Grease a 9 x 4 x 3-inch nonstick loaf pan.
  2. Dust the surface of the dough with flour and cut off a 1-pound (grapefruit-size) piece of dough.  Dust this piece with more flour and quickly shape (see link to videos demonstrating this in my post “Smell the fresh bread”.)
  3. Elongate into an oval and place in the prepared pan and allow it to rest for 1 hour and 20 minutes, covered lightly with a cloth or plastic wrap if it is dry in your home.
  4. About 5 to 10 minutes before baking time preheat the oven to 350 ° F.  If you are using a stone in the oven then you will need to preheat the oven for about 20 minutes.
  5. Using a pastry brush, brush the top of the loaf with the egg wash.
  6. Place the bread near the center of the oven and bake for 35-40 minutes.  It should be a lovely medium golden brown.  It does not form a hard crust because of the fat in the dough.
  7. Allow to cool before slicing and eating.  (I can tell you this part is really hard!)

Brioche

Brioche Filled with Chocolate Ganache (page 195)

This calls for good quality chocolate.  I have always used Valrhona chocolate for this.  It’s worth the splurge to have very good chocolate–after all, you are not likely to be eating this every day.

Note:  This dough can become very soft in hot weather or in a very warm room.  To keep the dough cool while rolling it out, fill two or three zipper lock bags with water and lay them flat in the freezer until frozen solid; use these under an upside-down lipped baking sheet to roll out the dough.  This will keep it cool and easier to work with, but you still need to work quickly.

Ingredients:

  • A 1-pound portion of the brioche dough above.
  • 1/4 pound bittersweet chocolate (Valrhona or equivalent)finely chopped.
  • 2 tablespoons unsalted butter (plus more for greasing the pan)
  • 4 teaspoons unsweetened cocoa powder (Valrhona or equivalent here too).
  • 1 tablespoon of rum or Chambord (optional).
  • 5 tablespoons corn syrup
  • 1 egg white, lightly beaten with 1 tablespoon water
  • Granulated sugar for sprinkling on top.

Making the ganache:

  1. Melt the chocolate in a double boiler or in the microwave until smooth; be careful not to burn it.
  2. Remove the chocolate from the heat and stir in the butter thoroughly.
  3. Stir in the cocoa powder into the rum or liqueur if using.  Otherwise, stir in the corn syrup and mix until smooth.
  4. Add to the chocolate.

Assembling the brioche:

  1. Lightly butter a nonstick 9 x 4 x 3-inch pan.  Take a 1-pound piece of dough as described above, and shape it into a ball, as above.
  2. Using a rolling-pin, roll out the dough into a 1/4-inch thick rectangle; dust with flour as needed.
  3. Spread 1/2 cup of ganache evenly over the dough, keeping a 1-inch border all around the edge.
  4. Starting at the short end, roll up the dough, sealing the bare edges.  Tuck loose ends underneath and place in the prepared pan.
  5. Allow it to rest for 1 hour and 40 minutes.

Baking the brioche:

  1. Preheat the oven to 350 ° F at least 5-10 minutes.
  2. Using a pastry brush, apply the egg white wash to the top of the loaf.  Sprinkle lightly with granulated sugar.
  3. Bake for about 45 minutes, or until golden brown and the sugar on top has caramelized.  (The loaf will likely split in places during baking and some of the ganache will show through, but it just looks so good with the chocolate peeking out!)
  4. Remove it from the pan and let the brioche cool slightly.
  5. Drizzle the rest of the ganache (1/4 cup) over the top crust.  Cool completely and slice.  (This really does need to cool completely before slicing–don’t be tempted to cut it while warm.

There you have it–a serious treat.  It’s very easy to make smaller filled brioches in small “mini” pans, but I’ve found you need to roll out the brioche dough more thinly for the “mini” loaves–otherwise the filling and the brioche are out of balance.  Of course this will take a smaller amount of ganache per loaf.  I have to confess to making more of the smaller loaves, and NOT drizzling the ganache on top, but just letting the sugar and the ganache peeking out from inside  be the finish on the top.

Now you want to know, what else can you do with this dough?  There are recipes in the book for filled breads, pastry, rolls, and other treats that you can make so easily.   You can vary the filling–I’ve done it with good ginger preserves, and orange marmalade too.  Lots of room to please your palate.

The basic brioche is wonderful toasted, makes a great grilled ham and  cheese sandwich (croque monsieur, if you wish, to be in keeping with the brioche).

Think what a great gift a loaf of plain brioche or the filled brioche would make.  Though I don’t make it often (diet!) I like to have friends in for a mid-morning slice of the filled brioche and hot chocolate to give us a wonderful chocolate fix!

Remember that you can halve the recipe easily so it’s very adaptable for almost single-serving cooking, but there really is some big-time taste here.  If you appreciate  breads, this book gives recipes for a huge variety that are all easy to portion  as appropriate for one person.

Fresh-baked bread

The smell of fresh-baked bread is one of the best that I know (along with bacon and fresh-ground brewing coffee).  I cannot think of anything much more pleasurable than hot, fresh bread with butter and maybe some exquisite (unprocessed) raw honey.  I’ve found that even when cooking for one on a busy schedule it not impossible to bring that wonderful taste and aroma into my kitchen with a minimal investment of time.

Buying bread from the bakery is fine, but for me, I keep ending up with stale bread.  I can make bread crumbs for later use, but that fills my freezer with more bread crumbs that I’ll ever need.  I could freeze part of the bakery loaf, but even though that helps, it’s still not the same as fresh bread from the oven.  I’ve baked bread the usual way: proofing, letting it rise, punching it down, letting it rise…successfully.  I put small loaves in the freezer, and as long as I remembered to pull them out to defrost in the fridge over night, I could have fresh bread with minimal effort and in quantities appropriate for one person.  That was fine when I was a telecommuter; I could use my breaks to knead the bread, and take the few minutes necessary to pop it into the oven.  I had my small loaves; but, I had to remember to defrost it. When I was no longer a telecommuter, that did not work quite so well, so when I heard about the dough being kept in the refrigerator, I had to try it.

Deli-style rye breadThe no-knead, wet-dough technique described in Artisan Bread in Five Minutes a Day by Jeff Hertzberg and Zoe Francois lends itself admirably to cooking for one.  I was skeptical when I first heard about this, but since I love good, fresh bread, I bought the book and gave it a try.  It has made fresh bread for one an easy thing to do.  When I’m in need of an attitude adjustment, nothing does it better than to go into the kitchen and with minimal effort have my home smelling of fresh bread.  The main attraction of this method for me was that the dough could be kept in the refrigerator for about two weeks (less for dough enriched with eggs).  I can reach in and grab a handful of dough, form a small loaf, let it rise (shorter time for small loaf), and bake.  The hands-on time is minimal.  The results are wonderful.

To give you a sample, here is an adaptation of the Master Recipe a free-form boule from Artisan bread in Five Minutes a Day.  For measuring the flour, just dip and then level your measuring cup with a spatula (scoop and sweep)–no sifting required.  You can bake this on a cookie sheet, but if you really get into this, you will probably want to get a baking stone, but even baking on a cookie sheet, you have some good bread.  Be sure to use dry-ingredient measuring cups for the flour. I assuming that you likely don’t have a stand mixer or  a large food processor, so I’m given the hand mixing instructions here.  I think that the only “tricky” part is shaping the loaf; not having the pictures in the book, here is a link to a video which will show you the mixing and shaping technique.

Ingredients for dough to make four 1-pound loaves:

  • 3 cups lukewarm water
  • 1-1/2 tablespoons granulated yeast
  • 1-1/2 tablespoons kosher salt or other coarse salt
  • 6-1/2 cups unsifted, unbleached, all-purpose white flour
  • cornmeal for your cookie sheet or parchment paper

Add yeast and salt to the lukewarm water in a 5-quart bowl or lidded (not airtight) container.  Mix in the flour all at once with a wooden spoon.  If the mixing becomes too difficult with the spoon, use your hands (wet) to work in the flour, but do not knead the dough.  Now, allow to rise at room temperature (covered) for about 2 hours until the dough as doubled, or starts to collapse (flattens on top).  Refrigerate the dough overnight since it’s easier to shape the loaves with cold dough.

When you’re ready to bake, prepare you cookie sheet, or parchment paper with a light sprinkling of flour or cornmeal.  Now, sprinkle a bit of flour on the surface of the dough and pick up a handful (about grapefruit-size for a one-pound loaf). Sprinkle with flour and shape, as if you were pulling a blanket from the top down around it to the bottom side.  Don’t knead–this shaping should take only about a minute.

Place the loaf on cornmeal on the cookie sheet or on parchment paper, and let it rest for about 40 minutes for the one-pound loaf.

Preheat you oven to 450 ° F  with the rack in the middle of the oven.

After the bread rests for 40 minutes, dust the top of the loaf with flour.  Using a serrated knife, slash a 1/4-inch deep cross on top so that you control how the crust breaks open when it expands in the oven.

The crust will be best if you use steam in the oven; you can do this by using the broiler pan on the lower rack, and pouring in a cup of hot tap water when you put the loaf in to bake.  Baking will take about 30 minutes, or until the crust is brown.

Store the remainder of the dough in the refrigerator until you’re ready to make another loaf.

I started with the master recipe, and have now worked my way through a number of others: deli-style rye, brioche, chocolate bread (yum), brioche filled with chocolate ganache, the Portuguese broa (a corn bread–great for the Thanksgiving holidays), olive oil dough, and others.  Every recipe has worked as it should.  It’s great to be able to make myself a crusty baguette one day, and a boule, or sandwich loaf the next time–all from the same batch of dough.  Since I use some bread for sandwiches, I frequently bake mine in an Italian bread pan which lets me have an oval loaf , larger than a baguette, that works well for the kind of sandwiches I make.  This pan is perforated so you get a better crust than using a non-perforated pan.  The pan is nonstick, but with the wet dough you will still need to us a cooking spray to prevent sticking, and the dough will ooze into the perforations sightly, but it can usually be removed easily.

The container that I use to hold my dough is a Rubbermaid that I got from the grocery store.  It has a good lid, and is not airtight.  If you are hand mixing you could , just mix in this container.  The corners are slightly rounded, but I find it’s difficult to get all the dry flour mixed around the edges, so I usually mix in a bowl and transfer the dough into this container.  If the lid on the container fits very tightly, you will need to leave it loose of because of the gases that are formed during the fermentation.

Of course, I was excited when the second book, Healthy Bread in Five Minutes a Day appeared.  I’ve just gotten the Kindle version of that one, and  anxious to try some of the recipes there.  I’ve been interested to see comments about this technique on other blogs.  An adaptation of the master recipe for whole grain bread can be found on the Former Chef blog, along with some helpful photographs that should make you want to run to the kitchen and bake.   I intend to take this evening to peruse this book and see what gems I can find.  To be on the safe side, I’ll start with the master recipe to see how the dough handles.  Based on my previous experience with these recipes I’m expecting great things.

More recipes and baking tips can be found in Zoe Francois’s blog, Zoe Bakes. New recipes and tips are available at Artisan Bread in Five website as well.

I’m hooked on having fresh bread in such an easy way.  The loaves in the photograph are brioche just out of the oven.  If you really need an attitude adjustment, the smell of the brioche (especially when filled with chocolate ganache) will definitely do it!  More about brioche coming  soon.  Happy baking!

Vinaigrette

I think that seasoning is SO important when cooking for one–it can take that serving of veggies from sort of humdrum to great so easily. One of the easiest ways to “dress up” leftovers is to use a sauce with them on the second run.

I think that one of the easiest is a vinaigrette.  It’s so simple, holds well in the fridge. If you know a basic ratio (usually 3 parts oil to 1 part acid or if you prefer a less tart dressing 4 parts oil to 1 part acid) you can vary it easily.

A bit of mustard serves to aid the emulsification of the oil and acid.  The acid can be vinegar, or it can be lemon juice, lime juice, orange or grapefruit juice.  You can easily add different herbs, or garlic, onion, shallot, spices, or chives as an aromatic, depending on what you want:  with fish, lemon might be a good choice.

Stored in a small jar, covered, it will keep for approximately a week in the refrigerator, so it’s always handy.  This same vinaigrette is good to make a non-mayonnaise tuna or chicken salad.  Better and less expensive than store-bought salad dressing, and without additives and preservatives.