Prime beef!

I did eat well over the Christmas-New Year holidays. Most of my fancy stuff was sale “finds” (pheasant and duck breasts), but I did have one splurge. The holiday season brings out USDA prime beef (without having to special order it) so I took advantage of that and treated myself to a steak. I guess you could call it a steak, but it was almost a young roast.

I’m enough of a carnivore that I like my meat rare to medium rare, it was cut thick enough that I could get a decent sear on the outside and still be rare inside. I cooked this marvellous hunk of beef in a combination of oven and stove-top as directed by Cook’s Illustrated. My first meal was a steak and potatoes meal (with the leftover cabbage and rutabaga from my Christmas dinner.

Obviously, there were some serious leftovers from a chunk of beef that big. Mostly I just enjoyed the leftover steak by making “roast” beef sandwiches of various sorts. After all, that’s a treat you don’t often get when you’re doing single-serving cooking.

In the process of eating up all that leftover beef I had lots of splendid sandwiches. But I did come up with one spectacular one. I love bleu cheese, and I think it’s excellent with beef. It’s not unusual for me to top a steak with gorgonzola dolce or even just Danish bleu.

Rummaging in the fridge, I realized that there was just enough beef to make one last sandwich–and it was time to use it or lose it. There was also a slice of Boar’s Head MarBleu cheese. MarBleu has (as you might guess) something to do with bleu cheese: it’s Monterey Jack with bleu marbeling. It’s got the bleu cheese tang, but not so strong that it is overwhelming, and it can be sliced (delicious grilled cheese sandwiches, too). A beef and bleu sandwich was just what I needed, but the real pièce de résistance was what I used for a condiment on this sandwich.

In the process of putting the finishing touches on my Christmas Eve and Christmas day dinner, I went to Bull City Olive Oil to get some balsamic vinegars to use with the duck breasts. While trying to decide what to do with leftover duck and pheasant, I made another trip to Bull City Olive Oil looking for inspiration. In a shop that allows tasting, I’m constitutionally unable to NOT taste. One of the oils that I tasted was a chipotle infused oil. That was just the thing to help me get rid of the leftover duck breast (later on that).

That bottle was sitting on the counter while I was making my beef and bleu sandwich. I passed on the mayonnaise, the butter, and the mustard that I had been considering. Instead, I drizzled some of the chipotle oil on my bread, stack on my thinly sliced beef, and the MarBleu cheese. Great combination–just a bit spicy, just a bit smokey. (I had the green stuff on the side as a salad.)

Ò¿Ó

(No pictures of that beautiful steak–they disppeared somewhere betwixt the smart phone and Google photo so all I have are the gustatory and olfactory memories.)


Braised lamb shanks

Continuing my freezer clean-out, I discovered two lovely lamb shanks that I must admit, I had forgotten were in there.  The weather that we’re having now just begs for comfort food, so I decided to make braised lamb shanks and the shanks beg for white beans to accompany them.

Starting with a recipe for braised lamb shanks and white beans that I knew worked well I still perused recipes from some other reputable sources (Williams-Sonoma, Food and Wine, and The New York Times). My lazy side came to the front and I decided that I wanted to do this all in one pot–so I went with the New York Times recipe–except I used thyme instead of rosemary and scaled the recipe for two lamb shanks.

Then I decided to follow a favorite principle of mine in cooking: never do on the stovetop what you can do in the oven (extremely hot weather will modify this). After bringing the pot to a simmer on the stovetop, I popped the pot into a 275°F oven for a few hours–low and slow since this is supper for tomorrow, likely with a grilled (well, broiled given the weather) cabbage wedge for a side.

Even for two shanks, this comes out to be a lot of food, so I’m looking forward to putting some into the freezer for another rainy day meal when I’m feeling indolent.

Leftovers. . . and second servings

One of the banes of refrigerator maintenance is leftovers. I work hard to avoid them, but I’m often defeated in my efforts, especially when eating out. So often restaurant servings are HUGE, and, sucker that I am, I don’t just leave the excess on my plate.  I bring it home, tuck in into the refrigerator, and then likely at some too-far-in-the-future date I get an odoriferous reminder that I now have to do something with the leftovers, which are likely to be found in the back of the refrigerator. They will most likely be unidentifiable now, so they go into the garbage.

cat in refrigerator

lookin’ for leftovers

The obvious first step is to think carefully about bringing home restaurant leftovers: Will it reheat well enough that you really want to eat it?  After all it probably doesn’t make much difference when it gets thrown out–then or a week later. If I decide to tote it home (and I already know that the cat won’t eat it), then I need to label it, and be sure that it doesn’t end up in the back-most corner of the fridge.  I have used masking tape (which comes off easily–often too easily), Sharpies (which can be removed from some things with rubbing alcohol).  I recently found a suggestion to use dry erase crayons (which I didn’t even know existed).  Might be worth a try, but better yet for me would be to be much more judicious in what I put into the fridge as a “leftover”.

“Leftovers” from my own cooking aren’t as much of a problem, but I’m always looking for ways to use the bits and pieces of produce or the last part of that can of beans. I’ve got a handle on the bits and pieces of bags of frozen vegetables and even partially on the celery.  But there are still bits  and pieces….

The Cook’s Illustrated books on cooking for two and Joe Yunan’s book (see bibliography) is the cross-indexing of recipes that use the same ingredient so you have a suggestion for what to do with the other half  of that head of cauliflower.

I’ve found several tools to help reduce waste in single-serving cooking. First from the kitchn is an article titled What to Do With…? 75 Tips for Leftovers and IngredientsThere is a long list of things from produce market, the refrigerator, and the pantry with suggestions of what to do with the extras. For a lot, the suggestions are “freeze it” which does not necessarily solve the problem–just moves it to some point in the future; however, there are some good suggestions.

The flip side of this is throwing away things that could reasonably be used. For some examples, see 10 Foods You Should Never Throw Away. I can agree with the cheese rinds and chicken bones, but here again, I think it’s easy to fall into the trap of just changing where you stash the leftovers. When you’re doing single-serving cooking you do need to consider carefully what you bring home and what you keep.  Also useful might be Top 10 Ways to Use Up Overripe Fruit.

Another article that is useful 15 Foods You Should Freeze in an Ice Cube Tray. There are lots of other things to freeze as “ice” cubes, and the put into zipper-lock bags for freezing.  Having these portioned out can make it easier to use them. One of the things I do with excess celery and carrots is to make mirepoix (soffrito) in a big batch, then freeze it in ice-cube trays. One or two cubes will be what you need for small-time cooking–and it cuts time from preparation, and should reduce waste!

Planning use as in having thought about possibilities for that second serving (no, not meal planning–I don’t do that), and shopping with single-serving cooking in mind should help. One way to manage what gets pushed to the back is to add a triage box to the fridge.  Triage  refers to the process or sorting, or assigning priority to something.  In the fridge it would be an eat-me-first box where you put things that have a short shelf-life, or perishables so that they don’t get pushed to the back of the fridge.


angel hair pasta with raw tomato sauce

I’ve always like angel hair pasta with a very light, fresh sauce. Since it’s tomato season, at least for a bit yet, I wanted to share this one–The recipes (and commentary) from this blog (Smitten Kitchen) are always good–and this is SO easy.  I’ve found that angel hair pasta cooks so well in the microwave pasta cooker which means no hot steamy, boiling pot in the  kitchen in this hot weather.

Enjoy!

angel hair pasta with raw tomato sauce from the Smitten Kitchen.

A “roast” beef sandwich

Sandwiches are not just something to be thrown together without thought–definitely NOT two thin slices of baloney and Wonder bread!  They are a special kind  of meal–sometimes comfort food (like grilled cheese sandwiches) and sometimes even need planning when cooking for one person.  I’m always on the lookout for good “recipes”–or maybe inspirations–for sandwiches–particularly roast beef.

As much as I like cooking for one, there are a few drawbacks. One is that  realistically you can’t do real roast beef.  One of the things I miss is a good roast beef sandwich–it’s just not the same when the roast beef comes from the deli–no matter how good the deli.

image from Lemony Thyme

roast beef sandwich

One of the ways to satisfy my craving for roast beef sandwiches is with the planned  “leftovers” from my  thick-cut  steak–intentional leftovers of nice rare, pink, juicy  steak to slice  thinly and make a sandwich.  Then the fun begins–it’s a happening.

  •  Start with good bread (my oat bread , if possible),
  • Add some  flavorful, spicy greens:  radish sprouts or possibly arugula, or endive.
  • Maybe tomato,  if in season.
  • Cheese:  something “bleu”– gorgonzola dolce, Cabrales,  or Danablu–is one of my favorites with beef, though nothing wrong with a good cheddar or Swiss.
  • Maybe some thinly sliced red onion (or Walla Walla, Maui, or Vidalia,   sweet onions, if those just happen to be lying around).
  • Maybe a good “smear” of horseradish or horseradish sauce, instead of onion.
  • Finally,  a thin film of butter, preferably European style cultured (salted or unsalted)!
  • The final touch would be a sprinkle of fleur de sel.

Now choose a beverage–beer, cider, or even a glass of wine. Enjoy.

Trying a new recipe….

As much as I’ve talked about improvisation in the kitchen when you’re doing single-serving cooking, I do occasionally like to have a recipe, at least for starters.  Trying to cut a recipe serving six or eight to one-person size is really frustrating.  The major ingredients are not that hard to do–it’s the seasonings that are hardest.  You’ve a much smaller quantity so you do need to cut them, but usually NOT by the same proportions as the main ingredients, so I was excited to see that the editors at America’s Test Kitchen had come out with Cooking for Two 2013, in addition to the Cooking for Two 2011.

In perusing  these (Kindle editions), I though the recipes looked like a good starting place for single-serving cooking: many looked as if the second serving would freeze well, and that’s a bonus. (If you’ve read much at all here, you’ll know I don’t “do” leftovers, nor do I do the cook-one-thing-and-eat-it-all-week scene.) For me, having one serving to eat now, and one in the freezer is good. Other recipes looked as if I could prepare a single chop or chicken breast, with the full recipe, freeze that, and then just add the meat later after thawing the base.

One of the appealing things about the recipes in these books is that they are not terribly involved–like weeknight suppers, and not all-weekend cooking marathons–and shouldn’r leave you with a sink overflowing with dishes, pots and pans.  Definitely worth a try since I’ve always had good results with recipes from Cook’s Illustrated and Cook’s Country.

When making a recipe for the first time, I do follow it–otherwise how would I know how I need to change it?  For my first exploration from the 2013 Cooking for Two I picked a dish that I though sounded tasty and fun, and that the second serving could be put in the freezer: “Moroccan-Style Quinoa with Chickpeas and Kale”.  I like quinoa, I like chickpeas, and kale so this seemed a good one to try.  I honestly did follow the recipe.  Really I did, despite some temptations to tweak the seasonings…like put in extra garlic–that sort of thing.

I’m going (since I’ve given you the attribution above) to reproduce the recipe here with a little adaptation (because I don’t want to key in the entire thing).  It was easy to follow, and –very little cleanup afterwards–all good points.

Moroccan-Style Quinoa with Chickpeas and Kale

  • 2 tablespoons olive oil
  • 1 small onion, chopped fine
  • 1 carrot, peeled and cut into 1/4-inch pieces
  • 2 garlic cloves, minced
  • 1/4 teaspoon ground coriander
  • 1/8 teaspoon red pepper flakes
  • 1/2 cup quinoa, rinsed (if not prewashed)
  • 1-1/2 cups vegetable broth
  • 3/4 can of chickpeas, rinsed
  • 2 tablespoons golden raisins
  • salt and pepper
  • 6 ounces kale, stemmed and chopped into 1-inch pieces
  • 2 tablespoons pine nuts, toasted
  • 1/4 teaspoon lemon zest plus 1 teaspoon juice
  • 2 tablespoons crumbled feta cheese
  1. Heat 1 tablespoon oil in medium saucepan over medium heat until shimmering. Add onions, carrot and cook until onion softens. Stir in garlic,  coriander, pepper flakes and cook until fragrant. Add quinoa and cook stirring often until lightly toasted.
  2. Stir in broth, chickpeas, raisins, 1/8 teaspoon salt.  Place kale (still wet from washing) on top and bring to a simmer.  Cover, reduce heat to low, and simmer until quinoa to  is transparent and tender (18 to 20) minutes.
  3. Off heat, add the remaining 1 tablespoon oil, pine nuts, lemon zest and juice. Sprinkle with feta, season as needed with salt and pepper to taste.  Serve.

-<>^<>-

I’m likely to make this again, because it did go together easily, and cleaning up afterward was easy; but there will have to be some serious modification! The quinoa and chickpeas part of it is okay–except for being  very bland–and I really, honestly did follow the quantities given in the recipe so I’d know. Well, now I do!

I’m not really familiar with Moroccan style seasonings, but I don’t think that this was it.  Even with the added lemon zest and juice, garlic, red pepper flakes, raisins, and coriander, it’s definitely not even approaching complexity. It’s missing something.

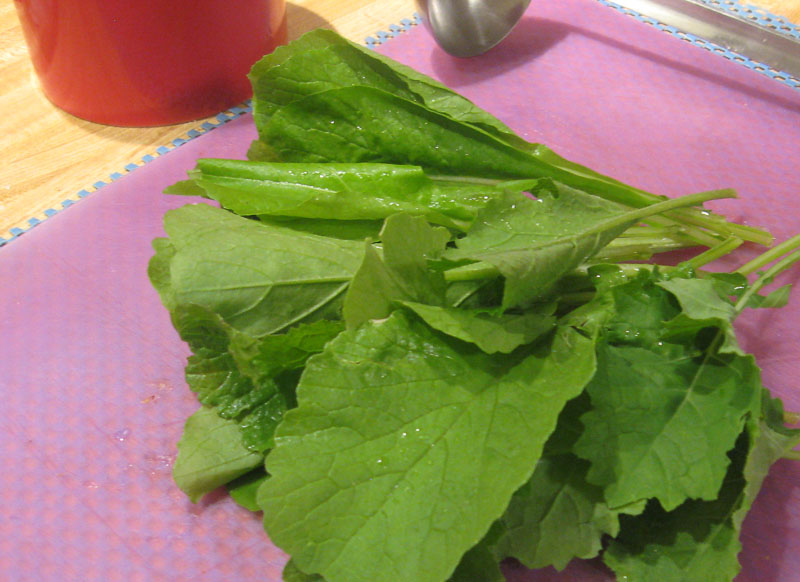
Then there was the kale. The recipe didn’t say anything about what kind of kale.  When I went to the  market, I did look for Toscano (Lancinato, Nero) or Russian red kale, but I could find only the curly, redbor kale; I picked out the smallest, youngest looking leaves in the bin. But it still wasn’t what this dish needed–at least for me. The kale completely overwhelmed the flavor of the rest of the dish–I had kale-flavored quinoa and chickpeas.  For me it  just did not fit with the quinoa and chickpeas.

I liked the idea of a one-dish meal (since it’s something I’ve posted about here a number of times), but I’ll not do it with that particular kale again.  I think I’m more likely to do spinach, or maybe arugula, though I might try it with Toscano or Lancinato kale, hoping that would be a bit milder.  (No pictures either–even with the smaller leaves, the kale was a rather icky green by the time it was tender.)

My other frustration with the recipe–supposedly for two–was that the servings were huge–I  have at least two more  servings sitting in the fridge now, even after having had a very reasonable portion for supper. Another piece of information for when I try another of the “for-two” recipes.

I know that when writing recipes public consumption, you do have to be moderate with seasonings, but this was downright bland, not something that I expect from recipes from this source–I’ll be looking out for that with other recipes. I guess I was expecting to taste and think that I’d need more garlic, or maybe more red pepper flakes next time, but I wasn’t expecting what I got from this.

You think I sound frustrated?

You’re right–because I have come to expect better from the recipes from American’s Test Kitchen–and now I have two more servings to try to make more palatable. I’ll try to add more seasoning when I reheat, but I don’t want the quinoa to be total mush.

I will do the quinoa and chickpeas combo again, but likely replacing the vegetable broth with at least part chicken broth, definitely increasing the coriander, red pepper, lemon juice and zest, and figuring out some other spices to add for more complexity–while trying to still keep it simple. (That’s my rationalization for going in search of a Moroccan cookbook now.)

Bottom line for me, it’s a starter–now to see where I can go with it. But, I’ll be trying another recipe from the book….but I’ll definitely feel free to make adjustments right from the start on a few things.

…and now it’s turkey soup!

Remember those turkey thighs that I roasted a couple days ago? They have really been a bargain.  I spent about $5 on the package of thighs–two small-to-medium ones.

I had my roast turkey with sides of potatoes and cabbage (with juniper berries). Then I had two full-size sandwiches, and a half sandwich for lunches. Now I’m finishing the turkey thighs with a very hearty bowl of soup (and a  glass of good wine).

small Rival Crockette

a crockette

I popped those thigh bones (with what meat wasn’t easy to carve for sandwiches) in to my tiny little single-serving crock-pot to make some stock–I just added a little salt, a bay leaf, the brown stuff that I deglazed from the roasting pan, and enough water to cover the bones. After slow cooking overnight, I removed the thigh bones.  The meat just fell off into the pot.

In the same little crock-pot (don’t want extra dishes to wash), I added a small handful of barley, some dried mushrooms of various sorts–including shiitake, chanterelle, and porcini. The other things that went into this soup were the leftover cabbage (with juniper berries) and a few potatoes that were roasted with the turkey.  (You may be thinking that this is pretty heavy on starch, but to finish the soup, I added some green stuff.)

small leaves of greens

mixed greens

About half an hour before I was ready to eat, I went out to the garden (which I share through the good graces of a neighbor) and picked a good size handful of small kale, turnip, and mustard greens.

After washing, I cut these in bite size pieces (though that was almost unnecessary as they were really not as big as my hand). They went into the crock-pot; in about 20 minutes they were still bright green but tender.

I did a final adjustment of salt using French Grey sea salt, and finally added several drops of black truffle oil to finish the soup.

-<>^<>-

I’ve had my bowl of soup for supper this evening–and it looks as if I’ll get one more meal out of those turkey thighs–with the barley, and the amount of meat that was left on the bones, there is easily another serving of this soup for lunch or supper tomorrow. (I’m sure that by the time I reheat it, those greens won’t be quite so bright green, but the flavors may have melded with the other ingredients so it should be good–maybe even better than this evening.

bowl of soup with greens

a warm, hearty supper

-<>^<>-

I opened a bottle of wine this evening that was a completely unknown to me. It was a limited release called “Dark” from Apothic. I was completely beguiled by the description that said that it “blends dark fruit flavors of blueberry and blackberry with opulent notes of coffee and dark chocolate”.  How could I possibly pass that up? (I found it while shopping at Harris Teeter–just after I had bought a case of something called “Besieged”–more about that one later.)

I was surprised how dark it was when I poured it into the glass! (I even tried to take a picture–but it just looks almost black–so forget that.) It is definitely a “big” wine and right out of the bottle it was fruity and mellow–but after breathing for a bit it lives up to its description.

I thought it might overwhelm my bowl of turkey soup, but with the juniper berries, the rather emphatic mushrooms, the flavors of the greens, and the truffle oil, it turned out to be a great combination.  Fortunately there is some of the wine left for tomorrow’s soup! This is one time when I’m looking forward to the “leftovers”.

It’s turkey time–again!

At the risk of being considered heretical, perhaps even un-American, and definitely not in the proper holiday spirit, I’m going to come right out and say that turkey would be my last choice for the main course of a holiday feast.  I’d much rather have duck, goose, roast pork, prime rib, or even roast chicken, (unless we’re going to talk wild turkey).  The problem is that it’s an achievement to get a whole turkey to be edible (and I do have a friend who does that well, so I eat her turkey–it’s the best I’ve had when the bird is roasted whole). The problem is the turkey–not the cook!

It seems to me that turkey is all about presentation, and NOT about cooking it to the best advantage. We’ve bred turkeys to have a huge chunk of breast meat, which really isn’t that flavorful. That white meat is attached to the legs, dark meat.  Now dark and white meat cook very differently, and here they are attached to the same bird, so that you have to cook them together–a real cooking dilemma.

Not to mislead you, some of the same problems exist with chicken, or Cornish game hen/poussin, though it’s easier to find ways to have both come out reasonably well on the smaller bird. The white meat still is not as flavorful as the dark, even on free-range chickens. I do use the breast meat–I usually cook it separately from the dark meat, but do sometimes roast a whole bird (French style in a dutch oven, in the Romertopf, or sometimes just uncovered in the oven). 

It’s not that I don’t like turkey–at least occasionally–even the white meat.  I just want it like I want all my food–to have the best taste and texture possible. It’s always seemed to me that when you have two things as different as turkey legs and breast, that you should not try to cook them together–neither will be at its best.  Cook’s Illustrated has provided a recipe for optimizing turkey, and it involves taking it apart, but it also provides for stuffing, and presentation, too. I’d like to try this out with a whole turkey to see how complicated it is to get it done.

I’ll buy turkey breast fillets almost any time for a quick sauté–just like I’d do chicken breasts, but I still like dark meat best. I’m actually glad to see turkeys in the market–especially the pieces–light and dark meat separately. While you can almost always get turkey breast and sometimes even the drumsticks, what I really like are the thighs–without the drumsticks attached. I was happy to find turkey thighs at Harris Teeter when I went to do my marketing yesterday.

roasted turkey thigh in roasting pan

turkey my way

Yes, even though turkey-eating season is about to get into full swing, I came  home with a package of turkey thighs–and tonight I had roast turkey–thigh that is.

It’s ideal for cooking for one–and inexpensive as well. One roasted turkey thigh will give me several meals: hot roast turkey, a cold turkey sandwich, and a serving of turkey soup.

-<>^<>-

Since I was working on an indexing job today, I really did not get fancy with my turkey thighs. I just let the thighs sit for a couple hours in the refrigerator, uncovered, so the skin would dry.  I plopped them into the roasting pan with some wedges of potatoes, and salted the skin liberally so it would be crisp and golden brown. Then, into the oven (350°F) for about an hour, and out came my roast turkey.

roast turkey thigh partially carved

ready to serve

I let it rest just like a whole bird, and then carved off my supper. Since I was after as few dishes to wash as possible, I made a cabbage dish that I wanted to try, and had potatoes roasted right along with the turkey–no gravy or stuffing tonight. (Cook’s Illustrated did give instructions for making stuffing with the disassembled bird, and I do want to try to adapt that for my single-serving quantity–but just not today. It was an easy, inexpensive, and tasty meal.

I’d eat more turkey if I were able to get thighs year round.  I’m looking forward to more roast turkey in the next few days as I have another thigh that’s been roasted.  I suspect there will be more than one turkey sandwich, and some will end up in with the bones in some hearty turkey, barley or lentil, and mushroom soup from my tiny single-serving size slow-cooker.

plate of turkey

A pork and kale braise

It’s been chilly, cloudy, and grey–just the kind of weather for soups, stews, and braises. It’s also time to get the freezer stocked with some quick, easy food as I’ve got indexing projects coming in–some while I’m still teaching this Fall term.  With lots of grading to do as well, I wanted something that would take care of itself while I worked–so out comes the all-purpose “rice” cooker for some slow-cooked food.

I’m a great fan of pork almost any way you fix it so when I found a package of boneless pork ribs–just the ticket for the slow-cooker–while I was doing my grocery shopping on Thursday it obviously went into the cart. Big package, but on special, so it came home with me to make a lazy meal, and some to go into the freezer for quick meals when I’m really busy, or when I need comforting, peasant-style food. Can’t pass up inexpensive on something I really like.

Braised pork and kale from the slow-cooker

Ingredients

  • boneless pork spare ribs, about 2 pounds
  • 1 packaged of frozen, chopped onions
  • chopped kale, one frozen “family” pack
  • 6 large garlic cloves
  • 1 14.5-ounce can of fire-roasted tomatoes
  • 2 tablespoons of Hatch chili powder
  • 2 teaspoons of kosher salt, adjust to taste as needed when cooking is finished

Preparation and cooking

  • cut pork into about 2-inch pieces
  • add half package of kale and onions, mixing
  • layer in pork, sprinkle with salt, chili powder
  • add remaining kale and onions
  • add fire-roasted tomatoes with juice
  • close the lid and set for 8 hours
  • shred pork using two forks (if desired)
  • check seasoning and adjust as necessary.

No, no pictures as  this is NOT a photogenic dish, but it sure is tasty! And there’s certainly nothing like complicated technique involved here.

Great served with a side of spicy black beans, or garbanzo beans, or just a big bowl on its own. This particular time I had a roasted winter squash as a side with it. (Now, to turn the rest of the winter squash into another meal–maybe stuffed with some Sicilian sausage that also went into the grocery cart.)

There was more liquid than I had anticipated when this was finished cooking, so after packing some in zipper-lock bags to go into the freezer (with SOME juice), the extra juice with some kale and some shredded pork is going to turn into soup–details will evolve when it’s used–but that’s an additional meal out of that pack of spare ribs!

Turnip greens…

Loose mustard greens

While having leisurely Sunday morning coffee I was browsing through the Huffington Post and discovered a presentation on rediscovering mustard greens (though I didn’t realize that they were lost or misplaced). If mustard greens need rediscovery, then perhaps turnip greens need rediscovery (or just discovery) too. One of my favorite things to do with heartier greens (those that need longer cooking, unlike spinach) like collards, mustard, kale, dandelion, or chard is to braise them with sausages for a one-pot meal that is easy to make in any quantity–and reheats and freezes well.

Just recently I was the happy recipient of a LOT of turnip greens from a gardener who likes the bottoms–the turnips and not the green tops. Some of these were older–so a bit spicier, with some of the “horseradish” tang that you find in mustard greens as well.

Even though it was warm weather, I had just started an intense indexing project and wanted some easy food–braised greens with sausage.  No need for a recipe and certainly not labor-intensive or needing a lot of attention while it cooked. (I thought about using the pressure cooker, or the slow cooker but just did this on the stove-top this time)

hot italian sausage IMG_6092I started by dicing and sautéing a large onion, then added a mix of sweet and hot Italian sausage, removed from the casings, to brown lightly.  Of course it needed garlic–about half a dozen large cloves, minced. (The garlic mellows a lot during cooking.)  Since the greens had their own “heat” and I had used hot Italian sausage, I didn’t add the hot red pepper flakes that I would have used with other sausages, or other greens–e.g. kale or collards.

Once the garlic had sautéed enough to become aromatic, I added the washed and cut up greens (still wet from washing) and a can of diced tomatoes. In a tightly lidded pot, I left this over low heat until the greens were almost tender–about 45 minutes. (Since these were older turnip greens, I did remove the stems before cooking.)

In went one can (rinsed) of pinto beans (not on the low-carb diet, but…) and continued to cook about 30 minutes more to let the beans pick up some of the flavor of the greens and the sausage. Home-cooked dried beans would have been better, but since I didn’t have any of those in the freezer, and hadn’t planned ahead–canned ones had to do for now.

And there you have it, a quick supper, and a couple of servings for the freezer for several more quick, comforting meals.  Since the greens were spicy, the sweet Italian sausage added a nice counterpoint. I’m glad to have some tucked away in the freezer since I suspect that will be the last of the turnip greens for the summer–as the weather gets hotter the greens get a bit more assertive. If I’m lucky and there are more, I’ll probably do this again, but omit the hot Italian sausage. Or think about doing this with lamb sausage…so many possibilities, and so easy–and reasonably healthy as well.

All you need to add is a glass of a nice sassy, robust red wine, and maybe some good crusty bread (if you’re not on a low-card diet). A son goût!