Lamb Stew (Alentejo-style)

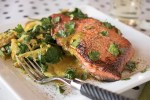
My bargain shopping got me a butterflied leg of lamb that was on special. Rather than roast it whole, I decided our chilly, grey, damp weather needed stew.

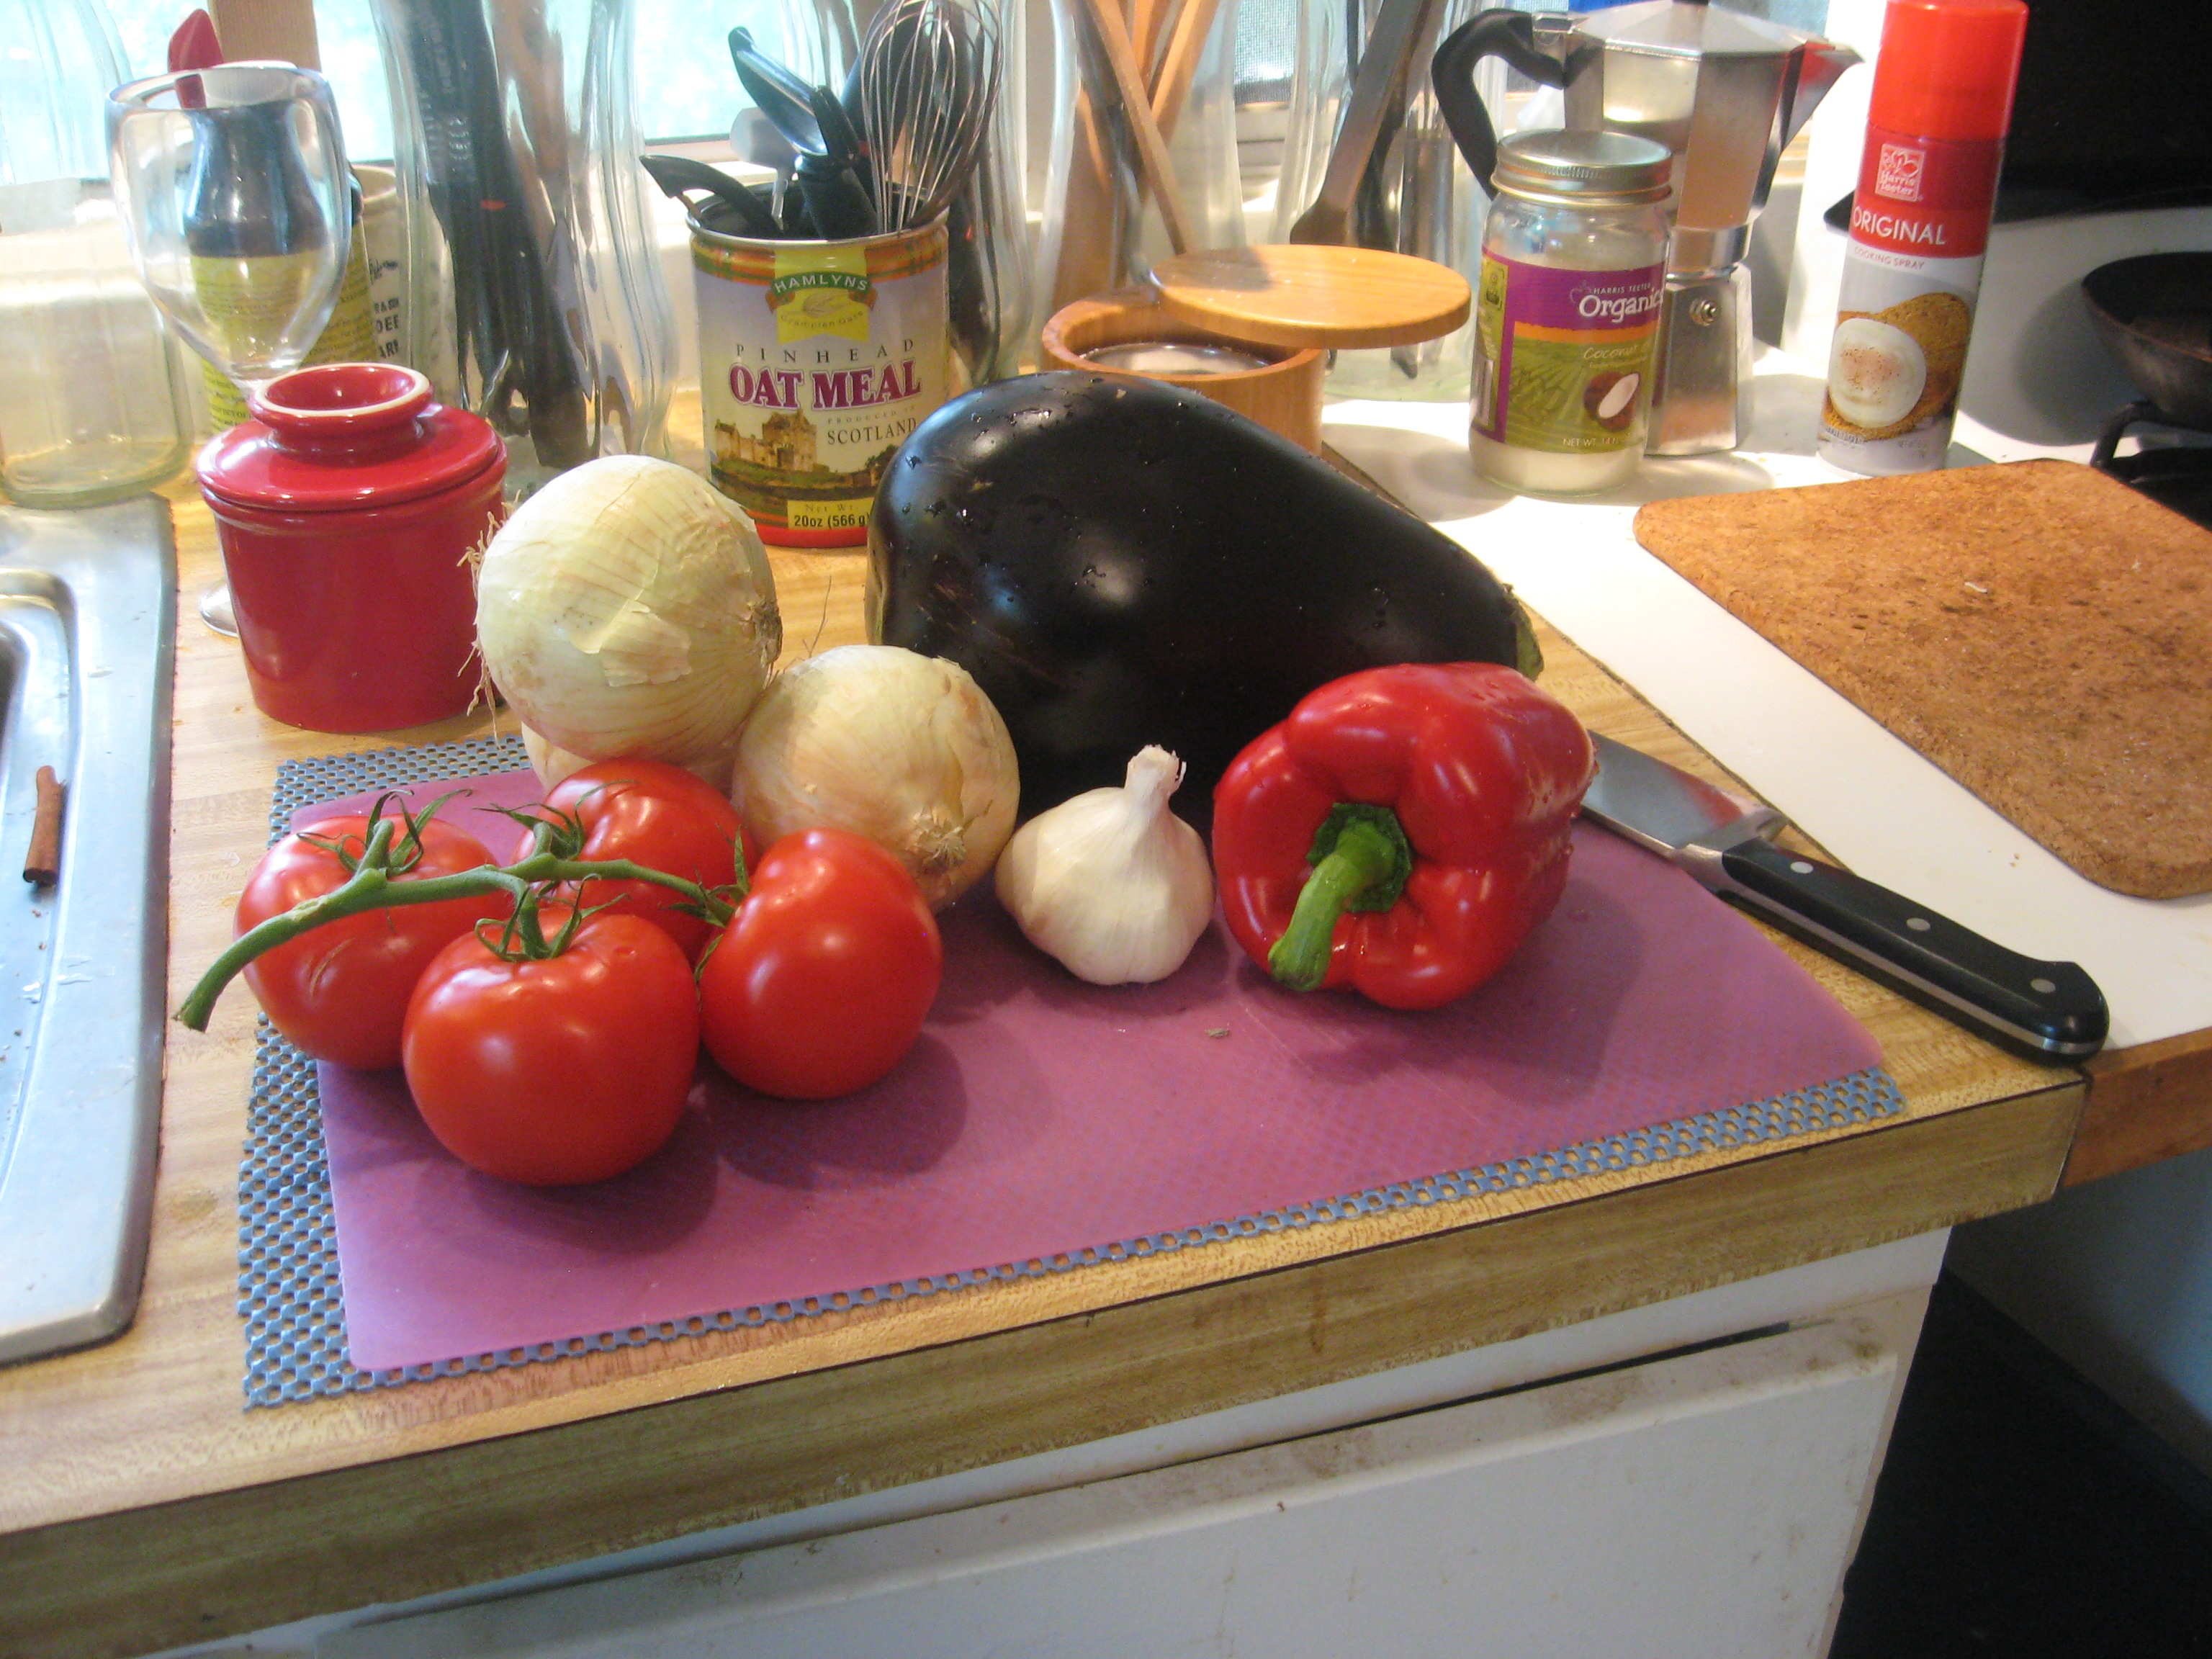
I cut the lamb leg into 3 cm cubes; I decided that I wanted some variety in my stews so since I had two pounds of lamb so all I needed to do was halve the recipes.Since I’ve not done much Iberian cookery I got out The Food of Spain & Portugal: The Complete Iberian Cuisine by Elizabeth Lambert Ortiz (page 152).  

pimenton-de-la-veraThere are a lot of lamb stew recipes in this book. I finally made a decision based on seasonings that sounded interesting: garlic, parsley, pimenton de la vera (smoked), cayenne, and cloves. (The recipe only said “paprika”–which I’m sure would work fine, but I particularly like the smokiness of the pimenton de la vera, but I used the amount called for.)

.

.

Carneiro à Alentejana

Ingredients

  • 4 cloves garlic, crushed
  • 1 tablespoon finely chopped parsley
  • salt and freshly ground pepper
  • 900 g (2 pounds), lean, boneless lamb, cut into 3.5 cm/1-1/2 inch pieces
  • 6 tablespoons olive oil or lard
  • 2 medium onions, finely chopped
  • 1 tablespoon paprika
  • 1/8 teaspoon cayenne
  • 1/8 teaspoon ground cloves
  • 175 mL/ 3/4 cup dry white wine

Preparation

  • Mix garlic, parsley, salt, and pepper. Add the lamb to the garlic mixture and marinate about 2 hours. (I left mine overnight)
  • In a large skillet, heat the oil or lard and brown the lamb pieces all over.
  • Transfer lamb to a flameproof casserole.
  • In the remaining oil and sauté the onion until soft and add to the casserole.
  • Add paprika, cayenne, cloves to the casserole. (I like to “bloom” dry spices in oil before adding liquid so I added the paprika while sautéing the onions)
  • Bring to a simmer on the stovetop.
  • Cover and put in a moderate oven (180ºC/350ºF) and cook until the lamb is tender (about 1-1/2 hours).

The author recommends serving with a light red wine (red Vinho Verde or Dão, and notes that in Portugal meats are usually served with both potatoes and rice.

õ¿õ

I halved the recipe above and used the other pound of lamb to make my favorite lamb and cabbage stew (Fårikål) with the other half. I considered being very energy conscious and making both at the same time; however, my hedonism won and I made them on different days because I love to luxuriate in the aromas of cooking–that’s part of the anticipation and enjoyment of cooking and eating. I just didn’t think I would get to enjoy them in the same way if I were to cook both at the same time. I would have missed some of the pleasure of cooking had I done that. The smell (especially of the pimenton de la vera) was particularly appetizing.

The combination of the pimenton, cayenne, and clove was wonderful. I don’t often use the “sweeter” spices with meats but that little dash of clove has made me wonder why I haven’t used them more with meat. I need to broaden my perspective on the “appropriate” spices to use with meats.

The balance of the seasoning in this recipe (I didn’t change anything) was wonderful–just enough cayenne to give a little “burn” as you eat your way through a serving, but not every getting to the point where you felt as if you had blisters on your taste buds–and the clove didn’t smack you in the face either. All in all a very well-balanced seasoning. I’ll probably try this with lamb shoulder chops–even without cutting them up.

Oh, wine? Well since there was a bottle of my “house wine” already open, I used that–it’s one of the things I like about that wine: it’s very versatile. Rice? Potatoes? Nope–garbanzo beans.

There is one modification I think I’ll make next time–I’ll add more onions they were luscious after cooking with the lamb and seemed just right with the pimenton.

Homemade skyr

41ktixxzjwl-_sx425_I finally got a yogurt maker. I didn’t go for the Cuisinart with all the bells and whistles–just opted for the Dash which seems to do the basics.  I didn’t order hot pink, but that’s what I got; I can deal with that–I’m not going to be sitting around contemplating it–so long as it works–and it does do what it’s supposed to. I got the “Greek” because it has a strainer with it and it does bulk yogurt instead of little itty, bitty jars.

Of all the commercial yogurts I’ve tried, the Icelandic Products Skyr is my favorite. I looked at the cultures used in that: Streptococcus thermophilus Icelandicus™ and Lactobacillus bulgaricus bifidobacterium. These are noted as heirloom cultures. Since this is my favorite store-bought yogurt I decided to use that as my starter culture.

Most of the recipes that I found for skyr called for rennet but that’s not listed as in ingredient in the Icelandic Products skyr, so I’m not using it. The ingredients did say skim milk but since I’m still working on the Always Hungry? plan, which calls for whole milk products, I made mine with whole milk.

I used 8 hours 30 minutes for my first batch. The texture after straining was great but for my taste, it needs to be just a bit more tart so I’ll try using 10 hours next time. Perhaps after I get off the Always Hungry? program, I’ll try skim milk and see how that works.

I’ve used the whey that was strained off to thin the consistency of the power shake just a bit instead of pouring it down the drain since I’m adding whey protein powder to the shakes. Though it’s a bit richer tasting than most commercial yogurts, it seems to work fine in all the uses called for in the meal plan.Certainly much cheaper than buying Greek yogurt–and I know exactly what is in it.

20160715_153827

A little food history

I do enjoy Facebook! Because my friends have such diverse interests, I get to read articles that I might never have encountered were it not for perusing Facebook posts. In this case, I’ve been overwhelmed with work (love that) which cuts into my skulking about the internet looking for fun stuff.

Here’s a link to an article from NPR on the Eastern and Western use of spices that I just read (no it’s not new–only new to me) and enjoyed.

Labneh

I finally got around to making some yoghurt cheese or labneh! I don’t know why it has taken me this long to do something that simple–it’s practically effortless. After reading David Lebovitz’s post on Labneh I finally did it. Now that the weather is getting warmer I’ll be looking for lighter things to eat with fresh vegetables.

After googling “labneh recipes”, I had a plethora from which to choose. Variations include some calling for full-fat plain yoghurt, some for Greek, one for adding lemon juice, and others for herbs. All called for some salt.

Greek yoghurt cheese

Labneh

For my first trial, I used full-fat plain that was lingering in the fridge since I’ve found that I really prefer skyr (even to Greek yoghurt). I added a healthy pinch of salt, then set the yoghurt to drain for 15 hours.

Tasting the labneh I discovered that it wasn’t quite as tangy as I had hoped–I’ll try adding lemon juice next time.

I suspect that this is going to become a “fixture” in my fridge instead of the usual cream cheese. I am a fan of radishes so adding those and other vegetables to labneh sounds like a great summer treat, and I’ve many other interesting recipes for using it. Some found its way into my omelette with sautéed kale as an improvised breakfast with the Always Hungry? meal plan inside the omelette, rather than as a topping, or have berries without the skyr  or yoghurt.

It’s such fun to discover new foods!

omelette with labneh and kale

Ratatouille (slow-cooker)

vegetables for ratatouilleDuring the summer abundance of eggplant, squash, and tomatoes  we’re often in the OMG-what-can-I-do-with-these-zucchini mode. Ratatouille and caponata  provide some good eating even when the hot weather has rather killed the appetite. I thought that being able to do this in the slow-cooker instead of stove-top would be an advantage in sweltering weather that is already taxing the A/C without adding more heat.

It’s easy to find ratatouille recipes–a quick search on the internet will provide a plethora.  The question:  are they  “good” recipes”?  I’m not sure I can tell you what (specifically) tells me “good”, “passable”, or “oh yuk”.  Most likely past experience, and reading a lot of food science, and (from America’s Test Kitchen) “why this recipe works”.

Here is a ratatouille recipe given by a friend, from Food.com, reproduced below. I’ve never made ratatouille in a slow cooker so I thought this was worth trying. In reading the recipe, I had only a couple questions, so I decided to make the recipe as directed–well, almost–as much as I can–I’m just a compulsive tinkerer, and constitutionally unable to follow a recipe strictly, but almost.  ratatouille ingredientsLooking at the recipe, I knew I’d want more garlic. Had I not been using part frozen peppers (from a Kitchen Disaster), I would not use green peppers–I prefer ripe (red, yellow, or orange) like them. I’m changing the herbs to thyme and oregano,  rather than basil (for reasons explained below in Cook’s notes).  My other question about this recipe had to do with that quantity of tomato paste. Why?

When I started the prep, I was still undecided about the tomato paste.  My inclination was to leave it out because this is an “all fresh” dish, and (to me) tomato paste tastes canned and cooked. Since this does not call for the tomato paste to be added until later, my obvious solution is to wait and see how it tastes, especially since these are summer tomatoes. If  I were wanting to supplement the “tomato” part of the flavor I would likely add some sun-dried tomatoes, rather than tomato paste–unless there is a dearth of “umami” (which is one of my reservations about slow-cooker dishes).

Slow Cooker Ratatouille (Food.com)

The modifications that I made on this recipe on the first round are shown in parentheses after the ingredient. These were just to meet my seasoning preferences, not for any other reason.  Don’t hold this on “warm”–it just doesn’t do well.

Serves: 6 to 8

Ingredients

  • 1 large eggplant, peeled and cut into 1 inch cubes
  • salt
  • 2 medium onions, chopped
  • 2 cups chopped fresh tomatoes–about 3 medium
  • 1 large green bell pepper, cut into 1/2 inch squares
  • 1 large red bell peppers or 1 large yellow bell pepper, cut into 1/2 inch squares
  • 3 medium zucchini, sliced
  • 3 tablespoons olive oil
  • 3 tablespoons dried basil (substitute 1/2 teaspoon thyme and 1/2 teaspoon Turkish oregano)
  • 2 garlic cloves, crushed through a press (4 garlic cloves)
  • 1/2 teaspoon fresh ground pepper (held until end as I think it gets bitter with long cooking)
  • 1 (6 ounce) cans tomato paste
  • 1 (5 1/2 ounce) cans pitted ripe olives, drained and chopped coarsely (oil cured black olives)
  • 3 tablespoons chopped fresh basil (substitute chopped fresh oregano)

Directions

  1. Sprinkle the eggplant with salt; let stand in a colander 1/2- 1 hour to drain.
  2. Press out excess moisture.
  3. Rinse the eggplant with water and pat dry with paper towels.
  4. Place the eggplant in crock pot.
  5. Add onions, tomatoes, bell peppers, zucchini, olive oil, basil, garlic, pepper and 1/2 tsp salt.
  6. Mix well.
  7. Cover and cook on high setting about 3 hours or until the vegetables are tender but still hold their shape.
  8. Stir in the tomato paste, olives, and the fresh basil.
  9. Serve hot, room temperature or chilled.

Notes:  Being of scientific orientation, I decided to do an experiment–half the recipe is cooked as above; and the other half cooked separately, with modifications after I had tasted the results of the original method. First, I had to cook for an additional hour–I thought my rice cooker/slow cooker ran rather hot, but not according to this.  After tasting I did add the tomato paste as the tomato flavor was not at all pronounced, but I think the tomato paste (unless browned before adding) doesn’t add the depth I want. I needed more salt (which kind of surprised me because I don’t usually need to add much. Oregano and thyme needed to be bumped up as did the garlic. Those minor things were done to the first batch. So far the onions  have stayed crispy and I think I’d prefer them a bit softer so maybe microwave them before putting into the slow cooker (that had to wait because they were already mixed with the other vegetables). This came out with more juice than I’d expected.

Now for the second batch. I’m adding more olives, more garlic (sliced rather than pressed), some red pepper flakes (about 1/8 teaspoon) for a little zing (but not a lot of heat), and sun-dried tomatoes (instead of tomato paste), a bay leaf, and increasing the oregano and thyme. Instead of increasing salt, I’m going to add just a touch of nam pla (fish sauce)–or an anchovy fillet mashed would work. This is not intended to make it at all fishy just more flavorful. This needs to be stirred after an hour so that the bottom veggies don’t mush and the top be a bit undercooked. Check for doneness–don’t just trust the time. I prefer my veggies cooked but with a little “tooth” to them, so in my slow cooker this finishes in about 2 hours. I like this one as there’s no added liquid, except the dash of nam pla and what the veggies give off. Minced fresh oregano added the last 15 minutes of cooking leaves it very fresh tasting.

Bottom line: this is quick and works if you want a very light ratatouille, not complex ratatouille.  I don’t want my ratatouille over whelmed with herbs and garlic, but I’d like to make it a bit more complex, or layered flavor–maybe it needs a little more umami It has the advantage of being very quick to assemble.

Ò¿Ó

As you likely know if you’ve read other posts, I’m somewhat partial to recipes from America’s Test Kitchen.  When the published Slow Cooker Revolution I had to check it out.  I was hoping that those recipes would improve my attitude to (and increase use of ) my slow cooker. There’s no denying it’s convenience, but generally I’ve simply not been happy with the results when compared with oven or stove-top methods.

A comparison of America’s Test Kitchen recipe with the one above is interesting. One of my “complaints” is that their recipes sometimes  seem more complicated–though they do increase flavor.  The recipe below is from the Slow Cooker Revolution (Kindle edition). This is the recipe that inspired me to try the one above.  The cooking instructions are quite extensive so I’m only going to summarize them for purposes of comparison. I’m trying to find a compromise of best flavor and easy preparation.

Slow-cooker ratatouille (America’s Test Kitchen)

Serves: 10 to 12

Ingredients

  • 6 tablespoon extra-virgin olive oil
  • 2 eggplants (2 pounds), cut into 1-inch chunks
  • 3 zucchini (1-1/2 pounds), cut into 1-inch chunks
  • 2 onions, halved and sliced 1/4-inch thick
  • 2 red bell peppers, stemmed, seeded, and cut into 1/2-inch pieces
  • 2 cloves garlic, minced
  • 2 teaspoons minced fresh thyme or 1/2 teaspoon dried
  • 1/4 cup all-purpose flour
  • 1 (28-ounce) can diced tomatoes, drained, juice reserved
  • 1/4 cup chopped fresh basil or parsley
  • Salt and pepper
  • Grated Parmesan cheese, for serving

Preparation

  1. Brown eggplant, half at a time, in olive oil (5 to 7 minutes), and transfer each batch to slow cooker.
  2. Brown zucchini, half at a time, in olive oil, transferring each batch to slow cooker.
  3. Cook onions, bell peppers, garlic, and thyme until softened and lightly browned (8 to 10 minutes), stir in flour and cook for 1 minute. Whisk in reserved tomato juice, scrape up browned  bits, and smooth out lumps, and transfer to slow cooker.
  4. Stir tomatoes into slow cooker, close and cook until vegetables are tender (4 to 6 hours).
  5. Season with salt and pepper as needed.

Notes:  The time it takes to brown the vegetables really is not that long, so it’s worth the extra flavor. It’s a drastic difference, even when you add some umami-hyping ingredients to the Food.com recipe.

The differences here are, notably, the use of flour to thicken, the lack of tomato paste, and the preparation of the eggplant. One of my reasons for trying the recipe from Food.com is the handling of the eggplant, with the idea that salting to remove fluid might eliminate the need for flour–I doubt that you’d know there was flour in this recipe simply by tasting.

After tasting the first batch of the recipe from Food.com with the adjustments noted in Notes, it’s a keeper for simplicity. The America’s Test Kitchen is a bit richer since you’ve browned the veggies. Either is good–depends on the time and effort you want (or have) to invest.

. . . a son goût

Ö¿Ö

cooked ratatouille

?

Fårikål (Norwegian lamb and cabbage stew)

Cold, rather dreary day so I’m making some warm, cuddly, comfort food from my most recent cookbook, The Kitchen of Light by Andreas Viestad.

I made the lamb and cabbage stew–well, sort of–I had goat meat in the freezer so I substituted that for lamb.  As I’m writing, I’m smelling it cooking–and practically drooling on my keyboard.

The stew is in the oven in my “small” Dutch oven (did not make the whole recipe). It smells SO good. I’ve been reading posts from a friend on Facebook singing the praises of this stew–reheats well–which means I can make a batch and freeze some.

The seasoning of this stew is bay leaves and black peppercorns–a lot of black peppercorns, cooked with the meat and cabbage.  This surprised me when I read the recipe because I’ve seen sources saying that black peppercorns will be bitter with long cooking, so it’s not usually added until late in cooking, though this is not dry heat, so that may make a big difference. This recipe calls for 1 to 2 tablespoons of black peppercorns.  (From tasting so far, I think I’m going to want to add more black peppercorns.)

Product.DisplayNameReally good, fresh-ground black pepper is one of my favorite spices.  I’ve gotten hooked on the India Special Extra Bold Tellicherry  and that’s what I’m using in this recipe.  Regular Tellicherry or Malabar pepper should also work.

Fårikål (Norwegian lamb and cabbage stew)

This recipe is adapted  from The Kitchen of Light (Andreas Viestad)–It’s easily adapted for single-serving cooking, but also suitable for making the full recipe and reheating/freezing.

Ingredients

  • 6 pounds of bone-in lamb shoulder, trimmed and cut into 1-1/2-inch pieces.
  • 4 pounds of green cabbage, shredded
  • 1 to 2 tablespoons black peppercorns
  • 2 bay leaves
  • 3 tablespoons unsalted butter
  • 1 tablespoon all-purpose flour
  • 4 cups cold water
  • fine sea salt (to taste)

Preparation

  • Layer the meat and cabbage in a large pot
  • Add black peppercorns, bay leaves, butter, and sprinkle in flour
  • Add water
  • Bring to a simmer, covered,
  • Cook about 2 hours over medium-high heat about 2 hours
  • To increase spiciness, add 1 more tablespoon peppercorns and cook an additional 15 minutes
  • Season to taste with salt
plated lamb and cabbage stew

Lamb and cabbage stew (from Wikipedia)

My first adaptation was the use of goat meat since that’s what I had in the freezer–as well as goat brown stock.

The goat meat was excellent, but in the future  I’ll use bone-in lamb shoulder chops, cut into appropriate-sized chunks.  My other adaptation of this recipe was to put it in the oven to cook at 300°F until the meat was very tender. It’s unlikely that I’ll want to make full quantity  of this recipe–more likely half, which will still give more than one meal, and  some to freeze.

This is NOT a pretty dish.  By the time the meat is really tender, the cabbage is NOT going to be pretty and bright green.  There’s more discussion of this dish on My Little Norway.  I like more peppercorns than that recipe uses–I actually added a lot more–and finished my serving with carefully roasted black peppercorns, coarsely crushed.

This has me looking for other recipes using cabbage–which I think is an under-appreciated winter vegetable. Too often I think it’s thought of as “slaw”.  After reading Viestad’s cookbook and North: The New Nordic Cooking of Iceland  by Gunnar Karl Gislason and Jody Eddy,  I want to explore more Scandinavian cooking.  I found lots more recipes on New Scandinavian Cooking, too–and the manifesto of the “New Nordic Cuisine”.

For a beverage with this dish? Well, a porter would be excellent. If I were doing wine, I think I’d look for something really robust–something that has at least some alicante bouchet in it, or maybe a Minervois–I think this calls for some research!

A son goût!


Trying a new recipe….

As much as I’ve talked about improvisation in the kitchen when you’re doing single-serving cooking, I do occasionally like to have a recipe, at least for starters.  Trying to cut a recipe serving six or eight to one-person size is really frustrating.  The major ingredients are not that hard to do–it’s the seasonings that are hardest.  You’ve a much smaller quantity so you do need to cut them, but usually NOT by the same proportions as the main ingredients, so I was excited to see that the editors at America’s Test Kitchen had come out with Cooking for Two 2013, in addition to the Cooking for Two 2011.

In perusing  these (Kindle editions), I though the recipes looked like a good starting place for single-serving cooking: many looked as if the second serving would freeze well, and that’s a bonus. (If you’ve read much at all here, you’ll know I don’t “do” leftovers, nor do I do the cook-one-thing-and-eat-it-all-week scene.) For me, having one serving to eat now, and one in the freezer is good. Other recipes looked as if I could prepare a single chop or chicken breast, with the full recipe, freeze that, and then just add the meat later after thawing the base.

One of the appealing things about the recipes in these books is that they are not terribly involved–like weeknight suppers, and not all-weekend cooking marathons–and shouldn’r leave you with a sink overflowing with dishes, pots and pans.  Definitely worth a try since I’ve always had good results with recipes from Cook’s Illustrated and Cook’s Country.

When making a recipe for the first time, I do follow it–otherwise how would I know how I need to change it?  For my first exploration from the 2013 Cooking for Two I picked a dish that I though sounded tasty and fun, and that the second serving could be put in the freezer: “Moroccan-Style Quinoa with Chickpeas and Kale”.  I like quinoa, I like chickpeas, and kale so this seemed a good one to try.  I honestly did follow the recipe.  Really I did, despite some temptations to tweak the seasonings…like put in extra garlic–that sort of thing.

I’m going (since I’ve given you the attribution above) to reproduce the recipe here with a little adaptation (because I don’t want to key in the entire thing).  It was easy to follow, and –very little cleanup afterwards–all good points.

Moroccan-Style Quinoa with Chickpeas and Kale

  • 2 tablespoons olive oil
  • 1 small onion, chopped fine
  • 1 carrot, peeled and cut into 1/4-inch pieces
  • 2 garlic cloves, minced
  • 1/4 teaspoon ground coriander
  • 1/8 teaspoon red pepper flakes
  • 1/2 cup quinoa, rinsed (if not prewashed)
  • 1-1/2 cups vegetable broth
  • 3/4 can of chickpeas, rinsed
  • 2 tablespoons golden raisins
  • salt and pepper
  • 6 ounces kale, stemmed and chopped into 1-inch pieces
  • 2 tablespoons pine nuts, toasted
  • 1/4 teaspoon lemon zest plus 1 teaspoon juice
  • 2 tablespoons crumbled feta cheese
  1. Heat 1 tablespoon oil in medium saucepan over medium heat until shimmering. Add onions, carrot and cook until onion softens. Stir in garlic,  coriander, pepper flakes and cook until fragrant. Add quinoa and cook stirring often until lightly toasted.
  2. Stir in broth, chickpeas, raisins, 1/8 teaspoon salt.  Place kale (still wet from washing) on top and bring to a simmer.  Cover, reduce heat to low, and simmer until quinoa to  is transparent and tender (18 to 20) minutes.
  3. Off heat, add the remaining 1 tablespoon oil, pine nuts, lemon zest and juice. Sprinkle with feta, season as needed with salt and pepper to taste.  Serve.

-<>^<>-

I’m likely to make this again, because it did go together easily, and cleaning up afterward was easy; but there will have to be some serious modification! The quinoa and chickpeas part of it is okay–except for being  very bland–and I really, honestly did follow the quantities given in the recipe so I’d know. Well, now I do!

I’m not really familiar with Moroccan style seasonings, but I don’t think that this was it.  Even with the added lemon zest and juice, garlic, red pepper flakes, raisins, and coriander, it’s definitely not even approaching complexity. It’s missing something.

Then there was the kale. The recipe didn’t say anything about what kind of kale.  When I went to the  market, I did look for Toscano (Lancinato, Nero) or Russian red kale, but I could find only the curly, redbor kale; I picked out the smallest, youngest looking leaves in the bin. But it still wasn’t what this dish needed–at least for me. The kale completely overwhelmed the flavor of the rest of the dish–I had kale-flavored quinoa and chickpeas.  For me it  just did not fit with the quinoa and chickpeas.

I liked the idea of a one-dish meal (since it’s something I’ve posted about here a number of times), but I’ll not do it with that particular kale again.  I think I’m more likely to do spinach, or maybe arugula, though I might try it with Toscano or Lancinato kale, hoping that would be a bit milder.  (No pictures either–even with the smaller leaves, the kale was a rather icky green by the time it was tender.)

My other frustration with the recipe–supposedly for two–was that the servings were huge–I  have at least two more  servings sitting in the fridge now, even after having had a very reasonable portion for supper. Another piece of information for when I try another of the “for-two” recipes.

I know that when writing recipes public consumption, you do have to be moderate with seasonings, but this was downright bland, not something that I expect from recipes from this source–I’ll be looking out for that with other recipes. I guess I was expecting to taste and think that I’d need more garlic, or maybe more red pepper flakes next time, but I wasn’t expecting what I got from this.

You think I sound frustrated?

You’re right–because I have come to expect better from the recipes from American’s Test Kitchen–and now I have two more servings to try to make more palatable. I’ll try to add more seasoning when I reheat, but I don’t want the quinoa to be total mush.

I will do the quinoa and chickpeas combo again, but likely replacing the vegetable broth with at least part chicken broth, definitely increasing the coriander, red pepper, lemon juice and zest, and figuring out some other spices to add for more complexity–while trying to still keep it simple. (That’s my rationalization for going in search of a Moroccan cookbook now.)

Bottom line for me, it’s a starter–now to see where I can go with it. But, I’ll be trying another recipe from the book….but I’ll definitely feel free to make adjustments right from the start on a few things.

Chilli con carne redux update

I’ve finished the “fast” version of the chilli con carne that I posted about in Chilli Con Carne Redux!  I’ll concede that it’s only sort of faster in terms of the active prep time–it still needs to cook long and slowly, but it is a success.  I don’t think that I can tell the difference (tasted side-by-side with the more laborious version from the freezer) and friends have given it the nod of approval.  So here are the changes and additions to the original chilli con carne that I posted.

  • After the bacon browned, 3 tablespoons of tomato paste was added while the onions were sautéed, and this was browned–again to enhance the umami, not to add tomato flavor.
  •  None of the meat (pork or beef) was browned before adding liquids.
  •  Added bay leaves to increase the earthiness (used five large for this 6 pounds of meat).
  •  Added Mexican oregano–about 2 rounded teaspoons. (You really do want Mexican oregano for this–much different flavor than Turkish or Greek (Mediterranean) oregano–after all it is an unrelated plant, but worth having in the kitchen if you like chili.)
  •  Sun-dried tomatoes (about 1/2 cup chopped) were added for more umami even though this was NOT made in a slow cooker, I was not aiming for tomato-flavored chili.
  • During the cooking time I tasted some in a bowl with a little fish sauce added (yep, I did get up the nerve to try this) and it tasted wonderful; so I added about 4 or 5 tablespoons of fish sauce.  (I suspect that if you don’t have fish sauce a couple of anchovy filets thrown in would have the same effect.)
  • The final thickening was one with a brown roux made with masa harina.  For the fat in this roux I reserved about 1/4 cup of the fat from the de-fatting step.  I heated this and made sure that all liquid was evaporate, then added about 6 tablespoons of masa harina and cooked it until it was a medium brown and toasty smelling.
  • Because of my work schedule, this was cooked in a lower oven (about 195° F) for about 10 hours.

After another run on this I’ll have to post a revised recipe for the “fast” and easier version, but if you feel so inclined you can work with these changes–after all chili con carne is one of those things that really doesn’t need a recipe to be followed strictly.