A virtual tour of the world

Many of us are in lockdown–or under stay-at-home orders. Same here, but I still have my Kindle and internet access. So I gave in to my weakness for cookbooks–as usual (especially with the lower prices for e-books).

Long a fan of Christopher Kimball through Cook’s magazine, Cook’s Illustrated, Cook’s Country, and America’s Test Kitchen, I’ve followed to Milk Street. I’ve always been successful with recipes from those sources (although sometimes finding things a little under-seasoned for my tastes).

I’m also a lover of my Instant Pot, although I’ve yet to use the slow cooker function on it. Always on the lookout for recipes (at least for inspiration if not the religious following of them), I was happy to discover this book on my “recommended” list. Awesome to see both the pressure function and the slow cooker function covered in one book. (Maybe I’ll get around to trying the slow cooker function sometime–someday.)

What better thing to do when you’re forced to stay at home than cook something. My first venture was determined by foraging in the refrigerator and the freezer, so it’s not exactly like the recipe, but enough to get a feel for the book, and to have a queue of bookmarked recipes to follow for my vicarious travels.

The “Spicy Collard Greens with Tomatoes and Peanuts” (a version of muriwo unedovi) was up for trial with the caveat that I was not going to the grocery store and that I was definitely in need of some green stuff. The freezer yielded frozen collard greens, and there were canned tomatoes in the pantry. The recipe called for chunky peanut butter, but my pantry gave up only a jar of creamy–so I had to do without the crunch. Whole habanero chilies also weren’t lurking in the fridge, so I had to sub in a serrano chile pepper lurking in the crisper. Overall very favorable result for not making a grocery run. Since I’m cooking only for me, I did halve the recipe and everything worked well–not too much in my category of “leftovers”.

In the queue for trying whilst I’m hiding at home is the German-inspired “Braised Red Cabbage with Apples” (one apple lurking in the fridge along with the cabbage), and the “Lentils and Bulgur with Caramelized Onions” which is a riff on my beloved mujaddara (only with bulgur instead of rice).

Tuna, lovely tuna!


Tuna_20170709_140604

those lovely tuna medallions

Wow! While skulking through Harris Teeter supermarket I noticed that they had beautiful tuna “medallions” for only $6.99 per pound.  The chunks are not a problem for me since if it were steaks I’d need to cut them up anyway. The main thing is the quality and the price. It’s time replenish my supply of tuna confit.

Since my last post on tuna confit, the recipe from that post, which was from Fine Cooking, I’ve been perusing sous vide recipes and have come up with some modifications for the seasonings, and the method. I’m using the method from ChefSteps this time around (with a little modification of seasoning and cooking time and temperature). One modification was to infuse the oil with some additional herbs suggested in other recipes, and then straining/filtering the oil before packing the confit (in Mason jars).

Tuna Confit (2017)

Ingredients

  • tuna (about 2 pounds)
  • salt and sugar (4:1 ratio) for the dry cure/dry brine
  • extra virgin olive oil, about 4 cups (enough to cover) the tuna

Infused oil ingredients

  • extra virgin olive oil (about 4 cups)
  • Turkish bay leaves (2 or 3 depending on size)
  • sprig of thyme
  • sprig of rosemary
  • smashed garlic cloves (about 3)
  • black peppercorns (about 2 teaspoons)
  • red pepper flakes (just a dash)
  • zest of one lemon (removed with a vegetable peeler)

Preparation

  • Infused oil:
    • Place the oil in a slow cooker or multifunction pot on the warm setting and add all seasonings.
    • Allow oil to infuse for several hours (a temperature of about 150°F) then cool the oil to room temperature.
  • Tuna:
    • dry cure/dry brine the tuna for about 30 minutes then rinse, transfer to plate and let it dry.
    • put the tuna into 500  mL jars, pouring oil around each piece, adding enough to cover the tuna in the jar
    • cook in a multifunction pot on the warm setting for two hours
    • cool tuna and refrigerate

__Ò¿Ó__

When I tasted the oil, the flavors were a bit strong so I diluted it with an additional cup of extra virgin olive oil before using it to pack the tuna. Since the oil had lemon zest added during the infusion–I didn’t add lemon zest to the cans as the ChefSteps recipe had suggested. I think that would have been just too much lemon for even me–and I do like lemon!

My “medallions” were a just little thicker than the usual tuna steak so I allowed them just a bit of extra time with the dry cure (about 45 minutes) before rinsing and allowing them to air dry. There was a big difference in the firmness after that short period of dry cure.

After rinsing and patting dry with paper towels, I left them sitting on parchment paper for about 30 minutes to air dry, turning them over just once, then packing them in 500 mL Ball/Mason jars, adding oil to the bottom of the jar, and then after each piece of tuna

__Ô¿Ô__

The ChefSteps recipe suggested cooking the tuna at 113°F  for 1 hour and 30 minutes. My experience has been that, even though I love sashimi, I like my cooked fish cooked just a bit more. Part of the reason for making confit is not to eat it immediately but to be able to keep it longer as my replacement for “canned tuna”–so I’ve opted for a higher temperature–actually a lot higher temperature–more in keeping with the original recipe.

The jars of tuna in olive oil were put into the slow cooker on the warm setting which should give me about 160°F. I know that’s not going to be as lush and velvety as if it were cooked at a lower temperature. But preservation is part of the objective here (I mean, that was certainly the original goal of confit). I want this to last (in the fridge) for a bit.

Jar size was a bit of a problem–three of the medallions were simply too large to be sure that they would remain submerged under the oil, even allowing for shrinkage with cooking. Since the jars were going to be sealed, I didn’t want to take the chance of having to open them to add more oil. So–extra room in the jar with only two medallions in each.

No matter how this turns out it will be hands down better than most canned tuna (unless you spring for the really expensive stuff) and a lot easier than doing it on the stovetop or even in the oven.


Dry_cure_20170709_141321

dry curing

post_dry _cure_20170709_145716

air drying after curing

Packing_20170709_153235

starting with oil in the jar

Packing_2_20170709_153301

add tuna

Packing_3_20170709_153704

leaving some headroom in the jars

cooked_20170709_183505

it’s tuna confit!


__Ò¿Ó__

Pheasant soup

Immediately after Christmas dinner, while I was still sipping my wine, I took care of the leftover pheasant. Since there was a carcass, there just had to be soup!

  • remove meat from the carcass when the meal is over,  refrigerate for later use
  • break up the carcass as much as possible
  • put in slow-cooker and flatten out as much as possible
  • add water to barely cover
  • add healthy pinch of salt
  • set for 6 hours–in other words, until morning
  • strain stock and put back in slow-cooker
  • add any leftover truffled au jus 
  • add a generous handful of barley and  generous handful of lentils
  • taste for salt and seasonings; add a dash of soy sauce and nam pla
  • add one pasilla chilli pepper, whole
  • add generous dash of herbs de Provence and/orle any other seasonings you wish
  • set slow-cooker for about 4 hours
  • when lentils and barley are tender, refrigerate or use immediately.
  • add pheasant meat to hot broth and reheat.

Now if you have leftover soup (from your first round of soup) and leftover cabbage and rutabaga from the side, and any remaining pheasant meat, add those and you have soup that’s a bit different for the final day of soup.

A son gôut!

. . . more Ratatouille (Provençal vegetables)

dark purple eggplantRatatouille is a summer dish that gets us over the hump of too many zucchini, and maybe tomatoes. It’s enjoyable warm, cold, or room temperature–but it’s not an especially memorable dish.  Not usually–however, I’ve one recipe for it that is memorable.This is not the ratatouille that you put together in the slow cooker, or quickly; however, if you like ratatouille, you should take the time and effort to make this one. Go ahead and splurge on the saffron.That’s part of what makes this memorable.

The recipe from Simply French: Patricia Wells presents the cuisine of Joël Robuchon (see bibliography) gave entirely new meaning to ratatouille.

Provençal Vegetables (Ratatouille)

Adapted from Simply French, pp. 229-230. Serves: 8 to 10

Ingredients

  • 10 medium tomatoes
  • 2 medium onions finely chopped
  • 1 cup extra-virgin olive oil
  • Sea salt to taste
  • 1 green bell pepper, peeled and thinly sliced
  • 1 red bell pepper, peeled and thinly sliced
  • Bouquet garni: several parsley stems, celery leaves, sprigs thyme, wrapped in the green part of a leek and fastened with kitchen twine
  • 4 garlic cloves minced
  • Freshly ground white pepper to taste
  • 1 teaspoon tomato paste (optional)
  • 6 to 7 small zucchini scrubbed, trimmed, and cut into matchsticks (about 1-1/4 pounds)
  • 2 teaspoons fresh thyme leaves
  • 3 small eggplants peeled and cut into matchsticks (about 1-1/2 pounds)
  • Pinch of saffron threads (optional)

Preparation

  1.  Core, peel, and seed the tomatoes. Save as much juice as possible and strain. If strained juice does not measure 1 cup, add water as needed to bring to 1 cup. Finely chop the tomatoes and set aside.
  2. In a large skillet, combine onions, 1/4 cup oil, and pinch of salt. Cook over low heat until soft and translucent.
  3. Add peppers and pinch salt. Cover and continue cooking about 5 minutes more.ÒΛÓ
  4. Add chopped tomatoes, stir and continue cooking for about 5 minutes more.
  5. Stir in the tomato juice, bouquet garni, and garlic.  Taste for seasoning.
  6. Cover and simmer gently for about 30 minutes–don’t over cook–vegetables should not be mushy!
  7. If the tomatoes lack flavor, add tomato paste.
  8. In another skillet, while the tomatoes, onions and seasonings cook, heat 1/2 cup oil over moderate heat. When hot add zucchini and sauté until lightly colored (about 5 minutes). Transfer to colander and drain excess oil. Season with thyme and salt.
  9. In the same skillet, heat the remaining 1/4 cup of oil and sauté the eggplant until lightly colored. Transfer to colander and drain excess oil.
  10. Add zucchini and eggplant to the tomato mixture and taste for seasoning, add saffron if desired, and simmer gently for about 30 minutes.
  11. Serve warm, room temperature, or cold. Will keep covered and refrigerated for several days.

ÒüÓ

This is not you everyday, get rid of the zucchini, ratatouille. It’s special occasion, peak tomato season, and it take time and effort, but if you invest the time and effort, I think you’ll agree that it is a fantastic dish. This best made when tomatoes are at their peak–you don’t want to expend this effort and use canned tomatoes or supermarket ones that have no flavor–that would be a waste of effort. Neither the tomato paste nor the saffron can overcome that deficit.

Ratatouille (slow-cooker)

vegetables for ratatouilleDuring the summer abundance of eggplant, squash, and tomatoes  we’re often in the OMG-what-can-I-do-with-these-zucchini mode. Ratatouille and caponata  provide some good eating even when the hot weather has rather killed the appetite. I thought that being able to do this in the slow-cooker instead of stove-top would be an advantage in sweltering weather that is already taxing the A/C without adding more heat.

It’s easy to find ratatouille recipes–a quick search on the internet will provide a plethora.  The question:  are they  “good” recipes”?  I’m not sure I can tell you what (specifically) tells me “good”, “passable”, or “oh yuk”.  Most likely past experience, and reading a lot of food science, and (from America’s Test Kitchen) “why this recipe works”.

Here is a ratatouille recipe given by a friend, from Food.com, reproduced below. I’ve never made ratatouille in a slow cooker so I thought this was worth trying. In reading the recipe, I had only a couple questions, so I decided to make the recipe as directed–well, almost–as much as I can–I’m just a compulsive tinkerer, and constitutionally unable to follow a recipe strictly, but almost.  ratatouille ingredientsLooking at the recipe, I knew I’d want more garlic. Had I not been using part frozen peppers (from a Kitchen Disaster), I would not use green peppers–I prefer ripe (red, yellow, or orange) like them. I’m changing the herbs to thyme and oregano,  rather than basil (for reasons explained below in Cook’s notes).  My other question about this recipe had to do with that quantity of tomato paste. Why?

When I started the prep, I was still undecided about the tomato paste.  My inclination was to leave it out because this is an “all fresh” dish, and (to me) tomato paste tastes canned and cooked. Since this does not call for the tomato paste to be added until later, my obvious solution is to wait and see how it tastes, especially since these are summer tomatoes. If  I were wanting to supplement the “tomato” part of the flavor I would likely add some sun-dried tomatoes, rather than tomato paste–unless there is a dearth of “umami” (which is one of my reservations about slow-cooker dishes).

Slow Cooker Ratatouille (Food.com)

The modifications that I made on this recipe on the first round are shown in parentheses after the ingredient. These were just to meet my seasoning preferences, not for any other reason.  Don’t hold this on “warm”–it just doesn’t do well.

Serves: 6 to 8

Ingredients

  • 1 large eggplant, peeled and cut into 1 inch cubes
  • salt
  • 2 medium onions, chopped
  • 2 cups chopped fresh tomatoes–about 3 medium
  • 1 large green bell pepper, cut into 1/2 inch squares
  • 1 large red bell peppers or 1 large yellow bell pepper, cut into 1/2 inch squares
  • 3 medium zucchini, sliced
  • 3 tablespoons olive oil
  • 3 tablespoons dried basil (substitute 1/2 teaspoon thyme and 1/2 teaspoon Turkish oregano)
  • 2 garlic cloves, crushed through a press (4 garlic cloves)
  • 1/2 teaspoon fresh ground pepper (held until end as I think it gets bitter with long cooking)
  • 1 (6 ounce) cans tomato paste
  • 1 (5 1/2 ounce) cans pitted ripe olives, drained and chopped coarsely (oil cured black olives)
  • 3 tablespoons chopped fresh basil (substitute chopped fresh oregano)

Directions

  1. Sprinkle the eggplant with salt; let stand in a colander 1/2- 1 hour to drain.
  2. Press out excess moisture.
  3. Rinse the eggplant with water and pat dry with paper towels.
  4. Place the eggplant in crock pot.
  5. Add onions, tomatoes, bell peppers, zucchini, olive oil, basil, garlic, pepper and 1/2 tsp salt.
  6. Mix well.
  7. Cover and cook on high setting about 3 hours or until the vegetables are tender but still hold their shape.
  8. Stir in the tomato paste, olives, and the fresh basil.
  9. Serve hot, room temperature or chilled.

Notes:  Being of scientific orientation, I decided to do an experiment–half the recipe is cooked as above; and the other half cooked separately, with modifications after I had tasted the results of the original method. First, I had to cook for an additional hour–I thought my rice cooker/slow cooker ran rather hot, but not according to this.  After tasting I did add the tomato paste as the tomato flavor was not at all pronounced, but I think the tomato paste (unless browned before adding) doesn’t add the depth I want. I needed more salt (which kind of surprised me because I don’t usually need to add much. Oregano and thyme needed to be bumped up as did the garlic. Those minor things were done to the first batch. So far the onions  have stayed crispy and I think I’d prefer them a bit softer so maybe microwave them before putting into the slow cooker (that had to wait because they were already mixed with the other vegetables). This came out with more juice than I’d expected.

Now for the second batch. I’m adding more olives, more garlic (sliced rather than pressed), some red pepper flakes (about 1/8 teaspoon) for a little zing (but not a lot of heat), and sun-dried tomatoes (instead of tomato paste), a bay leaf, and increasing the oregano and thyme. Instead of increasing salt, I’m going to add just a touch of nam pla (fish sauce)–or an anchovy fillet mashed would work. This is not intended to make it at all fishy just more flavorful. This needs to be stirred after an hour so that the bottom veggies don’t mush and the top be a bit undercooked. Check for doneness–don’t just trust the time. I prefer my veggies cooked but with a little “tooth” to them, so in my slow cooker this finishes in about 2 hours. I like this one as there’s no added liquid, except the dash of nam pla and what the veggies give off. Minced fresh oregano added the last 15 minutes of cooking leaves it very fresh tasting.

Bottom line: this is quick and works if you want a very light ratatouille, not complex ratatouille.  I don’t want my ratatouille over whelmed with herbs and garlic, but I’d like to make it a bit more complex, or layered flavor–maybe it needs a little more umami It has the advantage of being very quick to assemble.

Ò¿Ó

As you likely know if you’ve read other posts, I’m somewhat partial to recipes from America’s Test Kitchen.  When the published Slow Cooker Revolution I had to check it out.  I was hoping that those recipes would improve my attitude to (and increase use of ) my slow cooker. There’s no denying it’s convenience, but generally I’ve simply not been happy with the results when compared with oven or stove-top methods.

A comparison of America’s Test Kitchen recipe with the one above is interesting. One of my “complaints” is that their recipes sometimes  seem more complicated–though they do increase flavor.  The recipe below is from the Slow Cooker Revolution (Kindle edition). This is the recipe that inspired me to try the one above.  The cooking instructions are quite extensive so I’m only going to summarize them for purposes of comparison. I’m trying to find a compromise of best flavor and easy preparation.

Slow-cooker ratatouille (America’s Test Kitchen)

Serves: 10 to 12

Ingredients

  • 6 tablespoon extra-virgin olive oil
  • 2 eggplants (2 pounds), cut into 1-inch chunks
  • 3 zucchini (1-1/2 pounds), cut into 1-inch chunks
  • 2 onions, halved and sliced 1/4-inch thick
  • 2 red bell peppers, stemmed, seeded, and cut into 1/2-inch pieces
  • 2 cloves garlic, minced
  • 2 teaspoons minced fresh thyme or 1/2 teaspoon dried
  • 1/4 cup all-purpose flour
  • 1 (28-ounce) can diced tomatoes, drained, juice reserved
  • 1/4 cup chopped fresh basil or parsley
  • Salt and pepper
  • Grated Parmesan cheese, for serving

Preparation

  1. Brown eggplant, half at a time, in olive oil (5 to 7 minutes), and transfer each batch to slow cooker.
  2. Brown zucchini, half at a time, in olive oil, transferring each batch to slow cooker.
  3. Cook onions, bell peppers, garlic, and thyme until softened and lightly browned (8 to 10 minutes), stir in flour and cook for 1 minute. Whisk in reserved tomato juice, scrape up browned  bits, and smooth out lumps, and transfer to slow cooker.
  4. Stir tomatoes into slow cooker, close and cook until vegetables are tender (4 to 6 hours).
  5. Season with salt and pepper as needed.

Notes:  The time it takes to brown the vegetables really is not that long, so it’s worth the extra flavor. It’s a drastic difference, even when you add some umami-hyping ingredients to the Food.com recipe.

The differences here are, notably, the use of flour to thicken, the lack of tomato paste, and the preparation of the eggplant. One of my reasons for trying the recipe from Food.com is the handling of the eggplant, with the idea that salting to remove fluid might eliminate the need for flour–I doubt that you’d know there was flour in this recipe simply by tasting.

After tasting the first batch of the recipe from Food.com with the adjustments noted in Notes, it’s a keeper for simplicity. The America’s Test Kitchen is a bit richer since you’ve browned the veggies. Either is good–depends on the time and effort you want (or have) to invest.

. . . a son goût

Ö¿Ö

cooked ratatouille

?

Hot & sour soup

Swanson hot and sour brothOccasionally  my curiosity gets the better of me while I’m meandering through the supermarket and I bring home something that I usually would not buy.  This time is was a box of Swanson’s Chinese Hot & Sour Flavor Infused Broth.  Usually the “flavor infused” would be a signal to walk on by. Since I do use Swanson’s chicken and beef broths and stocks, I stopped and looked at the ingredients. I was pleasantly surprised when I didn’t feel as if I were in the chemistry lab stockroom, so I bought it.

I do really like hot and sour soup–it’s my usual test of a Chinese restaurant–usually disappointing since my standard was set in Hong Kong!  I don’t see another trip to Hong Kong in the future, so I thought I’d try it.  My expectations were not really high as I opened the box and tasted it, but it was better than I’d thought–the hot and the sour were pretty well-balanced.  It’s main problem was that it tasted boxed–in other words, it needed some brightening up–like most boxed or canned stocks or broths.

Armed with my box of broth, I decided that although I wanted hot and sour flavor, I didn’t want to buy esoteric ingredients that I might not use again for a while just to try it out.  I thought maybe I could do something that was in the “spirit” of hot and sour soup with what I found in the fridge and pantry without a trip to the Asian market. So no tree ears or lily buds, and not even bamboo shoots.

vegetables on salad bar at Harris Teeter

prepared veggies

I found a basket of sliced mushrooms  in the fridge,  shelled edamame and collard greens in the freezer, water chestnuts in the pantry, and some rotisserie chicken and some pork in the fridge that needed given a re-do.  My only addition was a very large handful of julienned carrots (from the salad bar of my local Harris Teeter).

Since this was one of those OMG-I-don’t-have-time-to-cook occasions, I got out the rice cooker (cum slow-cooker) and added the hot and sour “flavor-infused” broth.  I sautéed  the mushrooms in just a bit of peanut oil until browned and gave the carrots a brief swish through the pan with the mushrooms, deglazed the skillet with a bit of the broth, and poured that into the slow-cooker. I added the edamame, collard greens, and the water chestnuts and set it for two hours.

When the collard greens and edamame were done (about 2 hours) I added the chicken and  pork  to heat through.  At the same time I added a piece of fresh ginger root and a small clove of garlic to “freshen” the flavors up a bit.

Obviously not a traditional hot and sour soup, but it was a good test of the “flavor infused” broth, and pretty tasty with the chicken and pork to add some richness, and the textural variety of the mushrooms, greens and water chestnuts.  A garnish  of green onions when served finished it off nicely. (I didn’t add the eggs, either.)

Verdict on the broth–not bad–actually much better than I expected– but if I’m going to make traditional real Chinese hot and sour soup (with tree ears and lily buds) I will start with my own stock–besides, I really like my hot and sour soup with pork. But if it’s just hot and sour I want, I might use another box of “flavor infused” broth!

A son goût!

…and now it’s turkey soup!

Remember those turkey thighs that I roasted a couple days ago? They have really been a bargain.  I spent about $5 on the package of thighs–two small-to-medium ones.

I had my roast turkey with sides of potatoes and cabbage (with juniper berries). Then I had two full-size sandwiches, and a half sandwich for lunches. Now I’m finishing the turkey thighs with a very hearty bowl of soup (and a  glass of good wine).

small Rival Crockette

a crockette

I popped those thigh bones (with what meat wasn’t easy to carve for sandwiches) in to my tiny little single-serving crock-pot to make some stock–I just added a little salt, a bay leaf, the brown stuff that I deglazed from the roasting pan, and enough water to cover the bones. After slow cooking overnight, I removed the thigh bones.  The meat just fell off into the pot.

In the same little crock-pot (don’t want extra dishes to wash), I added a small handful of barley, some dried mushrooms of various sorts–including shiitake, chanterelle, and porcini. The other things that went into this soup were the leftover cabbage (with juniper berries) and a few potatoes that were roasted with the turkey.  (You may be thinking that this is pretty heavy on starch, but to finish the soup, I added some green stuff.)

small leaves of greens

mixed greens

About half an hour before I was ready to eat, I went out to the garden (which I share through the good graces of a neighbor) and picked a good size handful of small kale, turnip, and mustard greens.

After washing, I cut these in bite size pieces (though that was almost unnecessary as they were really not as big as my hand). They went into the crock-pot; in about 20 minutes they were still bright green but tender.

I did a final adjustment of salt using French Grey sea salt, and finally added several drops of black truffle oil to finish the soup.

-<>^<>-

I’ve had my bowl of soup for supper this evening–and it looks as if I’ll get one more meal out of those turkey thighs–with the barley, and the amount of meat that was left on the bones, there is easily another serving of this soup for lunch or supper tomorrow. (I’m sure that by the time I reheat it, those greens won’t be quite so bright green, but the flavors may have melded with the other ingredients so it should be good–maybe even better than this evening.

bowl of soup with greens

a warm, hearty supper

-<>^<>-

I opened a bottle of wine this evening that was a completely unknown to me. It was a limited release called “Dark” from Apothic. I was completely beguiled by the description that said that it “blends dark fruit flavors of blueberry and blackberry with opulent notes of coffee and dark chocolate”.  How could I possibly pass that up? (I found it while shopping at Harris Teeter–just after I had bought a case of something called “Besieged”–more about that one later.)

I was surprised how dark it was when I poured it into the glass! (I even tried to take a picture–but it just looks almost black–so forget that.) It is definitely a “big” wine and right out of the bottle it was fruity and mellow–but after breathing for a bit it lives up to its description.

I thought it might overwhelm my bowl of turkey soup, but with the juniper berries, the rather emphatic mushrooms, the flavors of the greens, and the truffle oil, it turned out to be a great combination.  Fortunately there is some of the wine left for tomorrow’s soup! This is one time when I’m looking forward to the “leftovers”.

Oven-braised lamb and garbanzo beans

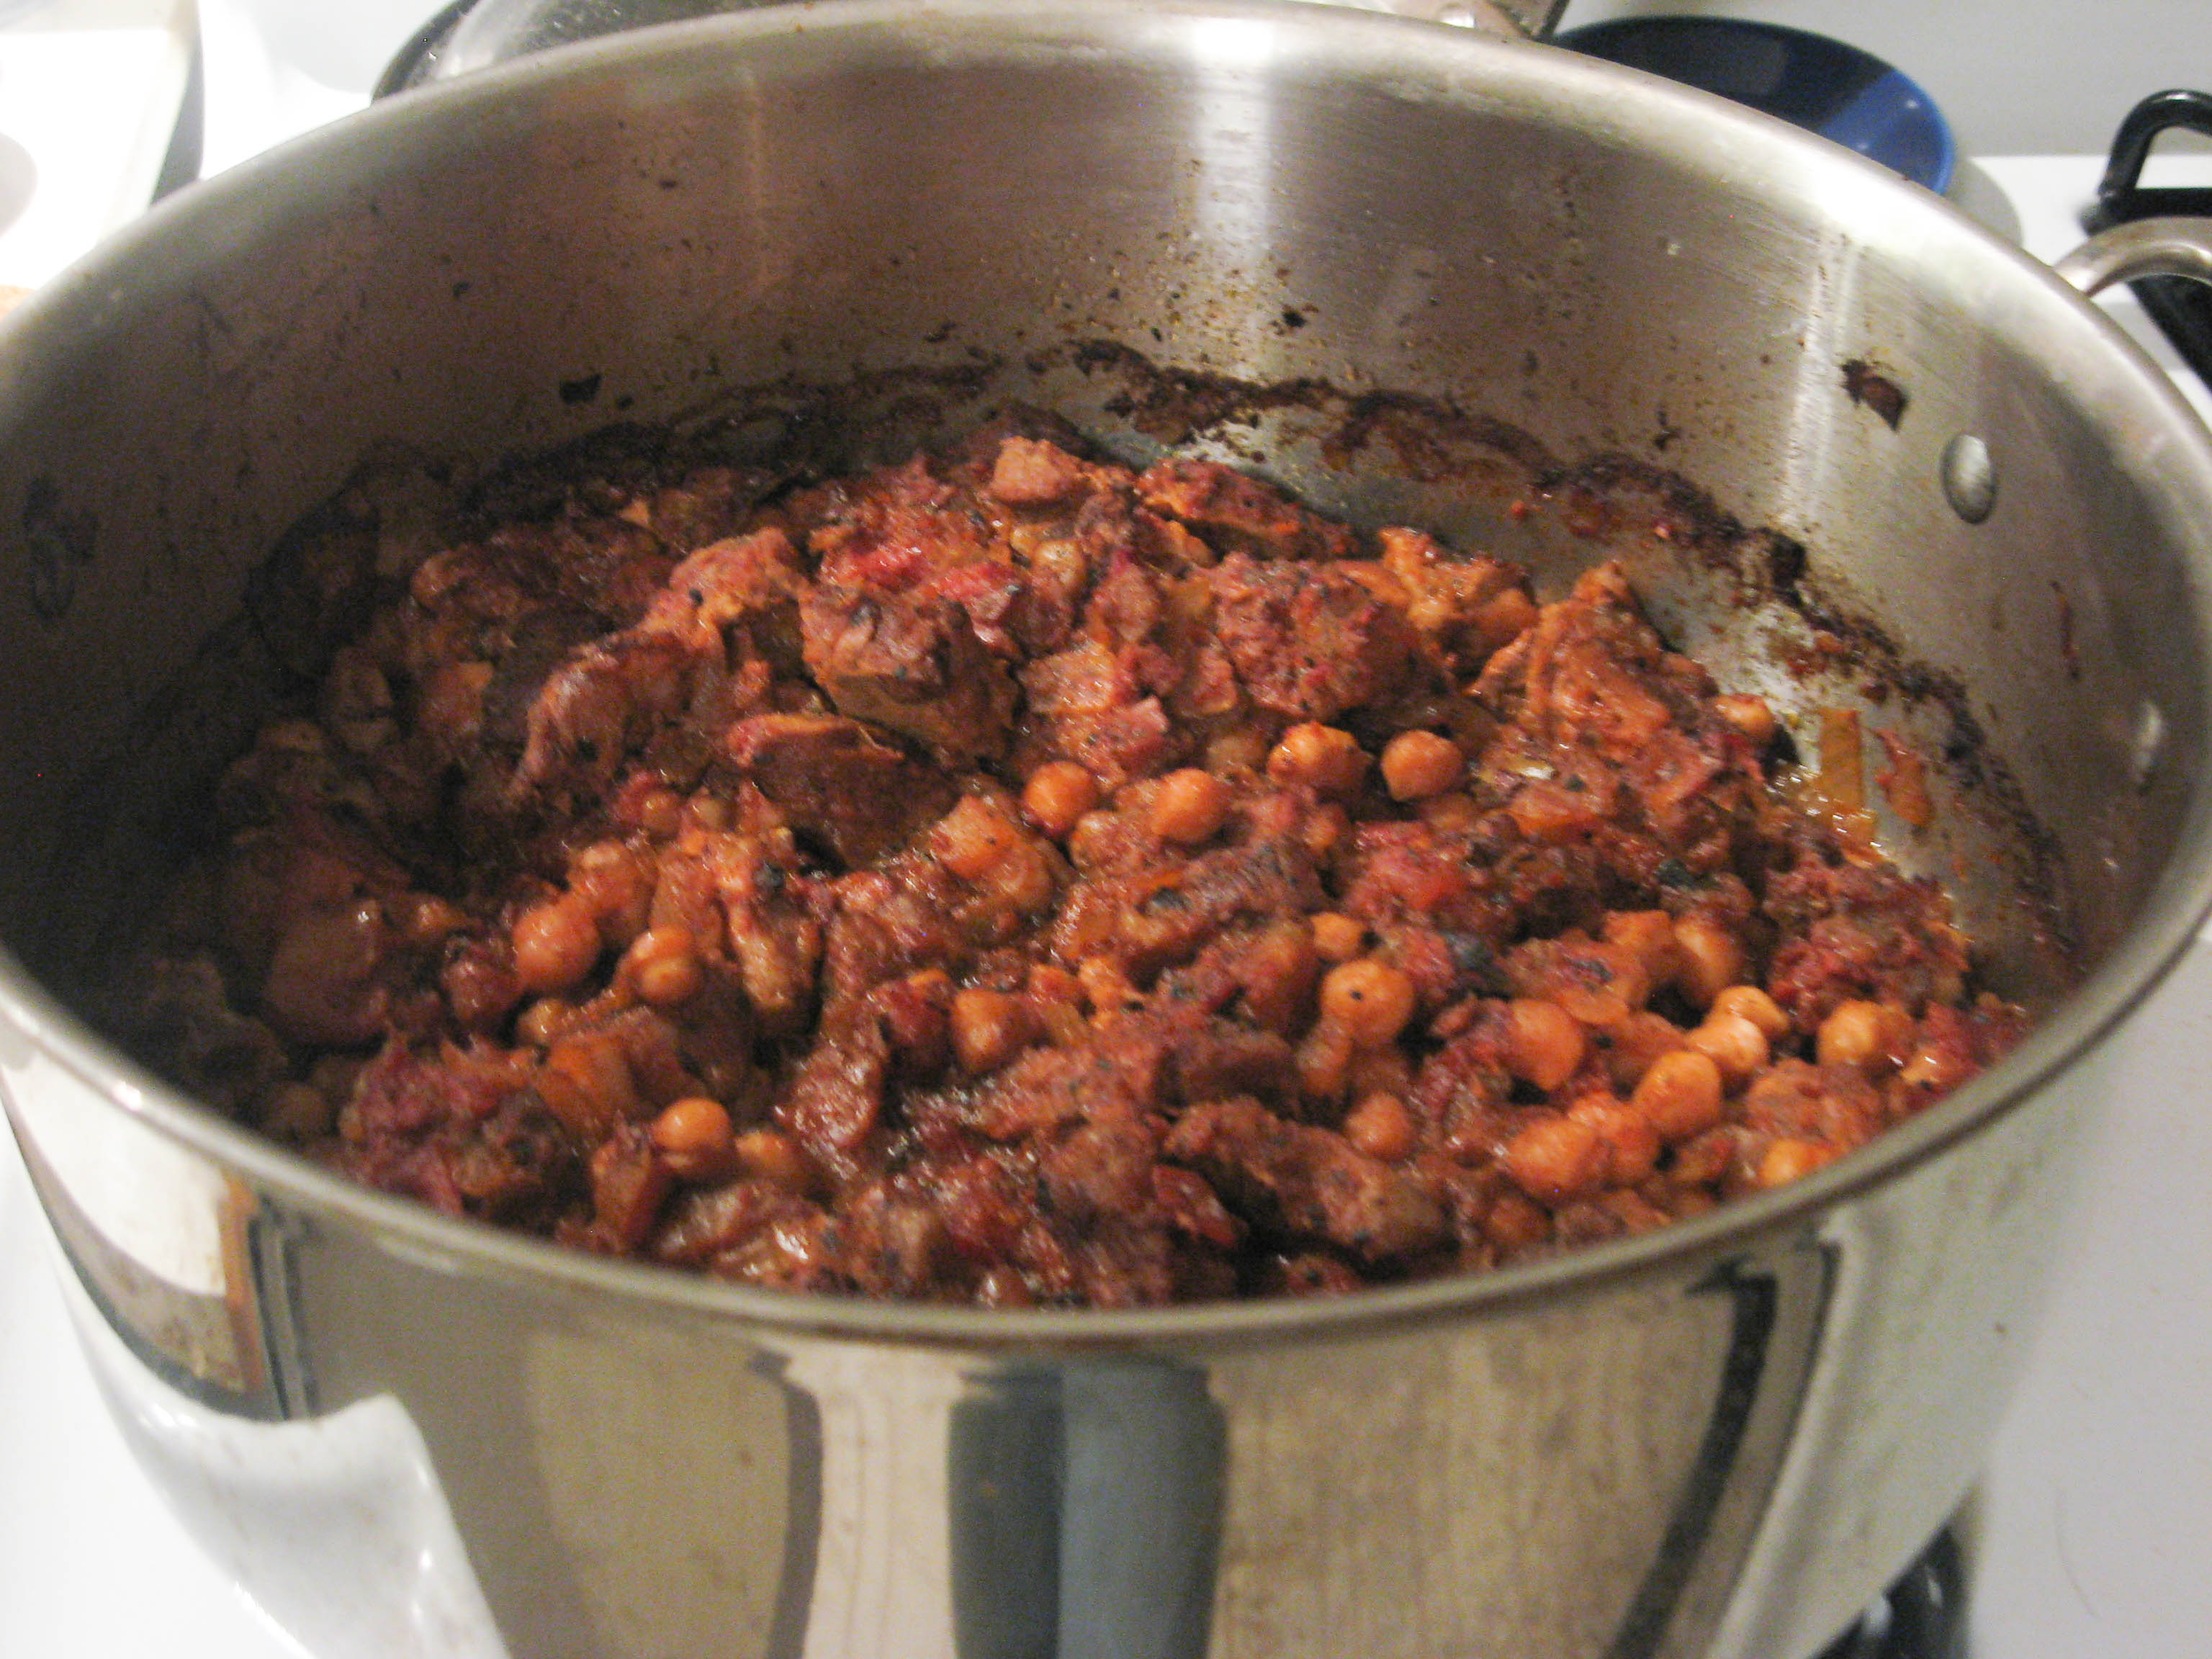
It’s another grey day–unseasonably warm, but at least not hot, sticky, and terribly humid today–the kind of day when you need to smell something cooking–long, slow, and tantalizing.   I found lamb shoulder chops on special (2-1/2-pound package) at the grocery store, I decided to try the lamb/garbanzo slow-cooker thing in the oven since it’s not too hot (and I’ll use the oven to prepare a second dish for reheating tomorrow (acorn squash stuffed with Sicilian sausage).

Book cover
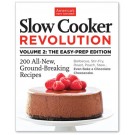
The slow cooker version of this concoction was really good, but I thought it could be improved by doing it in the oven. Even after reading the Cook’s Illustrated Slow Cooker Revolution (volume 1), I am still not a wild fan of the slow-cooker.  I use it because it does some things well, and is necessary at times to fit cooking into a working schedule.  The Slow Cooker Revolution has improved my slow-cooker results immensely, mostly because I’ve discovered some unusual ingredients that can improve flavor.

My impression was that many of these recipes required more preparation time than I would be able to put into a slow cooker recipe, given that I use it for utter simplicity.  I’m interested in seeing what comes from volume 2 of the Slow Cooker Revolution.  If I have to do a lot of preparation for the recipe, then I might as well not use the slow cooker.  I still find that I like over-braising when possible; however, I do find I’m using the slow cooker even more since I read the first volume of this book. That said, I still prefer oven braising, especially if I’m working at home.

Romertopf clay baker (oval)I had intended to do this in the Romertopf, (one of my favorite things for roasting and baking hearty, peasant-style comfort food in the winter) but by the time I had boned the lamb and added other ingredients, it wouldn’t fit in either of my small ones (great for single-serving cooking), and was not enough to fit in my large Romertopf (for roasting whole chicken, for example)–so it was the Dutch oven for today.

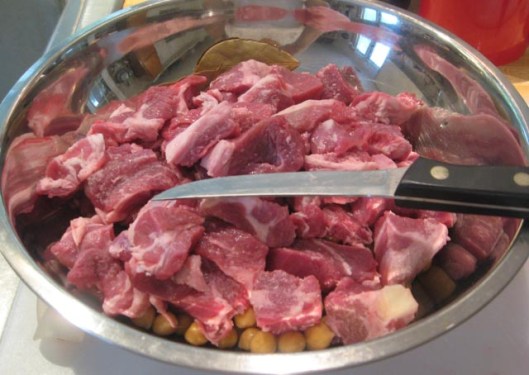
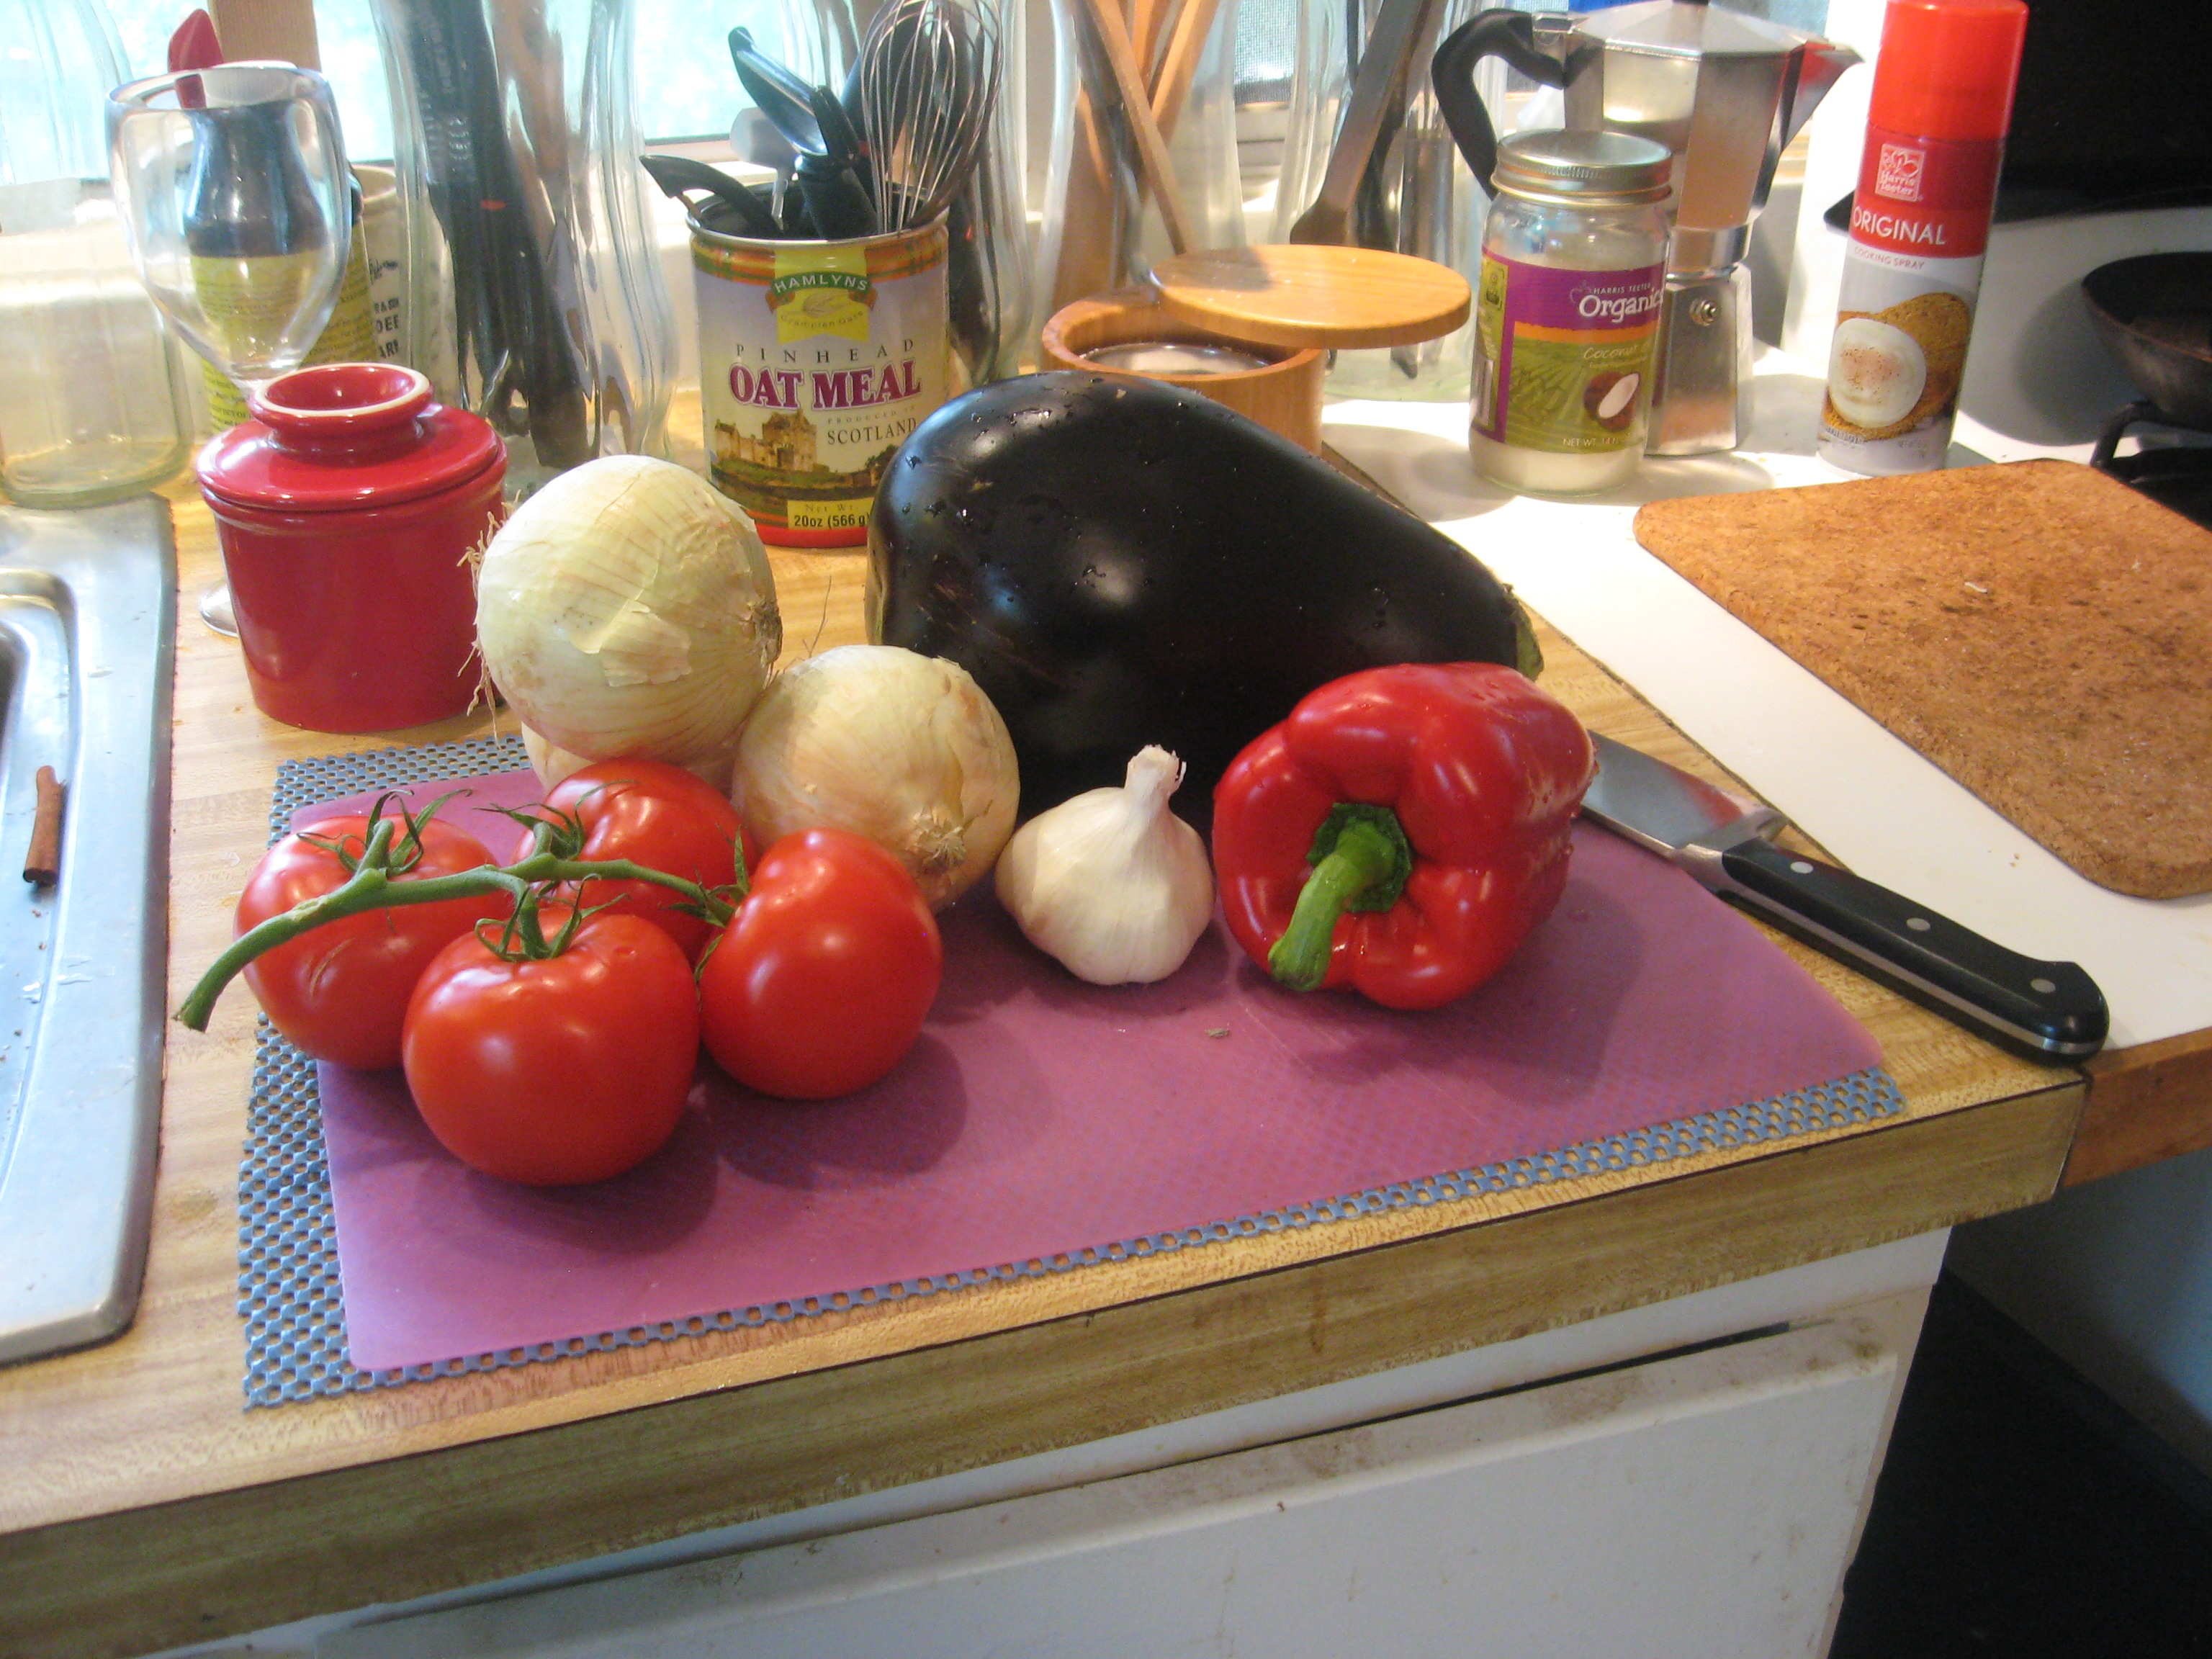
(Shoulder chops are reasonably priced, and the boning doesn’t take long if you use a boning knife rather than trying to do it with a paring knife or chef’s knife.  Those bone went into a saucepan with a tad of salt and some bay leaves to make stock.  After boning out, I had about 2 pounds of lamb, so that’s what I started with.)

Oven-braised lamb and garbanzo beans

lamb from chopsIngredients

  • 2 pounds lamb (from boned shoulder chops)
  • 2 14.5-ounce cans of garbanzo beans, drained and rinsed
  • 3 large onions, chopped
  • 1 14.5-ounce can of fire-roasted, diced tomatoes with juice
  • 2 tablespoons of Hatch chilli powder (used for the slow cooker), but more added after tasting this halfway through cooking
  • 2 teaspoons of salt, or to taste
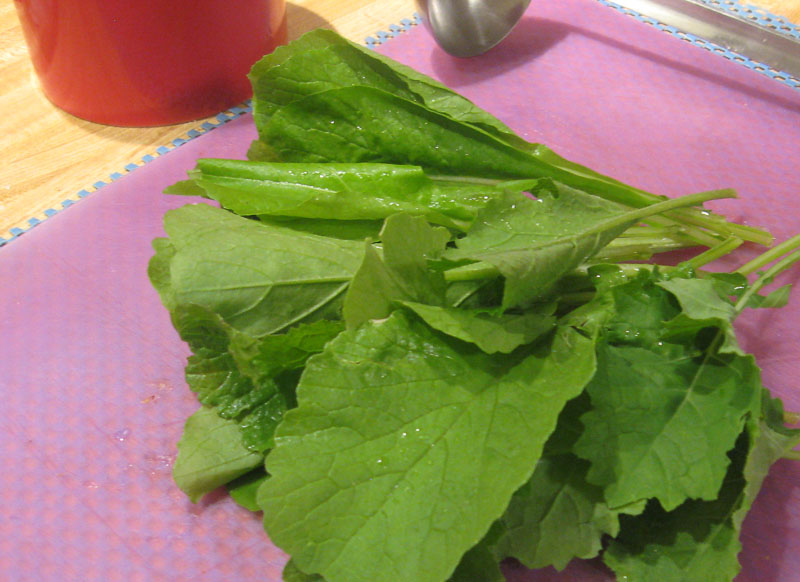
  • 1 tablespoon fresh Mexican oregano, minced
  • 1 cup water

PreparationIMG_7667

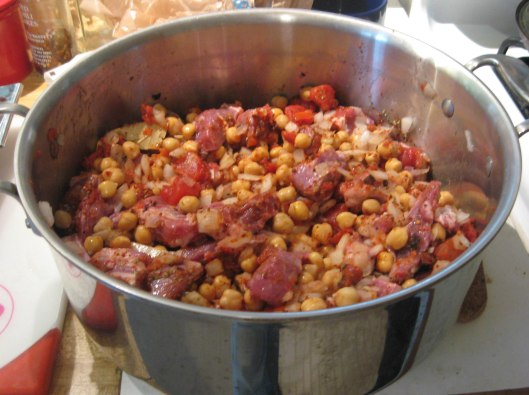
  • Put everything in pot
  • Cover
  • Pop it into the oven, and check for liquid in an hour
  • Go get laundry or whatever, then check liquid again

-<>^<>-

In order to be as much like the slow-cooker, I did not brown the meat or cook the onions separately–just combined everything, covered, and put in a preheated, 300-degree Fahrenheit oven.  I added 1 cup of water to start, and checked in one hour but there was plenty of liquid.

On tasting, I found it needed more than the 2 tablespoons of chili powder so I added about 1 tablespoon more, stirred, covered, and let it continue to cook. There was plenty of liquid, so next time, I’ll not add any water–just rely on the juice from the tomatoes, onions, and meat.

-<>^<>-

The stock made with the bones smelled really good–if more liquid had been needed during baking, I would use some of the stock.  There was some meat from the bones in the stock, but I not enough to spend time picking off, although I’m not compulsive about trying to get every bit off when I bone meat like these chops. Since I started the stock in cold water, the meat that was left was pretty flavorless, but the stock was good.

-<>^<>-

There will be a next time for this–and unless I’m really pushed for time, or can’t leave the oven while I’m out, I’ll opt for the oven method to cook this–a much more complex flavor with the same ingredients, likely attributable to the bit of evaporation that takes place in the oven but not in the closed slow-cooker.

Getting this added flavor lead me to consider the energy used in the various cooking methods–the energy required for cooking is certainly part of the energy required to make that food edible–the energy  of production and transportation, and the cooking is all part of the picture: the footprint of feeding me. We cannot ignore the energy used for cooking when we talk about other energy costs associated with our food so I spent some time browsing to find information on different cooking methods.

In trying to research this issue, I’ve perused many different sources–and the gas/slow cooker comparison is difficult, and I get the feeling that the answer to which is more efficient is an “it depends” situation.

Interestingly, an article on slow cookers versus electric ovens from the University of Connecticut Sustainable Living suggests that there may not be a significant difference in energy use.  SFGate discusses gas versus electric energy use, which gets more complicated, but I’m not sure that there difference is significant enough to make me give up oven braising, even though I’d like to minimize my “carbon footprint” as much as possible. If my slow cooker requires eight or so hours of cooking, and my oven braise requires only two or three hours on low to medium heat, then it may be a toss-up, since the slow cooker doesn’t cycle, and the oven (gas or electric) does.

Oven braising in the wintertime helps warm the house so probably cuts my heating use some, but I’m certainly NOT going to oven braise in the summer and increase the use of air-conditioning.  There is lots of conflicting information out there on the ‘net.  The “best” I found was from the Consumer Energy Center (California Energy Commission)–from that information, I’m not going to give up oven braising for the slow cooker anytime soon, but I’ll still use the slow cooker for some things.

Cover, pressure cooker perfection
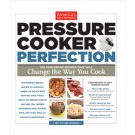
One comparison that I’d really be interested in is slow cooker versus pressure cooker energy use, and taste of the same dish prepared in both. Most data that I found suggested that the slow cooker wins on convenience, and the pressure cooker on energy saving. A taste comparison would certainly be interesting.  I’m almost certain that a pressure cooker can’t replace a good old-fashioned slow braise in the over.

I’ve recently started playing with a pressure cooker–it’s a lot different than what my mother used. The recipes in Pressure Cooker Perfection have been a good starting point. I suspect that I’ll be using a pressure cooker more  in the future, as well as the slow-cooker. Climate, air conditioning, and heating, are all things that will enter into my decisions. I’m also trying out an portable induction unit which is supposed to be ore energy efficient.

So many options for energy efficiency–but what about taste?  I doubt that any other method is going to come out tasting like an oven braise, no matter how many umami-enhancing ingredients you add.

A son goût!

Dutch oven with lamb and garbanzos

very simple, very tasty

Celebrating the autumnal equinox.

I woke up to a lovely fall morning–sunny, breezy, cool–absolutely lovely day, some leisurely time over coffee in the sunny kitchen, and realized that I’ve gradually been shifting into autumn cooking mode–cooking urges that are very different from the hot, humid weather of summer.

I’ve been making meals in the multitasking rice cooker lately: whipped up a great spicy lamb and garbanzo bean stew and another of braised pork and collard greens.  Some of immediate use today, and some of each of those to stash in the freezer for quick meals on a cold winter day when I need serious comfort food.

The lamb and garbanzo “stew” was one that I literally threw together in about 15 minutes while I was finishing an index to send to a client. A good friend who knows how much I like to use chili peppers gave me a wonderful chile powder from Made in New Mexico.  I used lamb shoulder chops, a healthy batch of chile powder, some Mexican oregano,  Goya garbanzo beans, and a can of diced tomatoes. The lamb chops came out of the slow-cooking melt-in-your-mouth tender, with just enough spice to accumulate a bit of burn by the time you’ve eaten a bowl of it, but not enough to rip you taste buds out by the roots.  This chili powder is the best I’ve ever used–I’ll be ordering more of that one.

Another job that just could not be put off any longer was cleaning the gas stove. It is one of my very least favorite things to do so I do tend to procrastinate about it; that does not make the task any easier and I know that but I still procrastinate about it. (I think that a house elf would be a wonderful thing to have around!)

Now the stove has at least had a  lick and a promise as my grandmother would have said. Well, at least the lick, but still needs the promise though that is going to happen today. (Definitely no pictures here!)  So happy that the oven is self-cleaning since it gets lots of use in cool weather for carefree braising while I’m working at home.

Now I’m ready for a plate of braised pork and collard greens!

Umami in the slow cooker…

flats of plants on tailgate of truck to be loaded for the farmers' market.

for market

Obviously I’ve not been giving a lot of thought to cooking  things lately–it’s been end-of-term grading, indexing and proofreading, or getting  ready for the farmers’ market, or actually being at the farmers’ market, with more energy going to planting things, both for later harvest and for selling at the market than into cooking.

One of the down sides of working the farmers’ market is that I’m one of those people who wake up like a compact fluorescent bulb–pretty dim at first–so getting to the farmers’ market on time on Saturdays involves getting up before the birds just to give me time to be awake and functional. Even Fridays demand early rising, especially as the weather gets hotter–flowers to cut early in the morning and produce to be harvested before the heat of the day sets in and thing wilt…and just to avoid being out in the worst of the heat.

wagon of flowers in buckets

cutting flowers

I’m getting into the swing of that now but it still takes time for my lights to come on, though less painful now.  That early rising on Friday and Saturday makes me into a really lazy slob on Sunday.  Now that the Spring term is over, I’m not meeting classes during the week so I’m enjoying the summer hiatus from lecturing, but still working at freelance indexing so the absolute laziness has to be confined to Sundays and Mondays through Thursdays are still busy.

All this means that for Friday, Saturday, and Sunday cooking is likely to be focused on one-dish meals, and dishes that are good (or even better) when reheated.  Sometimes Saturday meal is not even something reheated–it’s my treat-yourself day–OnlyBurger for after-market meal before I devote the rest of the day to quality time with the cat!  (This past Saturday the treat was a Texan (burger with braised brisket on it) and a peach ice cream sandwich (handmade at OnlyBurger) after the market.  The evening meal was Carolina Moon cheese and strawberries–both from the farmers’ market.)

packaged cross-cut beef shank

beef shank

This weekend schedule means that I try to do some planning and cooking on Thursday to have reheatable food on Friday and Sunday.

This weekend’s meals are going to feature an absolutely lovely cross-cut beef shank from Meadow Lane Farms (also from the Durham farmers’ market)  in an easy dish that can cook mostly unattended: osso bucco, but with beef shank rather than veal shank. (The osso bucco really just means “bone with a hole” or marrow bone.)

It’s a dish that’s easily adapted for one person–there’s nothing fussy about it–no need to be exact or tedious in measuring ingredients, and to make even more “unattended”, it will go into the slow cooker (also serving as rice cooker and steamer) while I’m out working on the farm.

Krups rice cooker/slow cooker and steamer

Krups rice cooker

I have to admit that I’ve not been a fan of the slow cooker until recently, at least for anything much more than cooking dried beans, or poaching a beef tongue. The flavors and textures just aren’t the same as when the slow cooking was done in the oven where some evaporation, browning and concentration takes place even in a covered dutch oven.

My attitude about slow cookers has changed since I found the Cook’s Illustrated Slow Cooker Revolution (See Bibliography) and learned some techniques for making food out of the slow cooker more flavorful.  I’m not ready to quit slow-cooking in the oven despite that, but in hot weather I’ll certainly use the slow cooker more often with some of the “tricks” I learned from that cookbook.

What I missed most in slow-cooker dishes was that savoriness that comes from browning (Maillard reaction)  when you slow-cook in a traditional oven or brown/sear on the stove-top.  In the slow  cooker, you can make this absence less noticeable by adding ingredients that contribute “umami“.

Some of the most useful things I learned from that Slow Cooker Revolution are ways to use the microwave oven to facilitate the slow cooker, and using some “unusual” ingredients  in recipes–not esoteric ingredients, just pantry staples that boost  the umami flavor:

  • precooking aromatics like onions in the microwave so that they don’t stay crispy-crunchy in the slow cooker,
  • using tomato paste (for umami) by browning it with the aromatics either in a skillet or in the microwave before adding it to the slow cooker,
  • using dried mushrooms to boost flavor (again, umami),
  • using foil packets in the slow cooker to keep some ingredients from over cooking.
  • using soy sauce or fish sauce to add more of that umami that many slow-cooker dishes don’t get without the evaporation and browning as in the traditional oven.
  • using the microwave to precook some ingredients to get rid of excess moisture that would otherwise dilute the dish in the slow cooker.

These are all easy to do–they really don’t add significant extra prep time or effort, and do really make a difference in the flavor.  I expect an easy, flavorful meal (or two) from the braised beef shank that is going to emerge from my slow cooker on Friday evening, thanks to some added umami!