Short ribs two ways!

It took me a while to join the Instant Pot (IP) cult, but I finally did and I’m glad that I did–I love my IP. Now I’ve added a new gadget to the kitchen: a sous vide immersion circulator.

I had tried some “jury rigged” sous vide (here and here) so I was sure it was a way of cooking I was interested in pursuing.

The Joule, from ChefSteps now has a place in my kitchen. We all also know that you can’t have a new kitchen toy without playing. So I had to decide what to cook first.

When I got my IP one of the first recommendations for something to cook was boneless beef short ribs. I’ve done short ribs as a braise in the oven (love them, but it’s a wintertime thing–not for summer when the A/C is working hard to fight the heat and humidity. As I was browsing amongst the cookbooks on sous vide I found a recommendation of something to try with sous vide. Yep, short ribs. There was even a recipe for them in the app on my smartphone (which you need to operate the Joule). An absolute no-brainer–short ribs by sous vide.

After reading the descriptions of sous vide meat, the scientist in me just had to do a little study of my own. I’ve really enjoyed short ribs out of my IP. Certainly they were not the same as the long oven braise that I would do in the wintertime, but for hands-off cooking and summertime, they are great. It seemed logical that I should cook something using my new sous vide that I knew so I could really get a feel for what sous vide really does. So, a little experimental design here.

I got a package of four very homogeneous-appearing boneless beef short ribs. Two of those went into the IP, and two into the sous vide according to the recipe on my smartphone. I seasoned both the same: garlic powder, onion powder, and salt then set to cooking.

The Joule app gave me a choice of cooking temperatures for ribs: 156°F, 167°F, and 176°F, with 167°F marked as the “fave”. Since I thought a good deal of experimentation had probably gone into those recommendation, I opted for the middle one for the recommended time of 24 hours. (Yes, really.) The other two went into the IP for 90 minutes that I’d previously used to get nice tender short ribs. (I’d tried less time, higher pressure but didn’t get the result I wanted. Less and there was just a bit too much chew to the meat.)

When the short ribs in the IP were cooked, I cooled them quickly, put them into a freezer bag and refrigerated them. (The freezer bag was because the sous vide ones and my IP ones would be reheated in the water bath.) At the end of the 24 hours, I chilled the sous vide ribs and refrigerated them too.

Instant Pot (left) and sous vide (right))

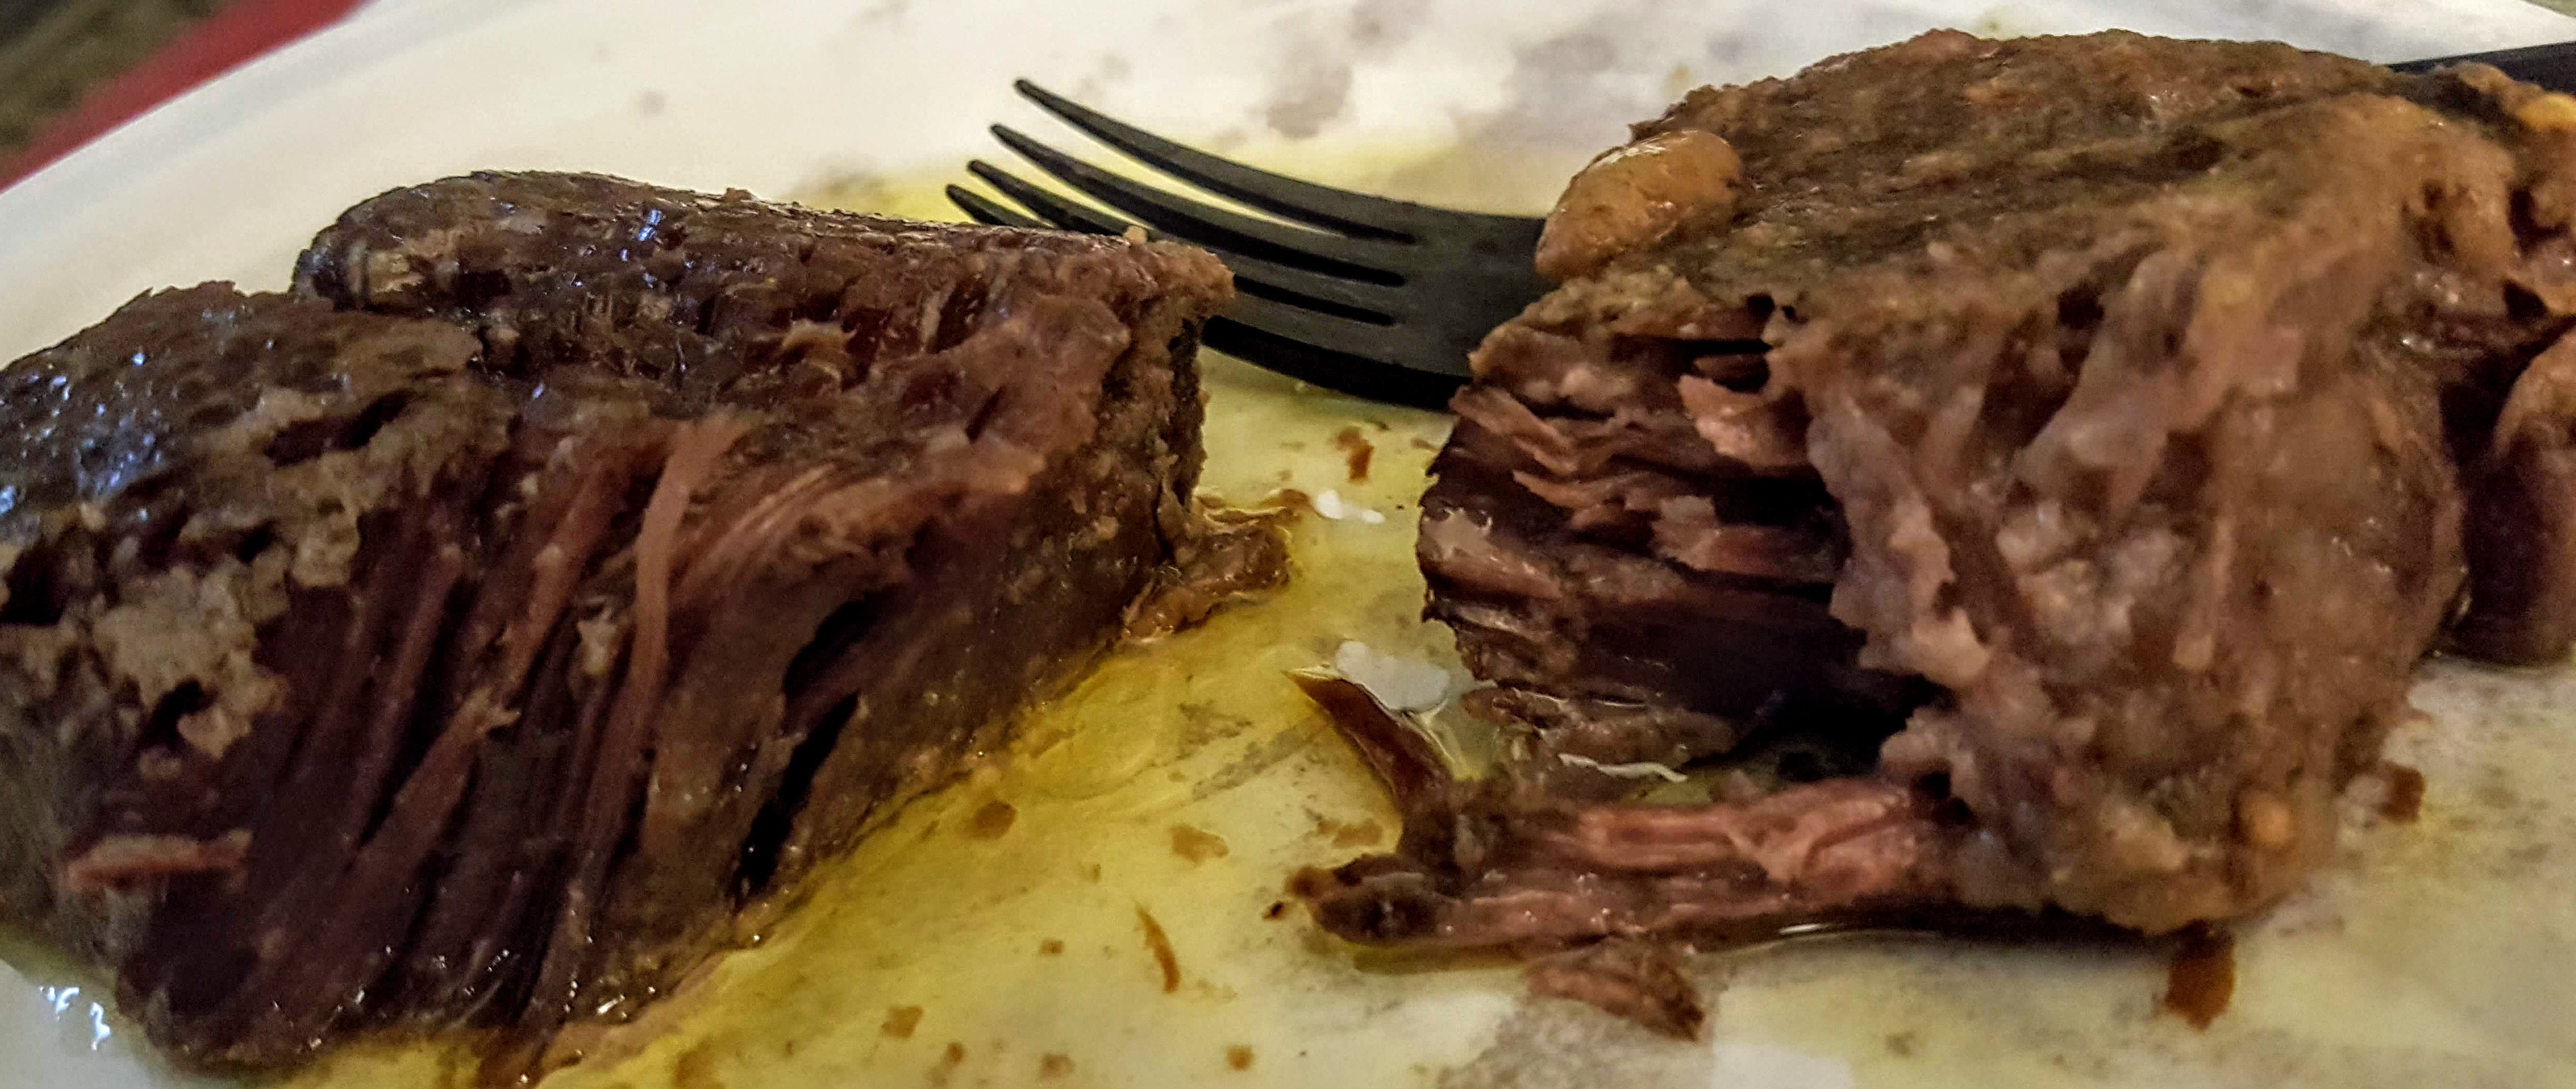
For the taste test, reheated both batches in the sous vide water bath at 140°F for 35 minutes and plopped them onto a plate and dug side by side and dug in. Was there a difference? Yes there was.

After all the descriptions of meat cooked sous vide I wasn’t quite sure what to expect. The seasoning on them was just about the same so they were beefy, onion-y, and garlicky. The appearance was slightly different: the IP ribs were a bit darker. Both were very tender, but the “mouth feel” of the sous vide ribs was much moister than those from the IP.

I really like the sous vide ribs! Am I going to give up cooking them in the IP? Not likely since it’s also hands off, but it’s quick. Will cook more ribs using sous vide? You bet! I’ll certainly want to try some different temperatures, though. I perusing the Sous Vide for Everybody* cookbook from America’s Test Kitchen I found that their suggestion of time an temperature for braised short ribs was 160°F for 20 to 24 hours.

When thinking about sous vide you have to remember we’re talking precision cooking here–not hit or miss, or close. So it’s likely to take a bit to get the feel for just how I like things cooked using sous vide, but it should be an exciting journey.

A son gôut!

—Ô¿Ô—

*Note: If you’re skulking on Amazon for sous vide cookbooks, be sure to look carefully at the author or editors. There is another with the exact title except that it has 2019 appended.

–<o>–

Cabbage rolls deconstructed

Despite the Always Hungry? diet now being a memory of things past this one recipe (and the blue cheese dressing) has stayed around the kitchen. Somehow with the rather chilly, grey days that seem to be endless, this seemed appropriate now, so I thought I’d share the recipe. Sometimes good things come from strange places. I never have thought I’d be keeping recipes from a diet book!

The recipe calls for using a food processor, and for blanching the cabbage. Since I cook for one, I really consider using a food processor a lot more work than simply getting out my knife, even if the recipe calls for “finely diced”. It’s so simple to clean a knife and a cutting board.

Here is the recipe (adapted from pp.236-237) from Always Hungry?

Ingredients

  • 1 medium onion, chopped
  • 4 (or more) cloves of garlic
  • 1 red bell pepper, cored and seeded
  • 1-1/4 pounds ground beef (the recipe calls for lean, but not in this cook’s kitchen)
  • 1 teaspoon of salt
  • 1/4 teaspoon ground black pepper
  • 3-1/2 cups diced tomatoes (about two 14.5 ounce cans
  • 2-4 teaspoons of apple cider vinegar
  • 1 apple, finely diced
  • 1/4 teaspoon of cinnamon
  • 5-6 cups shredded cabbage (about 1/2 small head)

Preparation

  1. Preheat the oven to 375°F.
  2. In a food processor (if you’re using it, otherwise chop and use an immersion blender, or finely dice) the onion, bell pepper and garlic. Transfer to a bowl.
  3. Stir the beef, 1/2 teaspoon salt, and 1/8 teaspoon black pepper (personally, I like more), into the onion mixture.
  4. Combine the tomatoes, vinegar, apple, cinnamon, remaining salt and pepper. If you have an immersion blender, use it here to complete the sauce–otherwise you can go rustic and have chunky sauce; it still tastes good.
  5. Blanch the cabbage for about 30 seconds and drain. (Not this lazy cook; it goes in the microwave briefly, or a zero minute steam in the Instant Pot now that I don’t have a microwave).
  6. Cover the bottom of a 9 x 12-inch baking dish with 1 cup of the tomato mixture. Layer with half the cabbage, then half the beef mixture; alternate tomato mixture, cabbage, and beef mixture, ending with beef and then tomato mixture.
  7. Cover with foil and bake for about 45 minutes; remove the foil and bake for an additional 30 minutes (or a bit longer if it’s still too juicy).

This is another of my cabbage “things” that gets better the day after, or even after that. It freezes well, so I don’t try to alter the recipe to cut it from 4 servings to one or two.

A son gôut!

—Ô¿Ô—

Beef and barley stew redux

The snow happened, and melted quite rapidly but with the temperature only reaching into the mid 40s, it’s still a good day for beef and barley stew. Just from browning the meat and the vegetables (including the garlic, tomato paste, and the Vegemite), it already smells like comfort food. I did opt to be lazy and finish cooking the stew in the oven (275ºF).

Now I’ve experienced the jar of Vegemite (Marmite wasn’t available at my local supermarket) although I’ve not gotten to the point of trying it spread on toast. I like the aroma from the jar–but that really didn’t come as any surprise because I already knew I liked the aroma of yeast-y thing: certain champagnes, bread dough….

The prep for this is really easy–most of the time spent browning the meat and vegetables but the hands-on work is still minimal, especially since I bought boneless short ribs, so chunking them up was quick and easy. To my dismay, I did find that I hadn’t any whole canned tomatoes–only diced, so diced was what I used.  I did “cheat” and use frozen chopped onions (probably my favorite “convenience” thing except for mirepoix (homemade and put in the freezer), and the kale will be from a bag as well. For now,  it’s time to wait, and anticipate!

Since I’m cooking this for only one person–and this half recipe should be two quite generous servings, I’m going to add the kale (frozen) to only what I’m going to eat today. Whether I decide to freeze half or simply reheat in a couple days, I’ll add the kale to that serving then so it not overcooked. That’s one of the advantages of frozen stuff when it comes to cooking for one.

20170312_161745

…Ò¿Ó…

…and finally, it’s time to eat! This is the first time for tomatoes in beef and barley stew, but I like it as an alternative to the more stripped down version that I usually do (read beef and barley with seasonings)–but I think I’ll try adapting mine by adding the extra umami sources and the kale but omitting the tomatoes. Beef and barley stew, for me, is a bit like lentil soup: you can never have too many variations.

I’ve not used short ribs often for stews, but in cooking for one when I don’t want to volume that I’d get with chuck, I think I’ll me using them more often–even though they are not really cheap, the have the advantage of being available in quantities suitable for single-serving, or two-serving, cooking.  Another adaptation that I’ll make is to increase the proportion of barley (and, obviously, the liquid) in my efforts to shift toward using less meat.

I suspect it would taste really good even without the Vegemite, but that jar of yeasty stuff is going to hang out with the fish sauce, anchovies, and soy sauce because it certainly is tasty with it.

This was a yummy meal for a chilly day!

20170312_164807

…Ò¿Ó…

.

Spring is here?

20170307_115628

Mertensia virginicia

Here in NC it’s beginning to feel a lot like spring! The maple outside my house is well into bloom; on my deck there are Virginia bluebells or cowslip (Mertensia virginica) blooming, and other green shoots (including the sorrel) are starting to peek out of the ground.

The birds are acting like it’s springtime, too; the Pine, and the Yellow-rumped Warblers that suddenly appeared (just in time for the Great Backyard Bird Count) seem to have disappeared as quickly as they appeared, and as I write I’m listening to a juvenile Red-tailed Hawk calling close by . Other harbingers of spring, catalogs from Johnny’s Selected Seeds, Brushy MountainBailey Bee Supply, and Dadent, have arrived, too (and I’ve ordered my package of bees to restart by beekeeping career).

I’ve been happily indexing with the doors and windows open on some days (like today) when the temperature rose into the 70s, and my cooking thoughts have turned to more spring-y things–like shad roe, fresh garden peas, and asparagus–instead of things like pot roast, chicken and dumplings that are so comforting in cold, winter weather. That was until I looked at the weather forecast this morning while I was imbibing my morning quota of caffeine. On my second cup of café au lait, doing my Facebook catch-up, I spotted a post from a friend about possible snow on Sunday–that’s right on 12 March 2017–after days of warm weather and blooming flowers!

Ever on the lookout for “fake” news these days, I pulled up the Weather Channel, and WRAL for local forecasts–sure enough–after daytime temperatures of 70 to 75ºF until Friday the forecast highs plummet to mid-40 to 50ºF for the weekend–and freezing (to below freezing) nighttime lows for the weekend and Monday. Yes, there were those cute little snowflakes in the graphics with the raindrops!  Here’s hoping that whatever we get, it’s not one of the infamous “ice storms” with freezing rain and all its complications.

That shifted my cooking thoughts in a rather abrupt manner: one last fling of winter food before we get to the kind of weather that makes me cringe at the thought of things like beef stew, pot roast, or beef and barley stew just because it hot and humid.

9780393081084Those specific things came to mind because I’ve just been reading  The Food Lab: Better Home Cooking Through Science by J.Kenji Lopez-Alt. Yes, food science with attached recipes (and experiments to demonstrate his points)–a good book to get you started with cooking by understanding the science (without too much science detail to bore you).

Considering that my freezer is already pretty well stocked with pot roast to get me through the damp, drizzly spring weather, I decided that wasn’t my option for my last winter cooking fling.

(So you’re asking why I’m doing one last bit of winter cooking instead of just pulling some pot roast out of the freezer? Well,  for me, part of the satisfaction of winter cooking is all about the the aroma of whatever is cooking in the oven (that’s also helping make the kitchen warm and cozy). It’s not all about putting stuff in the freezer for later although that’s good–it’s about the immediate experience, too. That’s what I mean by “comfort food”!).

Õ¿Õ

I’ve decided that I’ll try the recipe for Beef and Barley Stew. This may be the first time that I’ve ever used a recipe for it but this one looks interesting, and maybe, an improvement on my usual throw-together version. So–from The Food Lab (Kindle location 3875), here’s what I’m going to try (though I’ll adjust the quantities since it’s to serve only me–and the cat). The recipes in this book are very easy to follow–instructions complete, and the science explained before the recipe, thought it’s easy reading and not so tedious as some food science can be. The recipe below is a good example of what’s in this book.

Beef and Barley Stew

from The Food Lab (Kindle location 3875-3896)

Ingredients

  • 2 pounds boneless beef short ribs, cut into 1-inch chunks
  • Kosher salt and freshly ground black pepper
  • 2 tablespoons canola oil
  • 2 medium carrots, peeled, split in half lengthwise and sliced into 1/2-inch pieces (about 1 cup)
  • 2 medium stalks celery, split in half lengthwise, and sliced into 1/2-inch pieces (about 1 cup)
  • 1 large onion, finely diced (about 1-1/2 cups)
  • 1/2 teaspoon Marmite
  • 1 teaspoon soy sauce
  • 2 medium cloves garlic, minced or grated on a Microplane [grater/zester] (about 2 teaspoons)
  • 1 tablespoon tomato paste
  • 4 cups homemade or low-sodium canned chicken stock
  • one 14-1/2 ounce can whole tomatoes, drained and roughly chopped
  • 1 cup pearl barley
  • 2 bay leaves
  • 4 cups loosely packed roughly torn kale leaves

Preparation/assembly

  1. Toss the short ribs in a large bowl with salt and pepper to coat. Heat the oil in a Dutch oven over high heat until smoking. Add the beef and cook without moving it, until well browned on first side, about 5 minutes. Stir and continue cooking, stirring occasionally, until browned all over, about 10 minutes total; reduce heat if necessary to keep from scorching. Return the meat to the bowl and set aside.
  2. Return the pot to medium-high heat. Add carrots, celery, and onion. Cook, stirring frequently, until the vegetables begin to brown, about 4 minutes. Add the Marmite, soy sauce, garlic, and tomato paste and cook, stirring, until fragrant, about 30 seconds.
  3. Add the stock and scrape up the browned bits from the bottom of the pot with a wooden spoon. Add the tomatoes, barley, and bay leaves, then return the beef to the pot, increase the heat to high, and bring to a boil. Reduce to the lowest possible heat and cover the pot, leaving the lid slightly ajar. Cook, stirring occasionally, until the beef is completely tender and the barley is cooked through, about 2 hours.
  4. Stir in the kale and cook, stirring constantly, until wilted, about 2 minutes. Season to taste with salt and pepper. Serve, or, for best flavor, cool and refrigerate in a sealed container for up to 5 days before reheating and serving.

ô¿ô

Why did I decide to try this recipe? Well, in a word, umami. Good food is all about flavor–and I’m investigating an ingredient that I’ve never tried before: Marmite. I’ve read that it’s a love-or-hate thing with Marmite, but it’s supposed to enhance umami. I don’t think I’ll hate it–after all I’m not going to eat it straight, and I do use anchovies and nam pla (fish sauce) so why not try this one?

I’m not dissatisfied with my usual beef and barley stew or soup (which does contain most of the ingredients here except for tomatoes and Marmite), but I’m feeling adventurous–my ever-present curiosity about ingredients that I haven’t tried rears its head.

However, I’m thinking of one modification here–depending on my work schedule for Sunday. If an anticipated manuscript arrives for indexing, ending my hiatus of goofing off and spending quality time with the cat–meaning I’ll actually be working–the 2-hour cooking may take place in a slow (275 ºF) oven–with the lid slightly ajar as suggested in this recipe since it reduces the watching necessary with stove-top cooking; it’s usually my preferred method because it eliminates the possibility that I’ll get involved and not give the pot proper attention; nothing worse that a scorched pot to clean up–not to mention ruining good food!

There’s one other deviation that I’ll use with this recipe–because I’m only cooking for one and bunches of greens tend to be a bit overwhelming (read just too damn much of even a good thing), I’ll be getting my kale out of a freezer package (my usual  Stahlbush Island Farms chopped curly kale) so that I don’t have to deal with the excess. Since I’ve got a few “winter” veggies in the crisper that need to be used I’m planning  different vegetable sides for the week–something with rutabaga, and kohlrabi.

.

Õ¿Õ

..


Prime beef!

I did eat well over the Christmas-New Year holidays. Most of my fancy stuff was sale “finds” (pheasant and duck breasts), but I did have one splurge. The holiday season brings out USDA prime beef (without having to special order it) so I took advantage of that and treated myself to a steak. I guess you could call it a steak, but it was almost a young roast.

I’m enough of a carnivore that I like my meat rare to medium rare, it was cut thick enough that I could get a decent sear on the outside and still be rare inside. I cooked this marvellous hunk of beef in a combination of oven and stove-top as directed by Cook’s Illustrated. My first meal was a steak and potatoes meal (with the leftover cabbage and rutabaga from my Christmas dinner.

Obviously, there were some serious leftovers from a chunk of beef that big. Mostly I just enjoyed the leftover steak by making “roast” beef sandwiches of various sorts. After all, that’s a treat you don’t often get when you’re doing single-serving cooking.

In the process of eating up all that leftover beef I had lots of splendid sandwiches. But I did come up with one spectacular one. I love bleu cheese, and I think it’s excellent with beef. It’s not unusual for me to top a steak with gorgonzola dolce or even just Danish bleu.

Rummaging in the fridge, I realized that there was just enough beef to make one last sandwich–and it was time to use it or lose it. There was also a slice of Boar’s Head MarBleu cheese. MarBleu has (as you might guess) something to do with bleu cheese: it’s Monterey Jack with bleu marbeling. It’s got the bleu cheese tang, but not so strong that it is overwhelming, and it can be sliced (delicious grilled cheese sandwiches, too). A beef and bleu sandwich was just what I needed, but the real pièce de résistance was what I used for a condiment on this sandwich.

In the process of putting the finishing touches on my Christmas Eve and Christmas day dinner, I went to Bull City Olive Oil to get some balsamic vinegars to use with the duck breasts. While trying to decide what to do with leftover duck and pheasant, I made another trip to Bull City Olive Oil looking for inspiration. In a shop that allows tasting, I’m constitutionally unable to NOT taste. One of the oils that I tasted was a chipotle infused oil. That was just the thing to help me get rid of the leftover duck breast (later on that).

That bottle was sitting on the counter while I was making my beef and bleu sandwich. I passed on the mayonnaise, the butter, and the mustard that I had been considering. Instead, I drizzled some of the chipotle oil on my bread, stack on my thinly sliced beef, and the MarBleu cheese. Great combination–just a bit spicy, just a bit smokey. (I had the green stuff on the side as a salad.)

Ò¿Ó

(No pictures of that beautiful steak–they disppeared somewhere betwixt the smart phone and Google photo so all I have are the gustatory and olfactory memories.)


Supper for a chilly evening….

If it were not that my outdoor thermometer is reading 46ºF I’d be calling it a snow day–grey, chilly, misty, damp, dreary. It seems like a day for “oven food”. While the oven is on, the heat won’t be coming on as much. Food and warmth in one.

I’ve hit the time when cleaning out the refrigerator becomes a necessity–not that I had anything about to grow legs and crawl out, just things that should be used, and it’s also time to rotate stuff from the freezer, too. So a browse through the fridge, the freezer and from the counters is making a meal–a one-pot meal. I did have go to the grocery store because this kind of weather calls for potatoes–and I had only a baking potato in the house–and those just don’t do for braises. So, leaving the Romertopf to soak while I   went to do cat care for a friend and got some potatoes and then started to see what would b_shank_crop_20161204_153707
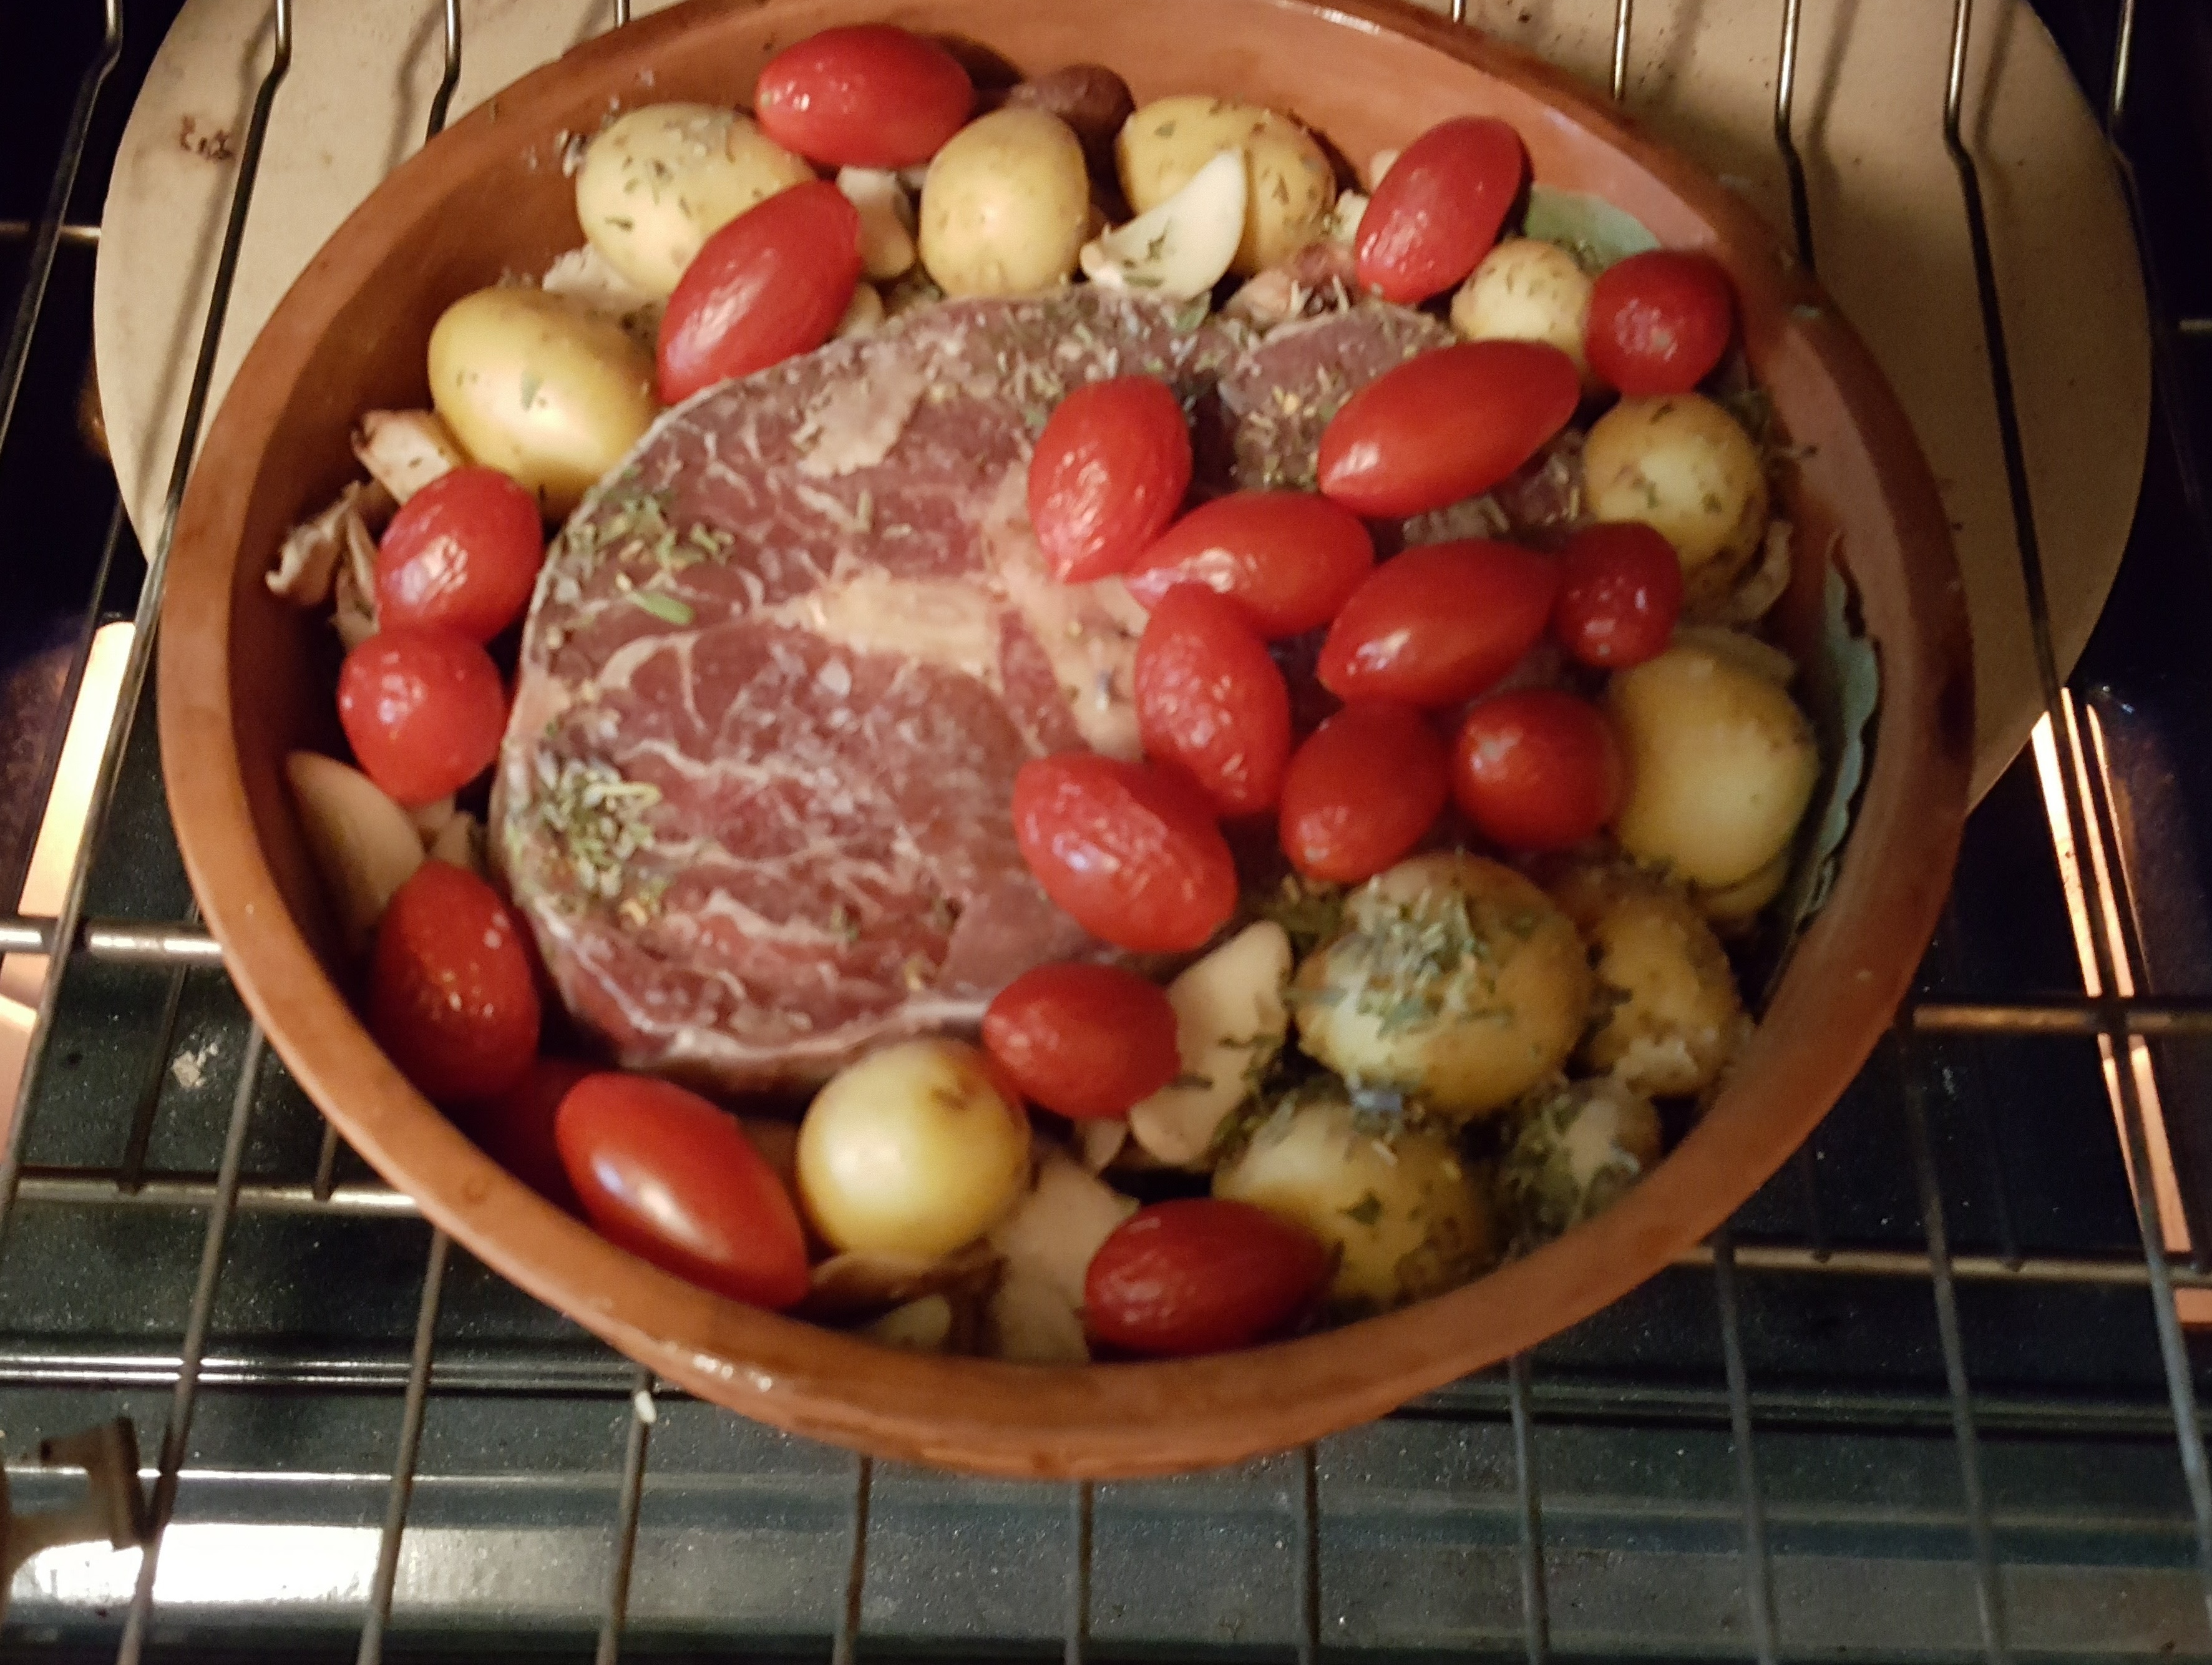
happen for supper–it’s a no-recipe event this evening.

I scrabbled around in the freezer and came up with a very large beef shank (with marrow in the bone), the refrigerator gave up some under-cooked collard greens ( I attempted to cook them in the slow-cooker–not recommended if they are older greens). The counter yielded some cherry tomatoes that were getting wrinkly, and there were some sliced shiitake mushrooms loitering in the fridge.

Even though it’s the weekend, it’s a working day for me so I’m doing lazy cooking. All of b-shank-covered_20161204_153715
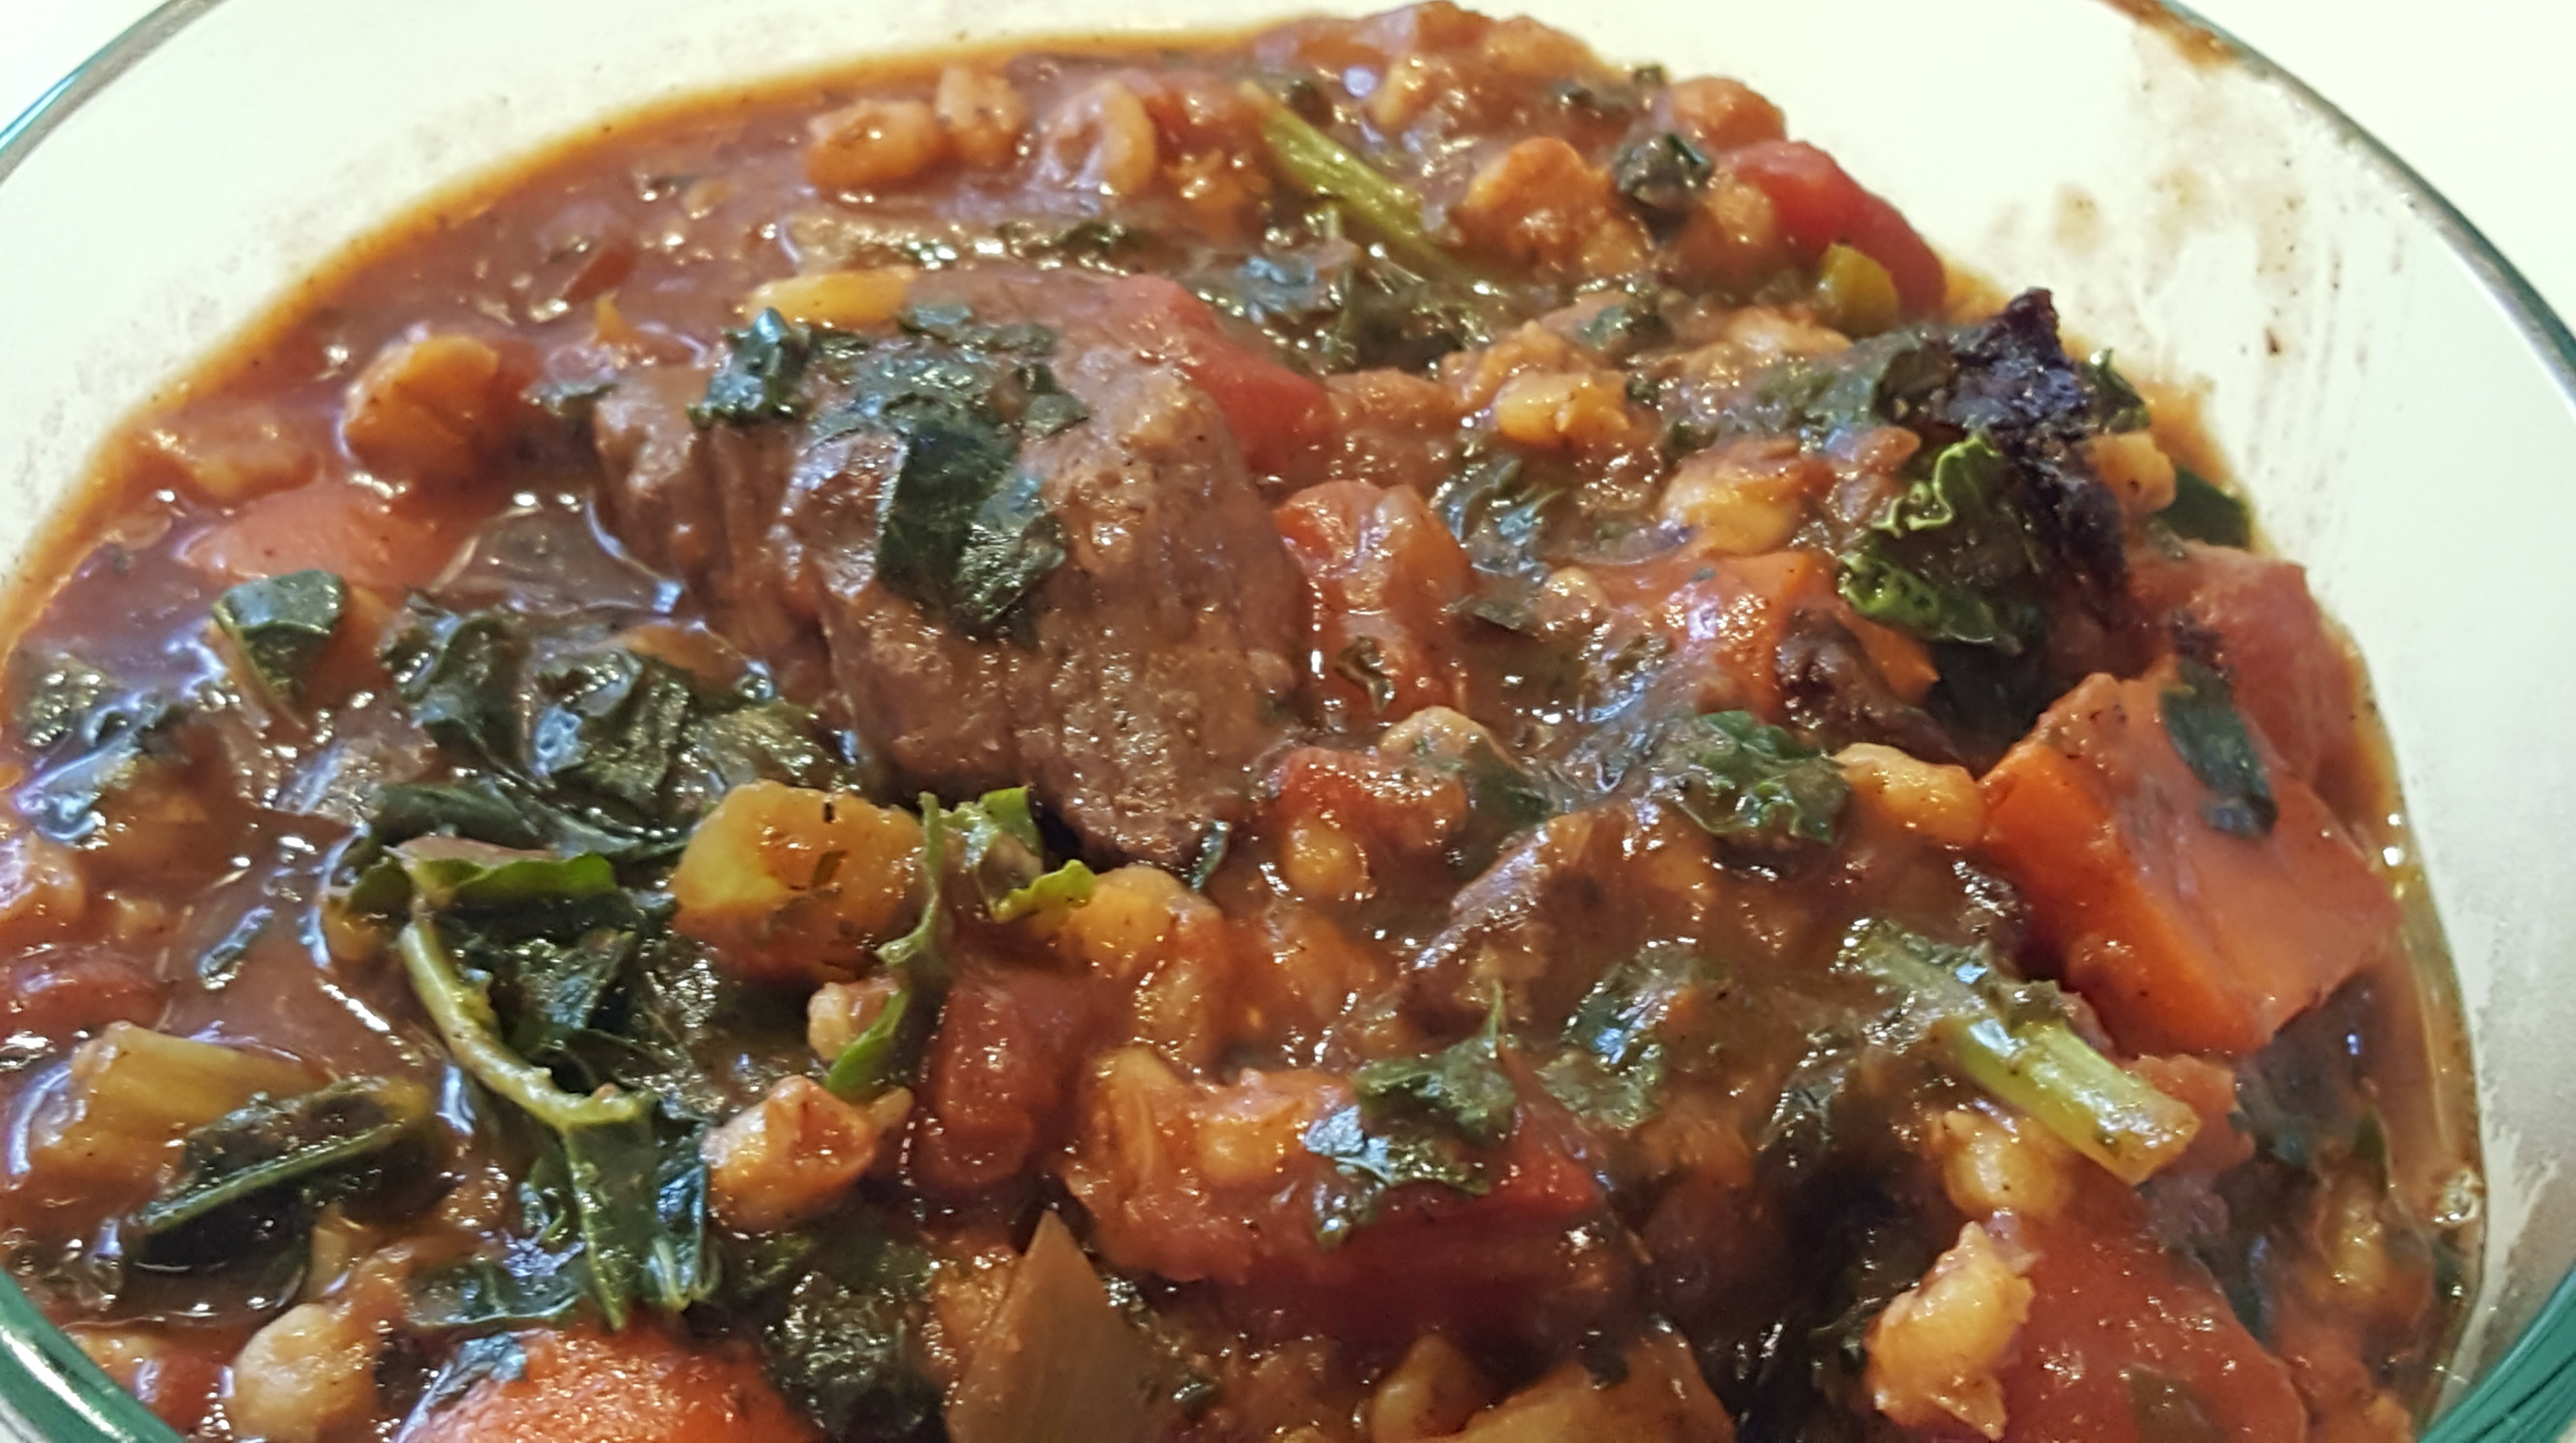
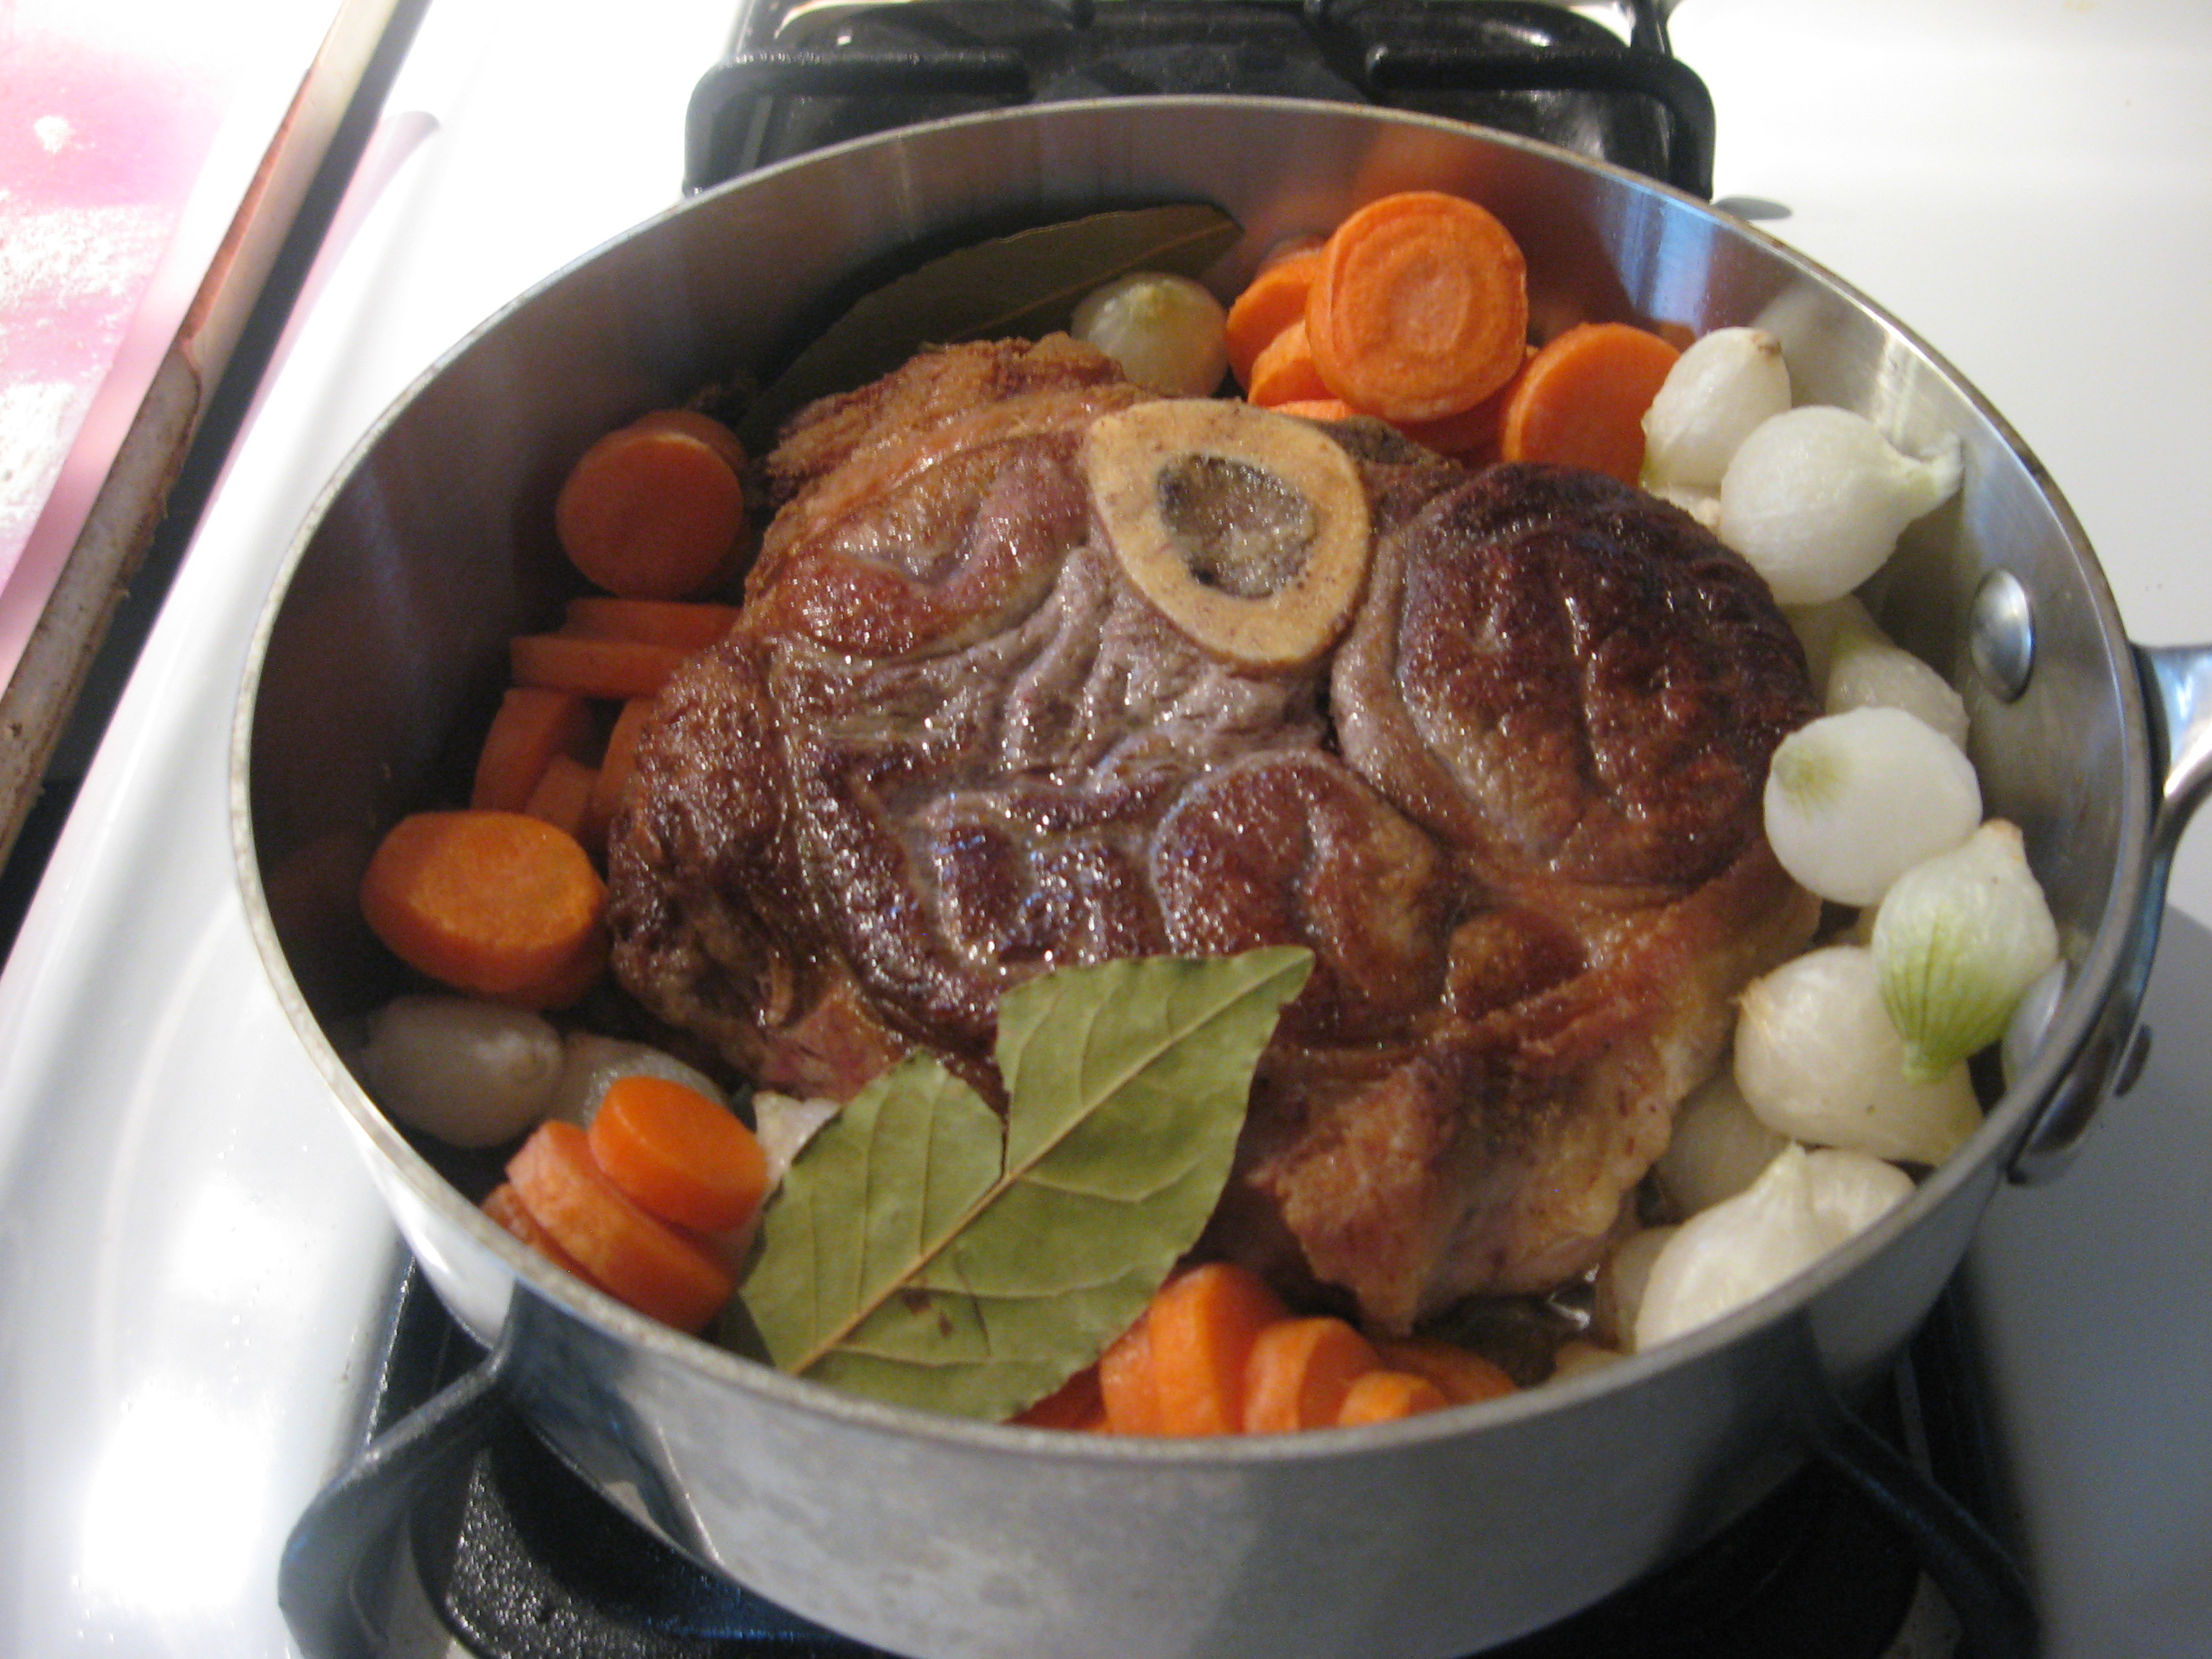
the above-mentioned items went into the soaked Romertopf–with bite-size Yukon gold potatoes added. I did my lazy herb seasoning (herbs de Provence), lots of garlic cloves, and then those cherry tomatoes that had wrinkles. Add a couple bay leaves, salt and water, and put it into a cold oven set for 350ºF–a kitchen happening. Had I soaked the larger Romertopf, I would have added some rutabaga and carrots too–but those looked as if they could linger for just a bit longer in the fridge. Now–to work!

ò¿ó

Today has been one of those frustrating days when I’ve had difficulty really concentrating–even though I didn’t have to attend to cooking supper. For all the true productivity I might as well have been in the kitchen cooking. Even without any attention, about three hours later, I’ve a really tasty meal–quite suitable for the weather tonight.

20161204_200628It may not be styled and truly photogenic, but the beef shank was very tender–but very beefy–it’s one of the things that is great about some of the less popular cuts of the cow.  The smoky, earthiness of the shiitake mushrooms, the mellow flavor of the roasted garlic made a great contrast to the bitterness of the collard greens (these took a lot of cooking to get them really tender). The healthy dose of bay and herbs de Provence really added a lot of flavor. I did finish my plate with a drizzle of herbs de Provence infused olive oil (Bull City Olive Oil). To accompany this casual meal I had a glass of 1999 Domaine Cros Minervois wine. Just the ticket to go with the very “beefy” beef and the collard greens!


A great supper for a rainy, damp, chilly evening. A successful kitchen happening without the vestige of a recipe in sight.

A son gôut!

shank_plate_20161204_200706

Õ¿Õ

.


Pot roast made for one

beef shankEven though we are getting warmer weather now, there are still some grey, chilly (but not really cold) days here–the kind of day where you want to smell fresh-baked bread or something warm and filling cooking in the kitchen. Even though pot roast is something that reheats well, and freezes well when you make it, I don’t always want a huge batch so I was thinking about alternatives to the usual chuck roast.

Today it’s somewhere between ersatz osso buco and pot roast. I love pot roast, but starting with a huge (for single-serving cooking, at least) chuck roast is just a bit much when you don’t want to stock the freezer for future meals.

I decided that a cut of beef shank would make a great alternative to the chuck roast; just have it cut a bit thicker, and the marrow bone is another benefit.  Since I had this cow shank, I obviously thought of osso buco, though it’s true that  real thing is would be made with veal shanks. Veal shanks (and lamb shanks) are actually too pricey for my budget most of the time–I watch closely for managers’ specials in the butcher case.

browned beef shank I treated the beef shank just as I would a big chuck roast–I dredged it in flour and browned it in a mix of butter and olive oil.  (Smells luscious while it’s browning . The flavor and smell of butter–yum.)  While that was in progress, I got my veggies ready (meaning I got frozen carrots and onions out of the freezer),

(Note that this is in a pan of the appropriate size–not too big, not too small. There’s no plastic so this can go into the oven for a nice low and slow cooking, covered with its tight-fitting lid.

Once the shank was nicely browned, there not really much to do except tuck some carrots, onions, and bay leaves around IMG_8056the edges, a pinch of salt,  add some dry white wine, and some beef stock–just poured it in until it was about 1/3 of the way up the side of the meat. That’s the reason it’s important to have an appropriate size pot–too large and you have to add too much liquid.  We’re not wanting to make soup here.

Cover with a tight-fitting lid; use foil if necessary  to make sure of a tight seal.  Cook in  a low to medium oven (275 to 300 °F) for about 2 hours or until the meat pierces easily with a fork, and enjoy–without having  too much left over! (A dollop of gremolata would be good with this.)

Gremolata

A simple, quick way to add some kick and freshness to lots of dishes: gremolata.  It’s an Italian classic served with osso buco, but can be used with almost any grilled, roasted, or even boiled meats, fish, or with vegetables. It’s especially delightful in the winter when food is a bit heavier and lacks that spring and summer freshness. Great taste, and it is so simple and quick.

It’s one of those things you don’t really need a recipe for. It’s just lemon zest, parsley, and garlic. Here is a nice post from The Kitchn that should give you all the information you need to whip up this condiment.

Once you’ve got this basic condiment down, you’ll find lots of uses for it, and here are some variations for different dishes.

So many variations!

A son goût.

Offal–the other tasty bits

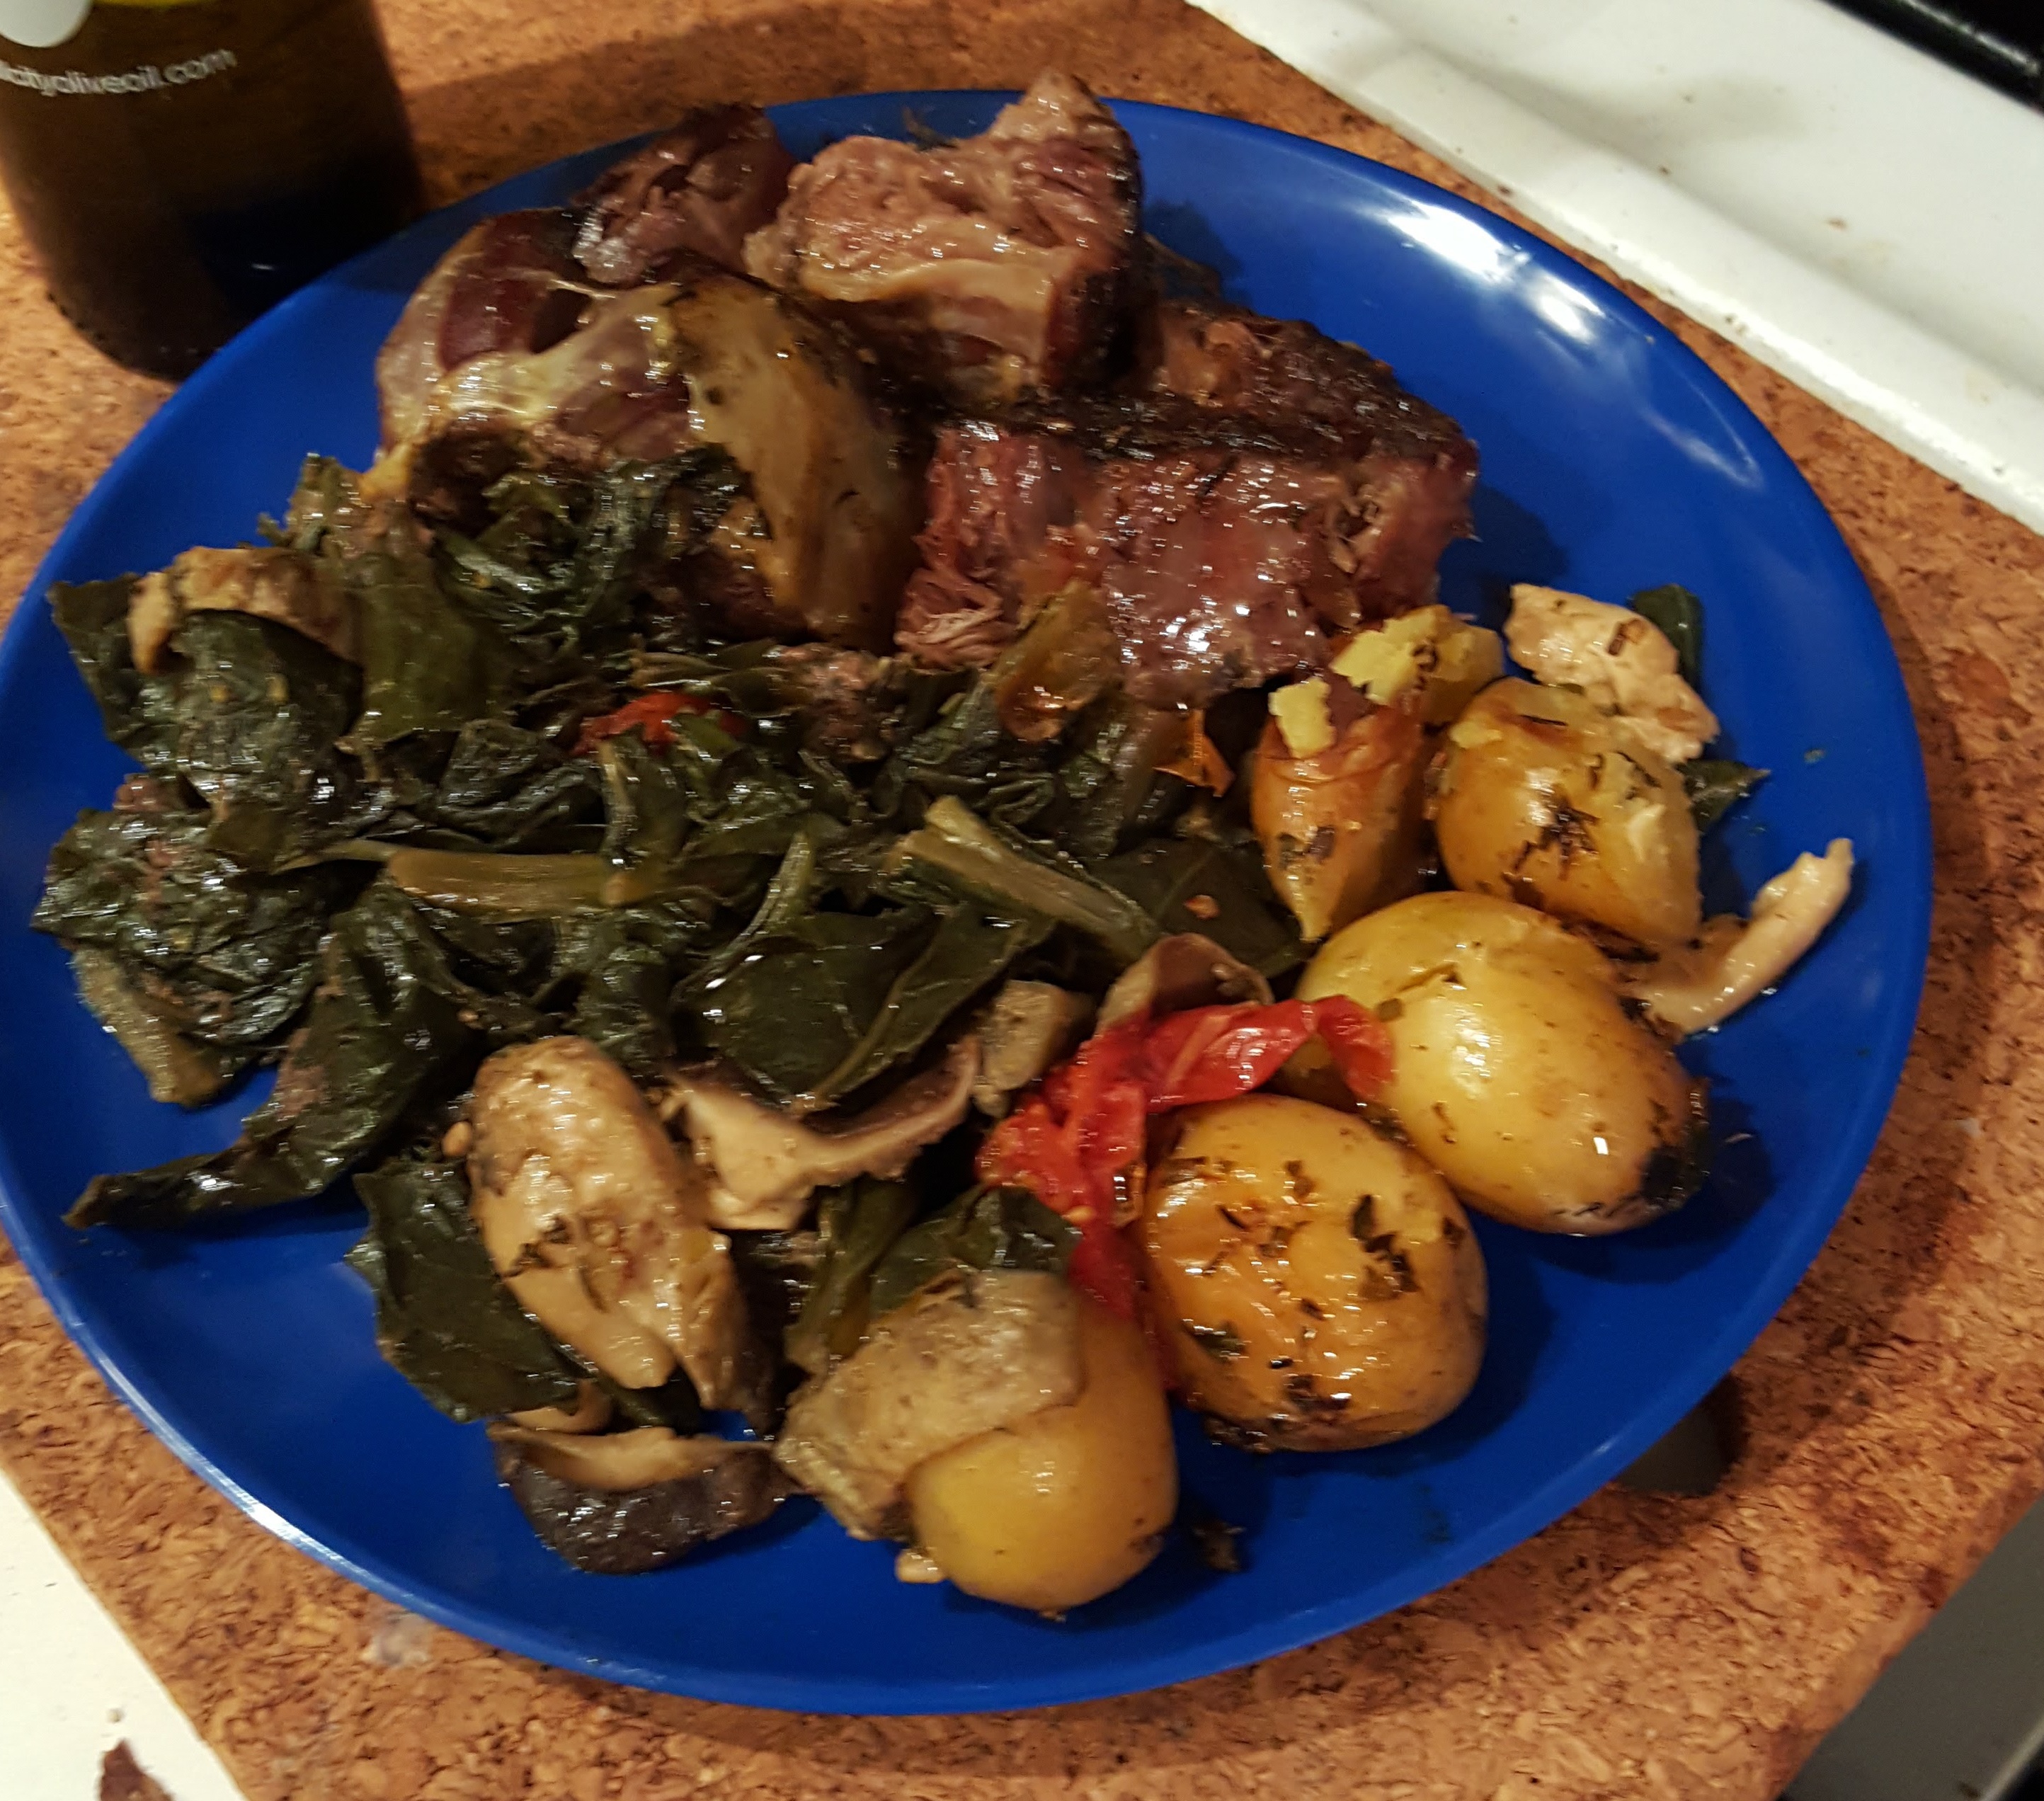
When I look at the meat counter in the supermarket I always wonder why we use so few of the parts of the animals that we raise and slaughter for food.  It seems wasteful and disrespectful of life, and  we’re missing a lot of good eating that way. Obviously, I favor of using all of the beast if you’re going to slaughter it to have a steak or a roast (the skeletal muscle, in other words).

Maybe part of the reluctance to use organ meats is that many cooks don’t know how to prepare these other bits–they can be a bit more complicated to cook than a steak. Certainly many popular cookbooks don’t include recipes for them.  It might also be because we are told that these are not good for us–that they are high in fats, and in cholesterol–which is supposed to be so terribly, horribly unhealthy for us. Maybe it’s also related to controversy about whether or not fat, and animal fat in particular, is actually bad for you–government and medical recommendations on what we should–or should not–eat.

There does seem to be increasing  interest in “variety meats” as something other than pet food. (Yes, I will  share the giblets with the cat when we’re cooking chicken or turkey but I will not give them all away.)  There are some excellent cookbooks available now.  I’ve added some of my favorites to the bibliography. Whatever the reasons, I’m glad to see it (and you can expect more of my opinions on the high-carb, low-fat controversy about how to get rid of the excess weight we tote around with us).

But to get to the thing that got me started on this particular topic. One of my favorite bits of offal is tongue and I found this delightful post on Fae’s Twist & Tango with a recipe for cooking tongue that is a good addition to my collection recipes for that particular bit of the beast.

(It’s really unfortunate that “offal” is pronounced like “awful” so that enunciating that word leaves a lot of people thinking that you’ve said “awful”–which is what many think of organ or “variety” meats. I’m sure there are people who love foie gras and caviar, and maybe even shad roe, who would not consider other organ meat from a cow, or a pig, or a chicken.  But offal is not awful–it’s good stuff.)

Roast NY Strip Loin

This is a great way to do strip. If you’re cooking for one, you can use a strip steak cut about 2-2-1/2-inches thick. It gives some “leftovers” for a roast beef sandwich. It’s one way to cook roast beef for a single-serving meal with not too many leftovers.

The Domestic Man

The NY strip loin, sometimes called loin roast or top loin, is a cut taken from the top of the cow’s short loin. The short loin is located near the spine, past the ribs but before the tenderloin and round. This is a crowded area of the cow in terms of butchery, as the porterhouse and tenderloin also come from this section. In fact, this strip loin is basically an uncut series of NY strip steaks. Confused yet? Don’t worry, you don’t need to know how to break down a cow in order to cook up this delicious specimen.

We’re going to roast this loin in a method similar to my most popular post, this Perfect Eye of Round. We’ll blast the roast at 500F to create a nice crust, then reduce heat to 250F until it’s medium-rare.

Not one to leave a job half done, I also roasted…

View original post 108 more words