
Another informative post on an underutilized and versatile food source. Even if you don’t wish to take the pledge, please read! Look at the nutrition data. If you cook your own, the preparation may take planning and time but it’s not labor intensive. Canned beans are an option to help use this food group.
Tag Archives: beans
Lamb leg steak–continued
 That lamb leg steak that I cooked a couple days ago was a big steak–weighing in just a bit under a pound. That’s a lot of meat–couldn’t possibly eat all that at one time. As vehement as I’ve been about not liking, or dealing well with leftovers, that does not apply here. I don’t really consider the part of this steak that I didn’t eat then as undesirable. I couldn’t have that luscious steak without some left for other uses–not when it needs to be at least an inch thick to cook well. You’re wondering what happens to the rest of this steak?
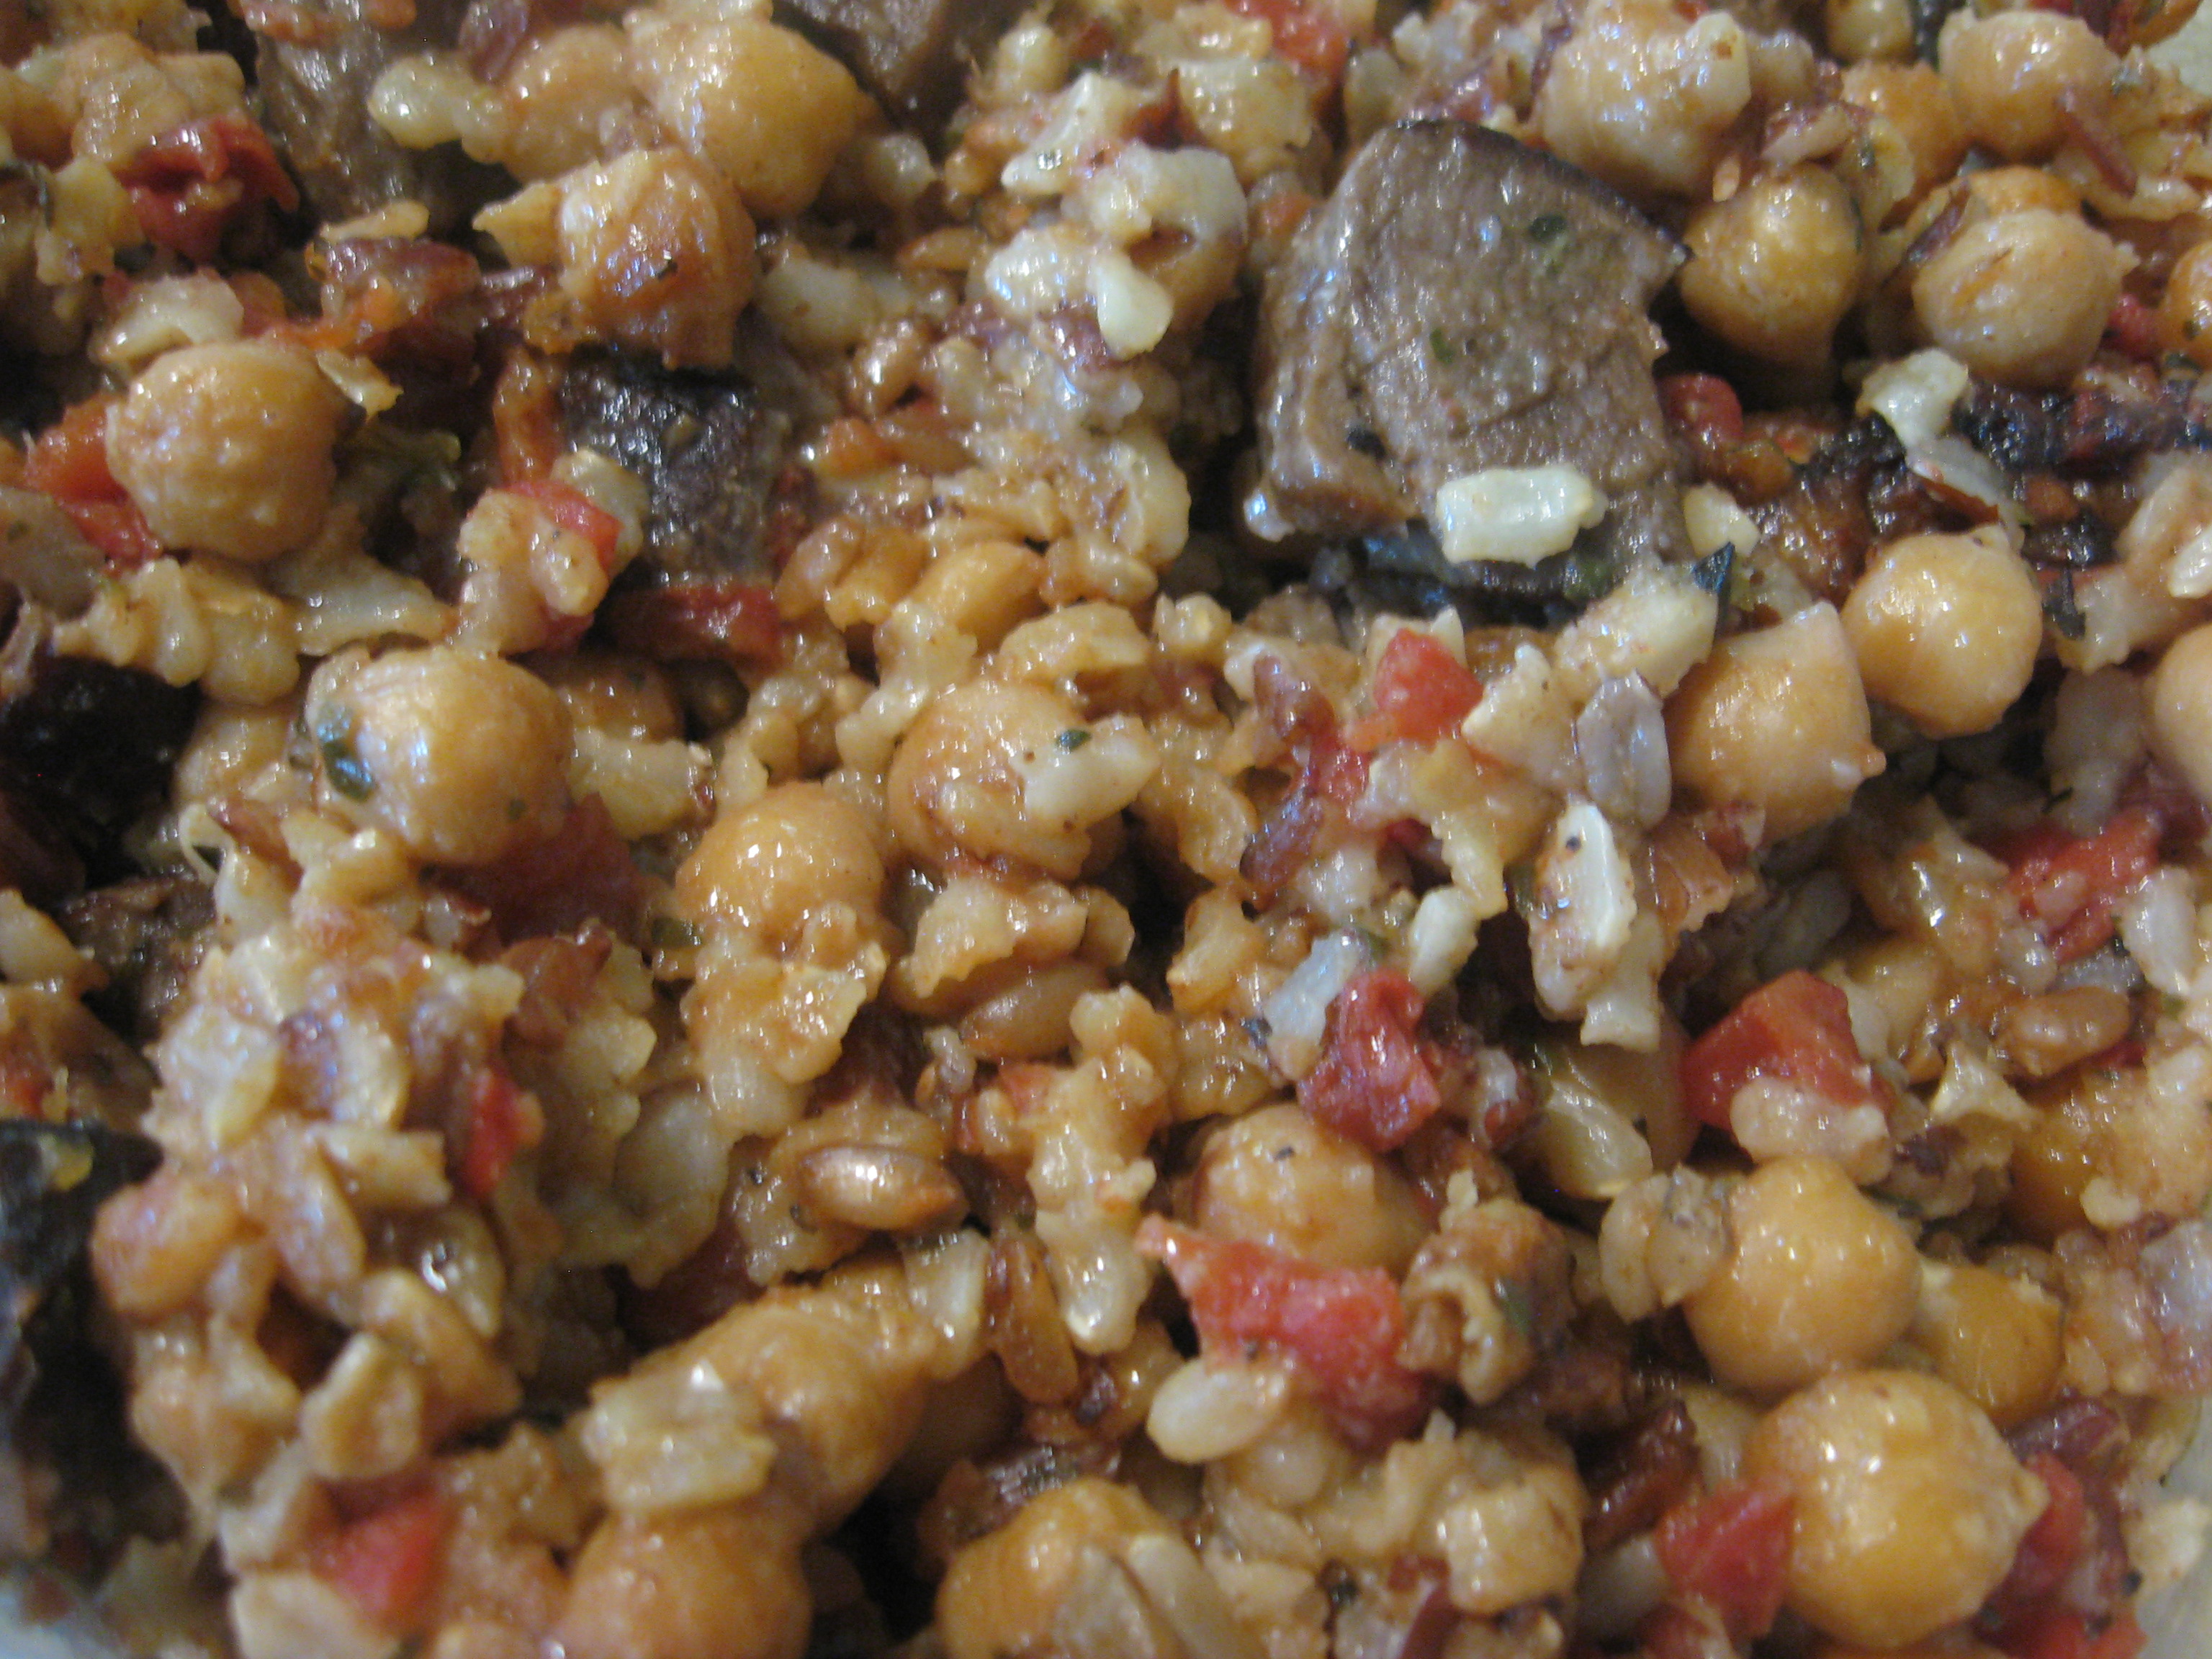
Often the remains of a beef steak or a pork chop goes into a sandwich–since roast beef, lamb, or pork is not on the single-serving menu. Other times it does some metamorphic changes. The remainder of this steak went into the rice cooker with a convenience mix of grains, some garbanzo beans to give me some additional meals that were not meat-centric.
Ingredients
- about 1/2 pound of cooked lamb steak, cut into 1/2-inch pieces
- one 15-ounce can garbanzo beans with liquid
- one 10 ounce can of diced tomatoes with jalapeños with liquid
- 1 cup of brown basmati rice, red rice, barley, and rye berry mixture (uncooked)
- 1 tablespoon olive oil
- 2 bay leaves
- 2 teaspoons dried Turkish oregano
- 1/2 to 1 teaspoon garlic powder
- 1 to 1-1/2 teaspoon onion powder
- 1 cup water (to bring total liquid to amount required for grains)
Preparation
- Add all ingredients to rice/multi-cooker, stir well.
- Set on rice cooking mode.
- When cycle finishes, check grain for doneness. If needed add more water in 1/2 cup increments until grains are done.
Ò¿Ó
Since the lamb steak had been well-browned on the griddle, it provided good rich flavor for the grains and the garbanzo beans. Some of this was an extra meal (with a side of ratatouille), and the rest was packed (with the Handi-Vac®) for the freezer for later (especially cooler weather) meals.
Dandelion greens
I finished my teaching week this afternoon and found myself in need of an attitude adjustment. It’s been a busy, hectic week but I still can’t figure out what I supposedly accomplished in all that business. Still laundry to do and other household chores….

dandelion greens
In prowling through the grocery store (my local Harris Teeter) the other day I found absolutely lovely dandelion greens. I haven’t had dandelion greens very often since I was a kid growing up on the farm. Then they were a springtime treat–the young tender ones in a wilted salad with bacon dressing. I thought that I’d try them in a one-dish meal based on a recipe from Jacques Pepin’s Shortcut Cook–quick, easy, and in the comfort-food category. I decided that a good complement to the bitterness of the dandelion greens would be Siciliansausage which Harris Teeter makes in the meat department. It’s a bit like Italian, but spicier and with much less fennel.

freshly made sausages
Remove sausage from casing, brown; add chopped onion and continue with the browning, then add a couple of garlic cloves, minced. Add the chopped dandelion greens, stems about 10 minutes before the leafier parts (still wet from washing), cover and simmer. Depending on the spiciness of the sausage you might want some red pepper flakes. This particular sausage is strongly enough flavored that I did not add anything else. When the greens are almost cooked, add some cooked pinto beans (in this case I’m resorting to canned ones). For a change from beans, add some diced potatoes to cook with the sausage and the greens.
Finish with a tiny drizzle of good fruity extra-virgin olive oil and it’s good to go, add some of my homemade oat bread, and ripe and fragrant Bartlett pears.
It’s certainly easy, reasonably quick–it takes about 15 to 20 minutes for the greens to cook, but it sure does contribute to attitude adjustment! (Sorry, no pictures–it’s not photogenic.) It’s good for single-serving cooking since I can buy the sausages individually, and if I’m using mustard, kale, I can buy those loose in the amount needed I don’t have leftovers. If there is more than I’m going to use at once, I’ll take out some of the sausage and greens to be used later, perhaps as an omelette filling.
A son goût!
Cooking dried beans
We’re all aware that we should have more whole grains, beans, and legumes in our diet–we’ll talk about grains later, but let’s consider dried beans now. They taste good, are good for you, and economical.
 Beans are a pantry staple for me–both canned and dried. The canned ones are mostly for “emergency” use. It’s very easy to cook your own dried beans–especially if you use a slow cooker or put them in a slow over. Either way, they are on their own without needing attention from you, other than checking them occasionally.
The advantages of cooking your own are multiple: the texture and flavor are likely going to be better than those coming out of a can; you can control seasoning (and the amount of salt), and you have so many more different heirloom beans with different flavors! Yes, different flavors–not all beans taste alike–and even from the supermarket, you have a lot to from which to choose. If you find that you do like beans, then it’s worth a venture into a gourmet store, or online to find some the wonderful heirlooms that are available.
It does need a bit of planning. First, you’ll need to sort them to remove any debris like small stones and broken beans–but that’s easily done if you just put the beans on a plate or a rimmed baking sheet. Since dried beans do need to be rehydrated, it’s best if you soak your beans overnight. The quick-soaking methods are not recommended as they can affect the nutrition and the texture of your cooked beans. (Cook’s Illustrated, “Dried Beans 101). Once cooked you can freeze them so that you have a supply of cooked beans on hand when you need them.
Soaking in tap water can toughen them, depending on the mineral content of your tap water. To avoid this, it’s best to soak them in brine; three (3) tablespoons of salt to each gallon of water will keep the tap water from toughening them, and even displace some of the minerals (calcium and magnesium) that occur naturally in the skins.
You want to cook beans at a gentle simmer so that they don’t break up or split open. That’s easy with a slow cooker, or in the oven at a very low heat; an advantage of either of these methods is that they don’t require your attention–just a periodic check to see if they are done yet. It’s an easy thing to do on the weekend when you want to have a lazy day. In the slow cooker, they can cook while you’re away.
What seasonings you use will depend on what you’re planning to do with these beans. If I’m cooking a large quantity to freeze some for various uses, I will likely keep the seasonings to a minimum–some onion, bay leaves–to have more flexibility in what I do with them later. One caution, though: it seems that most food scientists agree that adding acidic ingredients can keep dried beans from softening during cooking. So you don’t want to add acidic things (like tomatoes) until the beans are tender. If you see older recipes that suggest adding baking soda to the cooking water, I would give that a pass as the alkalinity can affect the nutrition.
Occasionally you’ll get a batch of beans that just don’t soften with cooking–that probably means that they are very old, so buy your dried beans where there is a good turnover and don’t let them linger on your pantry shelf for years–go ahead and cook them and freeze them. I think that you’ll find that if you have them readily available you will use them.
Once you “get into” beans, you’ll find that there are so many wonderful varieties. For an introduction to some of them, take a look at The Cook’s Thesaurus. Keep in mind that lentils and some “peas” don’t need soaking so may be substituted if you’ve not planned ahead. Additional nutritional information and survey of some varieties of dried beans can be found at Fruit & Vegetable of the Month (CDC).
My pantry is almost never without canned beans either: black beans, navy beans, cannellini beans, pinto beans, and garbanzo as the basics, but those are more for when I’ve not planned ahead or for emergency use. There are huge differences in the taste and, particularly, the texture of canned beans, so you’ll want to explore using different brands for the “emergency” pantry stash. Some store brands (Harris Teeter) are fine for basic uses, but as the texture can vary, you need to buy according to the used–if I’m making a cold bean salad in the summer, I might want Goya, or Progresso instead.
Tuna salad
Not that there’s anything wrong with traditional American tuna salad, but there are lots of other things to do with tuna. I like tuna, but I don’t want “tuna salad” in the traditional sense every time, so I’ve come up with lots of variations. Some of the best are made with the “leftovers” from grilling a lovely big tuna steak or with my homemade tuna confit.
My “salad” might have onion and celery (if present in the refrigerator) but it’s certainly not a requirement; no mayonnaise either (though I do like the stuff). Home from work, not going back out to the grocery store; it’s warm enough that I don’t want anything hot for lunch. What have I got to work with from the pantry and the refrigerator?
If you think about the basic American tuna salad, it has very few ingredients: usually mayonnaise, celery, onions, and maybe hard-boiled egg, or sometimes pickle relish.
Personally I find the usual supermarket canned tuna to be unappetizing–dry and crumbly if it’s water-packed white albacore, sometimes mushy and fishy lacking in any real texture, so I understand why it’s often hidden in the mayonnaise, but there are now reasonably priced alternatives available. If I don’t have homemade confit, I’ll be using a single-cooked canned tuna that more nearly approximates the quality of European canned tuna.
Starting with good quality tuna, unless you want to go all the way and make salad à la niçoise you really don’t need many ingredients. You don’t really want to overwhelm the tuna (since we are using good tuna here) so the components you need are:
- some contrasting texture and flavor ingredients
- just a bit of oil
- a little acid to brighten it up.
- fresh-ground black pepper
- some fresh herbs for extra flavor
Starting with a six-ounce can of tuna, here are some possible things to do:
- For something light, refreshing and crunchy for a sweltering day, I like to use diced cucumber, scallions, red onion or sweet onion like Vidalia (depending on what’s in the fridge), fresh-ground black pepper, salt (if the tuna has no added salt), about a teaspoon of very fruity extra-virgin olive oil, a squeeze of lemon juice, and some finely chopped spearmint.
- For something really quick, I’ve added some fresh onion, sweet bell pepper, diced chile peppers for texture and some salsa from a jar. Chipotle salsa can give you a warmer, smoky taste.
- If you want a heartier salad, add to your tuna some drained, rinsed white beans (great northern or cannellini are my favorites), tomatoes, chopped onion, green or black olives, some extra-virgin olive oil or aïoli (easy to make a quick version if you have decent mayonnaise in the fridge) and some fresh oregano.
- If you have some pesto in the fridge, try chopped onion (almost always use this), diced tomato, capers, or olives. If there’s pasta around, that can be added too.
- I usually have a jar of a fruit salsa in the fridge as well and that makes a good start. Add sweet onion like Vidalia or Walla Walla, more fruit such as peaches or mango, some ripe bell peppers.
- Black beans, diced tomatoes, onions, chile pepper, ripe bell pepper (I’m just not fond of green bell peppers so I don’t use them), celery, and even some corn and a vinaigrette with a light touch of chilli powder added.
- For an oriental take on the tuna salad, a bit of sesame oil (the kind from roasted sesame seeds) with some ginger, green onions, a little garlic if you like, with cucumbers, celery.
- That extra serving of roasted vegetables–even potatoes–with cherry tomatoes, and a splash of vinaigrette, maybe some fresh thyme.
Obviously, a many of these suggestions would work equally well with chicken if you have that instead, or don’t like tuna. It’s easy to improvise a quick salad if you start with a serving of meat. The possibilities are really almost endless–just follow your own taste.
A son goût!
Mind your peas and beans….
Main Entry: leg·ume Pronunciation Guide
Function: noun
Inflected Form(s): plural legumes \-ümz, -m\
Etymology: French légume, from Middle French, from Latin legumen, from legere to gather — more at LEGEND
1 a : the fruit or seed of a leguminous plant (as peas or beans) used for food b : a vegetable used for food — used chiefly in menus
2 : a leguminous plant; especially : one grown as a forage or green-manure crop (as clover, alfalfa)
3 : a dry dehiscent one-celled fruit developed from a simple superior ovary and usually dehiscing into two valves with the seeds attached to the ventral suture : POD — compare FRUIT 1d, LOMENT; see FRUIT illustration
“legume.” Webster’s Third New International Dictionary, Unabridged. Merriam-Webster, 2002. http://unabridged.merriam-webster.com (17 Jul. 2011).
-♦♦♦-
 I brought up the subject of purple-hulled peas since they are seasonal. Unless you are a native Southerner you likely don’t know about this vegetable. I’m not–and it took me a lot of research to find out what I wanted to know about peas and beans, which is which, and what is what.
At the risk of being a bit didactic, let’s start with legumes, which are ancient foods–good sources of protein, carbohydrates and fiber. We should all eat more of them! A list of legumes would include beans, peas, soybeans, peanuts and lentils.
For now, lets just talk about peas (Pisum sativum). When I say peas, you probably think of “garden” peas–those lovely bright green vegetables that are harbingers of spring. There are English peas (shelled as the pod is inedible) and the edible-pod peas (snow peas, sugar snap peas or mange-tout). There are also “field peas”–which are really the form of pea that is grown to be dried (on the vine) and would include yellow and green split peas.
Beans include broad beans (Vicia faba) and the common or horticultural bean (Phaseolus vulgaris)–also in pods–again legumes. When I say “bean”, you likely think of those green things meant when we say “green beans”, “snap beans” or “string” beans. Then you might think of dried beans. But did you think of “shell” beans? Bet you didn’t–unless you’re a Southerner or unless you grew up on a farm where you grew your own food.
Those are all life stages of beans–first comes the pod which we eat as the “green bean”, This is an immature form–picked very young these can be haricots verts; a bit more mature and they are string or snap beans. The shell bean is the mature, but not dried, bean. If you leave the pod on the plant to dry in the field, then you have dried beans–black beans, navy beans, pinto beans, et cetera. For more detailed information on many varieties of Phaseolus vulgaris see The Versatile Grain and the Elegant Bean (bibliography).
Then there are lima beans: Phaseolus limensis (large lima beans frequently Fordhook, Phaseolus lunatus which are small lima beans (also called sieva beans, baby lima beans among other names) which are believed to have first been domesticated in the new world.
So, what are crowder peas, purple-hull peas, black-eyed peas, pigeon peas? Those are subspecies of cowpeas (Vigna unguiculata) sometimes called cowpea beans. They do look more like beans than like peas, but pods are not edible as are the common (or horticultural) beans. So these are really neither the common bean nor the peas we know as garden peas. They are their “own thing”.
So who cares? I just wanted to know–think of how you can make conversation at the next cocktail party! The really important thing is that the legumes (lentils will come later) are an important source of protein, carbohydrates, and fiber for animals and we should use more of the as people food.
So, back to the questions that really started this: how do you cook purple-hull peas? You’re not going to find out by looking up purple-hull peas in the index of a cookbook. Look for recipes for black-eyed peas or for fresh shell/shelled beans and you should be able to substitute you shelled purple-hull or black-eyed peas in those recipes. I’d strongly recommend looking at a vegetable cookbook like The Victory Garden Cookbook. (The information here has been gleaned from multiple sources, but is mainly from this cookbook).
Some guidelines for buying: you can likely expect about 50% loss when you shell them–so if you have bought a pound of these in the shell, you will end up with about 1/2 pound shelled.
If you’re not going to cook them immediately after shelling, refrigerate in a zipper-lock bag with a very slightly damp paper towel to keep moisture even–it will soak up condensation or add a bit of moisture if needed. I wouldn’t keep more than a week…the sooner you cook any vegetable after harvest the better.
- You can blanch/boil/braisethem: cover with water, add seaonings if desired, and simmer until tender or partially cook with minimal seasonings andthen finish with additional seasonings or ingredients with another cooking method. For small beans/peas like these it may take no longer than 5 to 10 minutes to be tender, but they do keep their shape well even with longer cooking times. The braising is really just cooking in water at a gentle simmer, using a minimal amount of water so you’ll need to keep an eye on them to see that they don’t dry out/burn/scorch.
- you can steam them: cooking time will be about the same as for blanching–about 5-10 minutes. (Theoretically, you can cook them in the microwave, but I’ve not ever been satisfied with how they turn out if cooked in the microwave, so I’m leaving that out.)

purple-hull peas in steamer
Once they are cooked, you can add some “finishing touches”. If you cook them without much seasoning, you may be able to use them in a number of different ways.
- after boiling or blanching, add some butter, salt and pepper to taste, and maybe a squeeze of lemon juice.
- you can add cream and reduce it to a thicker sauce.
- bake with a Béchamel/velouté sauce, topped with cheese, until bubbly.
- add olive oil and herbs…e.g. savory which is sometimes known as the “bean” herb, dill, or sage, or other favorite. Let stand for a bit to allow herbs and oil to meld with the beans.
- you can add them to cooked snap/string/green beans, or other green veggies.
- use cold or at room temperature with tomatoes to make a “bean salad”….
- you can add them to rice. Remember that the combination of legumes and grains does provide good quality, complete proteins.
- then there’s “hoppin’ john”–Here’s a link to Emeril Legasse’s recipe. If you’re a Southerner, you probably have a variation of this. I’m not–but this one looks pretty good to me.
They are versatile–and underappreciated veggies. My personal favorite for hot summer weather is to use them at room temperature for a “salad”. Here’s a rough guide to making this dish.
- steam beans/peas until tender–about 5-15 minutes.
- While the beans/peas are steaming, dice some sweet onion, halve or quarter

- some cherry tomatoes, or dice large tomatoes, and place in a bowl.
- take enough extra-virgin olive oil to lightly coat the veggies and the beans (about 1 tablespoon per pound of beans) to a small skillet over very low heat and add crushed or very finely minced garlic and herbs of choice (savory, oregano, mint, ….) and allow to infuse for about 10 to 15 minutes; you don’t want the garlic to brown–so keep the heat very low–you just want the oil infused well with the flavors of the seasoning. Or heat the
 oil with the herbs and crushed garlic in a microwave safe container on low for about 4 to 5 minutes and let stand until cooled to infuse.
 - combine ingredients and add salt and fresh-ground black pepper to taste.
- add a squeeze of lemon or a dash of vinegar (rice wine or sherry) to brighten it up and contrast with the earthiness of the beans/peas.
- toss with the extra-virgin olive oil, herbs and garlic. (I’ve used about 1 to 1-1/2
- tablespoon of very finely minced winter savory here.)


Some other additions or variations that are possible would include:
- if you have “leftover” rice in the fridge or freezer, you could add that to the mix to make this a light meal that has complete proteins.
- sprinkle with crumbled feta cheese; be careful how much salt you add if you’re going to use feta cheese with this.
- add chunks of good quality tuna (canned) or from “leftover” tuna steak (this would be worth planning to have some extra grilled tuna steak around).
Now you say you have some lingering in the fridge and you’re tired of eating it? Well, try putting it into some rice as you’re cooking it–the purple-hulled peas usually hold shape well, and the tomatoes and onions will cook with the rice. Now use it as a side dish with grilled/griddled meat; you might want to add additional herbs to this.
Epazote & Mexican Mint Marigold

Epazote (Chenopodium ambrosiodes)
Epazote (Chenopodium ambrosides) is an herb that is used in Mexican cooking (sometimes even referred to as “Mexican herb”). It’s difficult to describe the flavor. I’ve asked a number of customers at the farmers’ market who have used it and we agree that flavor is a bit like cilantro (or culantro) with a bit of citrus thrown in for good measure, with perhaps a bit of bitterness. It is one that has become a part of my kitchen garden each year now. It’s not really a pretty herb, but it is tasty. (Image from Mountain Valley Growers).
It is a tender perennial (dies back to the ground at frost but emerges again in the spring) hardy to USDA zone 8. It is an heat-loving herb that will develop best flavor in full sun. It is tolerant of some, but not complete, drying out. In colder regions it may be over-wintered indoors.
Young leaves can be treated like sorrel–added to other greens, wilted and added to soups, but use sparingly until you’re acquainted with the taste as it can be potent. It is said to reduce the flatulence that can occur after eating beans, and had other medicinal uses by Aztecs.
As with most herbs, I think it is best used fresh, although it can be dried, and is available from Penzeys Spices. That is how I first used it, but extrapolating from that use, I decided that I wanted to try the fresh herb–and it’s become permanent part of my herb garden.
Mexican mint marigold/Spanish tarragon (Tagetes lucida)

Spanish/Mexican tarragon (Tagetes lucida)
If you find it impossible to get French tarragon (Artemisia dracunculus sativa) to thrive, but would like a reasonable tarragon flavor, the you might want to investigate Spanish tarragon (Tagetes lucida) or Mexican mint marigold. This plant does better in hot, humid weather than French tarragon. It is an annual/tender perennial that likes sun, even moisture (but not wet feet) and average soil. It can be up to 3 feet in height.
The flavor is anise/licorice rather than what you expect of other “marigolds”. It is a better substitute for French tarragon than is Russian tarragon. In recipes calling for French tarragon, you can substitute this herb is the same quantity. It does break down more quickly than French tarragon with cooking so might need to be added later, or additional added at the end of cooking if the flavor has weakened with heat. In vinaigrettes, flavored vinegar and sauces it can be used as French tarragon. Good with eggs, chicken, mild seafood and tomatoes as is French tarragon.
