Popcorn!

I am a big fan of popcorn. I’ll take that over potato chips, or any other variety of chips almost any time. It’s just the thing to go with a good book while you’re having a duvet day.

PopCorn MakerYou can probably even make a case that it is at least “healthy-ish”–compared to most other snacks that come in bags from the grocery store–and it’s more fun. You can custom tailor the seasoning to fit your mood. At least I know what’s in it if I’ve popped and seasoned it myself.

I’ve gotten very fond of my Lékué PopCorn Maker for making popcorn in the microwave (and that’s about the only thing I do in the microwave).  I will admit to using oil (usually about 1-1/2  tablespoons of olive oil for about 1/3 cup popcorn) when popping popcorn. For some awesome popcorn, use just a little Baklouti chili pepper (fused) olive oil (about 1 teaspoon) with the regular olive oil. Wow!

Other favorite infused oils (all from Bull City Olive Oil) to touch up my popcorn with are harissa, chipotle, or garlic.

While I don’t often do stove-top popcorn, I did find some interesting suggestions for other flavorings to try from Taste in “Really Good Popcorn“: brewer’s yeast, dulse flakes (I know I like other seaweed seasonings), and Urfa biber (described as in that article as “a dried Turkish chile pepper with a raisin-like sweetness, a subtle spice, and the gentle acidity of a lightly roasted Ethiopian coffee”–that sounds totally great.  Since I’ve used Aleppo pepper on popcorn and that makes this sound very interesting to me.

A son gôut!

—Ô¿Ô—

Tuna, lovely tuna!


Tuna_20170709_140604

those lovely tuna medallions

Wow! While skulking through Harris Teeter supermarket I noticed that they had beautiful tuna “medallions” for only $6.99 per pound.  The chunks are not a problem for me since if it were steaks I’d need to cut them up anyway. The main thing is the quality and the price. It’s time replenish my supply of tuna confit.

Since my last post on tuna confit, the recipe from that post, which was from Fine Cooking, I’ve been perusing sous vide recipes and have come up with some modifications for the seasonings, and the method. I’m using the method from ChefSteps this time around (with a little modification of seasoning and cooking time and temperature). One modification was to infuse the oil with some additional herbs suggested in other recipes, and then straining/filtering the oil before packing the confit (in Mason jars).

Tuna Confit (2017)

Ingredients

  • tuna (about 2 pounds)
  • salt and sugar (4:1 ratio) for the dry cure/dry brine
  • extra virgin olive oil, about 4 cups (enough to cover) the tuna

Infused oil ingredients

  • extra virgin olive oil (about 4 cups)
  • Turkish bay leaves (2 or 3 depending on size)
  • sprig of thyme
  • sprig of rosemary
  • smashed garlic cloves (about 3)
  • black peppercorns (about 2 teaspoons)
  • red pepper flakes (just a dash)
  • zest of one lemon (removed with a vegetable peeler)

Preparation

  • Infused oil:
    • Place the oil in a slow cooker or multifunction pot on the warm setting and add all seasonings.
    • Allow oil to infuse for several hours (a temperature of about 150°F) then cool the oil to room temperature.
  • Tuna:
    • dry cure/dry brine the tuna for about 30 minutes then rinse, transfer to plate and let it dry.
    • put the tuna into 500  mL jars, pouring oil around each piece, adding enough to cover the tuna in the jar
    • cook in a multifunction pot on the warm setting for two hours
    • cool tuna and refrigerate

__Ò¿Ó__

When I tasted the oil, the flavors were a bit strong so I diluted it with an additional cup of extra virgin olive oil before using it to pack the tuna. Since the oil had lemon zest added during the infusion–I didn’t add lemon zest to the cans as the ChefSteps recipe had suggested. I think that would have been just too much lemon for even me–and I do like lemon!

My “medallions” were a just little thicker than the usual tuna steak so I allowed them just a bit of extra time with the dry cure (about 45 minutes) before rinsing and allowing them to air dry. There was a big difference in the firmness after that short period of dry cure.

After rinsing and patting dry with paper towels, I left them sitting on parchment paper for about 30 minutes to air dry, turning them over just once, then packing them in 500 mL Ball/Mason jars, adding oil to the bottom of the jar, and then after each piece of tuna

__Ô¿Ô__

The ChefSteps recipe suggested cooking the tuna at 113°F  for 1 hour and 30 minutes. My experience has been that, even though I love sashimi, I like my cooked fish cooked just a bit more. Part of the reason for making confit is not to eat it immediately but to be able to keep it longer as my replacement for “canned tuna”–so I’ve opted for a higher temperature–actually a lot higher temperature–more in keeping with the original recipe.

The jars of tuna in olive oil were put into the slow cooker on the warm setting which should give me about 160°F. I know that’s not going to be as lush and velvety as if it were cooked at a lower temperature. But preservation is part of the objective here (I mean, that was certainly the original goal of confit). I want this to last (in the fridge) for a bit.

Jar size was a bit of a problem–three of the medallions were simply too large to be sure that they would remain submerged under the oil, even allowing for shrinkage with cooking. Since the jars were going to be sealed, I didn’t want to take the chance of having to open them to add more oil. So–extra room in the jar with only two medallions in each.

No matter how this turns out it will be hands down better than most canned tuna (unless you spring for the really expensive stuff) and a lot easier than doing it on the stovetop or even in the oven.


Dry_cure_20170709_141321

dry curing

post_dry _cure_20170709_145716

air drying after curing

Packing_20170709_153235

starting with oil in the jar

Packing_2_20170709_153301

add tuna

Packing_3_20170709_153704

leaving some headroom in the jars

cooked_20170709_183505

it’s tuna confit!


__Ò¿Ó__

Eggs, egg salad, etc

It’s amazing what you find whilst skulking about on the internet. The latest “odd” thing was a novel method of making lots of hard-cooked eggs at one time: in the oven.  It sounds simple–I may have to try it just to see if the texture is as good as reported.

But one thing leads to another–I guess that’s why it’s called browsing. On a chilly, rainy day with a big mug of not cocoa in hand, it’s not possible to simply check one link, so this one relating to cooking eggs lead me to a link on pickled eggs and other eggy links, including “All About Eggs” which covers eggs other than chicken, as well as information about color and size, and printed stuff on the carton, just in case you want to know about cage free or natural.


6-Pack-Chicken-EggsEggs (and milk) seem to be among the necessities in my kitchen. Whether working–or have a lazy hiatus between jobs–eggs get used in so many ways. Some of the less frequent uses include deviled eggs and pickled eggs. If I’m in a mad rush to meet a deadline an egg (or two) are easy to turn into a quick meal in so many ways. Omelettes, scrambled, poached, egg salad, or just added to soup or as a “dressing” for veggies.


Although I don’t make deviled eggs often, I do collect recipes for those occasions that call for them. Mostly deviled eggs call for mayonnaise. I’ve got no problem using mayo in them but I like some options for flavoring.  Following the Food52 link lead me to a recipe calling for yoghurt which sounds kind of interesting (though it does include some mayo).

I almost always have mayonnaise in the fridge–but a recent reluctance to venture out in the rain to go to the grocery store left me without mayo and a need for some quick egg salad, which like deviled eggs seems to almost always call for mayo.  I had the onion and celery, and capers so I decided to “wing” it: chopped up my eggs, and carefully, bit by bit while tasting added Arbequina extra-virgin olive oil (again from Bull City Olive Oil–love that place) that is a medium intensity but still rather delicate, and then just (again by taste) a bit of apple cider vinegar, and finished with salt and freshly ground black pepper.  Definitely not southern-style egg salad, but very good. It’s likely that I’ll do it again even if there is mayo in the fridge. (I did eventually find an egg salad recipe using olive oil.)

That little experiment got me looking for other recipes for egg salad made without mayonnaise–some recipes that I found just use mustard (I do sometimes put some mustard in egg salad), others used Greek yoghurt (though I don’t “do” non-fat–and I use Skyr as starter for my homemade). Another recipe that I found interesting was one using avocado for the “fat” part of the egg salad–so intriguing that I may have to try that when next I have a ripe avocado on hand. And then, the delightful post from Food52 on “How to Make Egg Salad Without a Recipe” which I think will elicit a smile (at least) if you’re an egg salad fan. If you want to really take your egg salad to another level, take a look at “Mediterranean Egg Salad” or “Egg Salad: The True Breakfast of Champions“.

Why my foray into egg salads? Well, hot weather is approaching, and I know I’ll be looking for more meals involving minimal heat–and I really like eggs, but always looking for new ways to use them–maybe even graved eggs!

Wondering about other things to do with eggs? Try here.  A son gôut!

from wikipedia

 …..Ò¿Ó…..

..


Steamed eggs?

Browsing through my email cooking subscriptions, I found an article that made me think of my egg cooker–one of my favorite small kitchen appliances is my egg cooker–yes, it’s a single-use appliance, but it’s worth the bit of space it takes up because it gets used often–to hard cook eggs that I want to have around for snacks and salads, to soft cook in the shell for breakfast, or to poach. It is so much easier than “boiling” in a pot of water; it eliminates cracked eggs, with funny alien looking growths. I can’t screw up the timing. Even in my minimally functional morning state, I can do the simple task of measuring some water in a Maveriick egg cooker IMG_3799specially marked cup to cook my egg. The buzz (truly obnoxious) when the eggs are done takes care of overcooking issues.

This is an inexpensive (under $20 even today and as you can see, well-used, Maverick) egg cooker–no fuzzy logic, nothing complicated. It’s just physics in operation. The eggs are cooked by steaming. There is an on-off switch, but otherwise, absolutely no controls to fuss with–except the cup to measure the water. (The cup also has a piercing gadget built right into the bottom of the cup so you don’t have to look for a thumb tack or push pin. So, you’re wondering why steam cooking eggs is better? A more tender egg white and a smoother yolk that is much appreciated by egg aficionados.

If you don’t have an egg cooker but would like to try steaming your eggs here is a link to an article from Bon Appetite on steaming eggs. You do have to watch the time with this method, but it would let you see the difference with steaming (which may lead to the purchase of an egg cooker); however, I not about to give up some other cooking methods like carefully scrambling in butter, poached in olive oil (video), or in Spanish potato omelette.

(Cook’s note: It would seem that the Maverick egg cooker has gotten more expensive, and a fancy version comes looking like a white hen; perusing Amazon.com for egg cookers, I see that there are still some basic cookers still available in that price range; given how happy with my Dash yoghurt maker, were I looking for a basic, inexpensive egg cooker I’d likely try theirs or the Better Chef.)


Homemade skyr

41ktixxzjwl-_sx425_I finally got a yogurt maker. I didn’t go for the Cuisinart with all the bells and whistles–just opted for the Dash which seems to do the basics.  I didn’t order hot pink, but that’s what I got; I can deal with that–I’m not going to be sitting around contemplating it–so long as it works–and it does do what it’s supposed to. I got the “Greek” because it has a strainer with it and it does bulk yogurt instead of little itty, bitty jars.

Of all the commercial yogurts I’ve tried, the Icelandic Products Skyr is my favorite. I looked at the cultures used in that: Streptococcus thermophilus Icelandicus™ and Lactobacillus bulgaricus bifidobacterium. These are noted as heirloom cultures. Since this is my favorite store-bought yogurt I decided to use that as my starter culture.

Most of the recipes that I found for skyr called for rennet but that’s not listed as in ingredient in the Icelandic Products skyr, so I’m not using it. The ingredients did say skim milk but since I’m still working on the Always Hungry? plan, which calls for whole milk products, I made mine with whole milk.

I used 8 hours 30 minutes for my first batch. The texture after straining was great but for my taste, it needs to be just a bit more tart so I’ll try using 10 hours next time. Perhaps after I get off the Always Hungry? program, I’ll try skim milk and see how that works.

I’ve used the whey that was strained off to thin the consistency of the power shake just a bit instead of pouring it down the drain since I’m adding whey protein powder to the shakes. Though it’s a bit richer tasting than most commercial yogurts, it seems to work fine in all the uses called for in the meal plan.Certainly much cheaper than buying Greek yogurt–and I know exactly what is in it.

20160715_153827

Black bean pasta

I’ve had a long work week, which  ended  in frustration  this evening in–I’m hungry, but the planned meals just don’t DO it. After staring in the fridge for a while, and going back to take a few of those silly online quizzes, I still hadn’t the foggiest idea what I wanted to eat. More peering into cabinets (sardines–nope, tuna–NOT).

While skulking through the pantry, I realized that what I’d most likely cook were I not trying to be really serious about weight loss would be pasta.  Obviously, that won’t do–at least not pasta, as we most commonly think of it.

On my grocery rounds day before yesterday, I noticed that there was a new section of pasta displayed with lots of signage designed to attract attention–it was gluten-free pasta. I’m not gluten intolerant so I usually don’t pay attention to that (and I get really irritated when I see fruits and vegetables touted as gluten free–but I won’t go there now). As I stood perusing the boxes, I had a faint memory of a friend telling me that her grandchildren liked black bean pasta, so I read the ingredients list–and it was only black beans. I found that rather amazing, since so many gluten free products have potato starch or other things that are off limits to me right now. I succumbed–I bought a package of black bean pasta.

I stashed the black bean pasta (pasta?) in the pantry and went straight to  the Merriam-Webster unabridged dictionary to look up pasta. I discovered that it was defined as “an alimentary paste in processed form”. While spaghetti was given in an example nothing was specified as to what the paste was made of.  Ok–it’s black bean pasta.

I spend a little time thinking about why I eat pasta. It’s because I like pasta. I like the different shapes, too. I like the flavor of pasta made from wheat, but there is a texture factor there as well. Maybe there is more than that–maybe there is something about twirling spaghetti or angel hair pasta around a fork to get it into my mouth–part of the process of eating that’s satisfying–more than just the flavor.

What I’d usually make is spaghetti aglio e olio–sorry, that just sounds better that plain olive oil and garlic–so I decided to give the black bean pasta a trial that way. I got out my favorite pasta-cooking gadget. For this to keep with the meal plan in some remote fashion, I needed to add some vegetables. Spinach!  I sautéd the and spinach in the olive oil and dumped it over my black bean pasta. (I know I had a bigger serving of carbohydrate than I should have, even though it was black bean pasta, but at least I had veggies with it.)

The result? A pleasant surprise! It was remarkably satisfying (maybe just because I was hungry); the texture was good though not quite like pasta made from wheat flour. It’s not overwhelmingly “beany” either. It was so satisfying that I had to think that there is more to my liking pasta than just the flavor. Would I rather have had “real” pasta? Yes, but this was good. Black bean pasta is not going to replace the traditional stuff made of durham wheat flour. It certainly beat trying to fake it with spaghetti squash (though I like that too, but it’s definitely NOT pasta–it’s a vegetable so don’t tell me to use it instead of spaghetti).

The final call? I’ll cook  pasta made from black beans again until I can have the traditional kind that we usually think about. I don’t know why I had this resistance to this as pasta since I like soba and rice noodles. It’s a good stand in for this meal plan. After eating that I find that there is also pasta made of chickpeas (garbanzo beans).  I’m sure I’ll find some other uses for it as well, and I’ll explore other “alimentary pastes” to add to the soba and cellophane noodles as well. But I’ll still want that plate of “real” spaghetti aglio e olio!

Õ¿Õ


Smoky, spicy red lentil soup (Always Hungry?)

Lemony Red Lentil Soup with Cilantro

This is one of those “recipes” that really isn’t. Kitchen Express doesn’t give you a list of ingredients–it gives you a paragraph description of what to do–a happening. I don’t always have red lentils, so I’ve made this with De Puy lentils; it simply takes a little longer to cook. This is the “light, bright” lentil soup that I make in warm or hot weather.

The soup below started as the Red Lentil Soup (pages 283-284) in Always Hungry?  However, true to form for me, it evolved–still keeping the spirit of the meal plan. So here’s my version of a seemed to be rather a bland lentil soup when previewed on the page. It evolved on a dreary, rainy, chilly day in May that felt more like regression to March. It’s only mildly spicy and garlicky–you could increase the chipotle powder or add a dash of cayenne.

Serves 4 with big bowls, or 6 with small bowls. Add some meat (lamb would be good) and it’s a meal in a bowl.

Smoky, Spicy Red Lentil Soup

Ingredients

  • 2 tablespoons olive oil (for cooking)
  • Chopped onion–about 1 to 1-1/2 cups
  • 2 medium carrots, diced
  • 2 ribs celery, diced
  • one 14-ounce can of diced tomatoes [fire-roasted are really good in this.]
  • 32 ounces chicken stock
  • 1 cup red lentils
  • 2 or 3 large cloves of garlic minced or pressed (or more according to taste)
  • 1-1/2 teaspoons of herbs de Provence
  • 1 to 1-1/2 tablespoons of pimentón (smoked Spanish paprika)
  • 1 teaspoon chipotle chile powder
  • 1/2 teaspoon red pepper flakes (hot)
  • salt and black pepper to taste
  • one 8-ounce package of frozen chopped kale
  • extra virgin olive oil for drizzling as a tasty garnish

Preparation

  • Heat the cooking olive oil in a good-sized pan and sauté the onions until beginning to brown.
  • Add the carrots and celery and sauté until starting to brown.
  • Add the pimentón, chipotle chilli powder, red pepper flakes, and garlic; sauté until fragrant.
  • Add the chicken stock, tomatoes, and 2 cups water.
  • Add the herbes de Provence
  • Bring to a simmer and cook until the lentils are almost tender. [I moved it to the oven to finish cooking so I could work without worrying about checking it.]
  • Stir in the chopped kale and continue cooking until the lentils are tender.
  • Serve it up and drizzle with a bit of aromatic extra-virgin olive oil.

clear glass bowl with lentil soup

Always Hungry? What’s in the pantry?

I don’t do meal planning well…I don’t like to do meal planning.  I’d much rather be spontaneous about my cooking and eating. Okay, I’m a picky eater–my appetite varies with the weather, the season, and even mood. While I’m managing to be moderately successful with the Always Hungry? meal plans, I really appreciate the “how to” section for each phase. It gives me much more freedom to cook what I want to eat. Even so, I’m looking forward to getting past the first two weeks of Phase 2 when I can do even more improvisation. Besides weight loss, one benefit of reading the book and starting this has been a close look in the pantry. In my pantry inventory, I found very few items that were on the discard list so doing without a lot of the prepared or processed things was not really a big issue.

I’m fortunate that from where I live it’s easy for me to stop at the grocery store on my way to and from other errands, so I tend to shop for perishable several times a week–check out the market and see what looks good: meal planning on my feet.  There is a farmers’ market close to me that is open on Wednesday evenings and one on Saturday mornings.

Many times I cook without a recipe and improvise something from what is in the house; improvisation is much easier if you have a well-stocked kitchen and pantry.My only purchase that was specific for the Always Hungry meal plan was the whey protein. That may remain in my pantry after Phase 2 is over–shakes for breakfast work well for me since I really don’t want major food first thing in the morning.  The Stahlbush Island Farms frozen berries have been a huge help with these when fresh berries aren’t of best quality.

There are a number of  things that I almost always have around.  You can find lots of lists in cookbooks for things you “should” always have on hand, but all of those lists need to be modified to suit your tastes.  If you hate anchovies, then there is not much point in having those in the pantry.  I may not want to eat them on a sandwich, but they can add a very subtle, rich background flavor to vegetables like broccoli–used in very small quantities they won’t scream “fishy” at you, and they can stand in for nam pla in providing umami.

Though I do shop for perishables frequently, I want to be able to prepare a meal even if it’s so hot that I just cannot face going outside, so I  keep a reasonably well-stocked freezer, refrigerator, and pantry. Even just from the canned (not many things) and dried goods, I could produce a meal at the drop of a hat.  Canned tomatoes in several forms–diced, whole, fire-roasted (add a little smoky flavor to a dish) and quick sauces–are such a pantry staple that they need not get more than a passing mention.  Sun-dried tomatoes, a tube of tomato paste, capers, and roasted red peppers are some other things that get frequent use.

Some of these supplies also stand in for the emergency kit in case of hurricane or ice storm that results in a power outage.  Peanut butter is a staple, but that doesn’t mean that I want to have to pull that out of the cupboard for supper–that’s snack food or for breakfast on toast, or with slices of apple or stuffed into celery ribs.

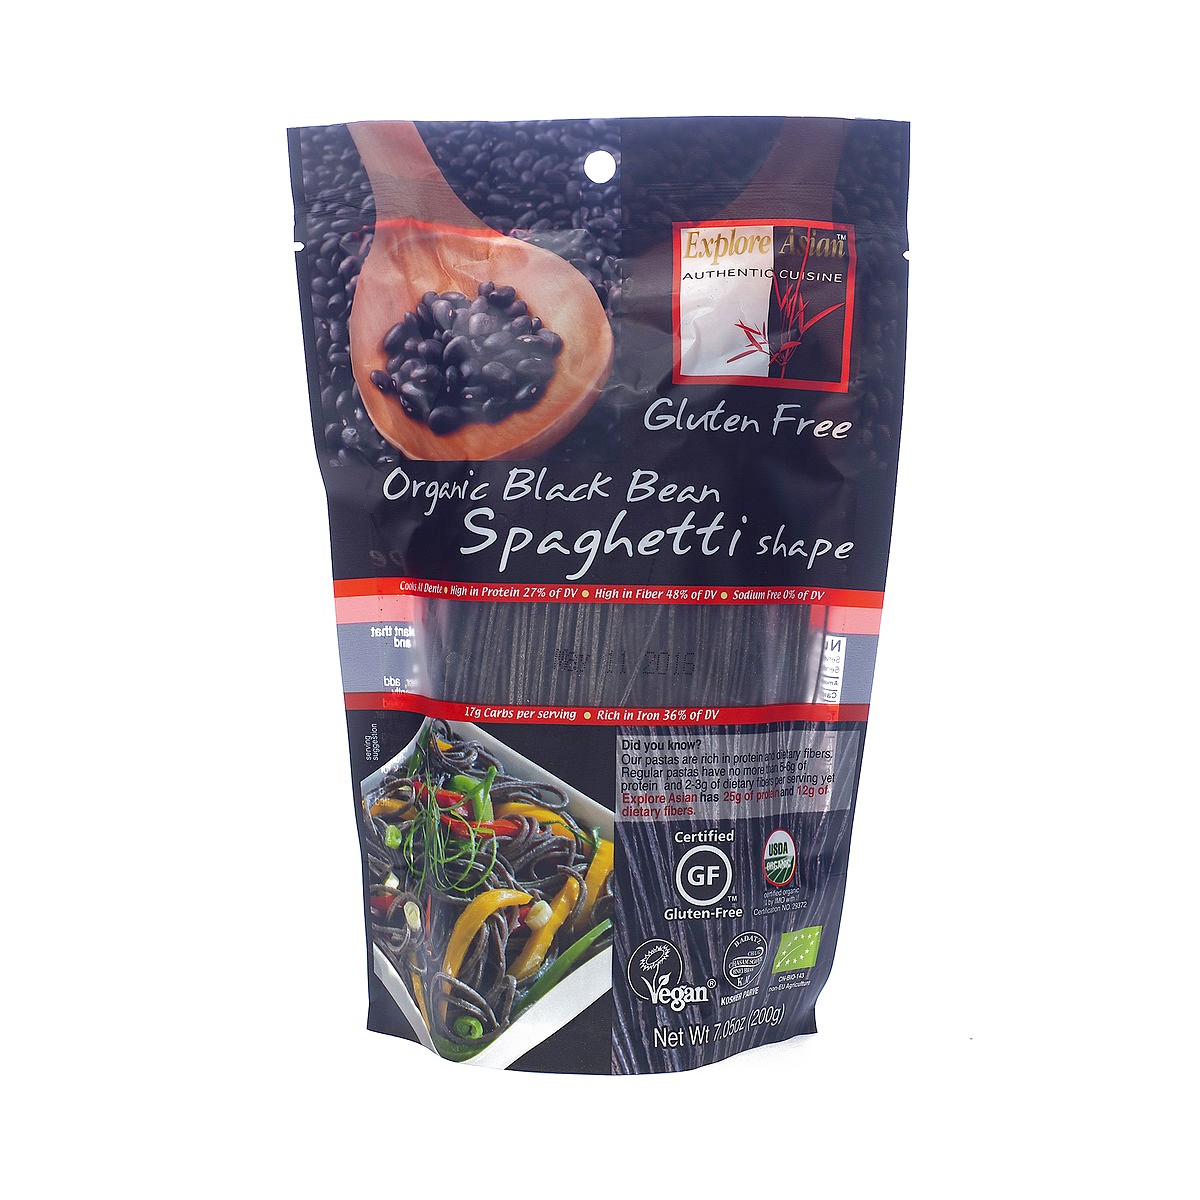
Dry pasta is a great base for improvising, so it’s good to have several different shapes around to harmonize with what is going in it or on it.  Once the package is opened,  if the unused portion is transferred to a Ball or Kerr Mason jars so that it’s tightly sealed it will keep until the next time I need this particular pasta. It will be good to add that back into my meal (in moderation, of course).

Dried lentils are another pantry staple–they don’t need soaking before cooking; it’s so easy to make a side dish or a soup using them.  There are many kinds of lentils (as there are beans) that can easily add variety to your cooking and allow improvisation.  The basic “brown” lentil can be found in most supermarkets in the section with the dried beans and rice.  My favorite is  the French Le Puy lentil which are small and hold their shape well when cooked. If you use them often, it’s worth looking for other lentils such as small black, or Spanish brown lentils.  You might have to find a “gourmet” store, but these are worth having on hand as a pantry staple. Lentils combine well with rice or other grains, and can be cooked with rice, or alone, in the rice cooker.

Although it does take a bit of pre-planning cooking your own dried beans instead of using canned ones it is worth the effort, but canned beans are still a pantry necessity. Cooking your own has the advantage of controlling the amount of salt and seasonings.  (That is not to say that I don’t have canned beans of various kinds in the pantry–I do–and I would not want to be without them.)   Some heirloom beans and/or specialty beans have such different flavors that they are worth searching out.  You can soak and cook more than you need for a single serving and freeze them with some of the cooking liquid so that you have them for quick use when you haven’t planned ahead. (One of the reasons I’ve been able to stick with the Always Hungry meals as will as I have is that legumes are part of the program.)

barley and rice

Barley (left) & arborio rice (right)

Grains are another staple in my pantry: rice, barley, quinoa, and some of the commercially available mixes that provide variety in a convenient way.  Being able to add some of these in Phase 2 is so welcome!  Since I love polenta, but corn is off limits, I’m going to try the millet “polenta”, though I don’t expect it to replace the real thing.

Basmati rice (brown or white) is a favorite for long-grain rice.  Since risotto is a great way to improvise a meal,  arborio or another short-grain rice that is suitable for making risotto is on hand too. It’s good to use in soups as well.  Barley is also a grain that to have on hand at all times–it makes a hearty soup, it can be cooked like risotto, and it makes wonderful side dish instead of rice. Depending on the season,  bulgur and couscous, both the fine and the Israeli, are also likely found lurking on my pantry shelves. Especially in the summer, with tomatoes abundant, tabbouleh is quick, healthy, and easy as a salad or a side dish. There are so many good grains that we use all too infrequently, just waiting to be added to out diet.

Though not “dry” cans of broth/stock are good to have on the pantry shelves, right along with the canned beans.  As a further backup, something like Better Than Bouillon in whatever flavor you use most often–chicken is a good compromise.

American Tuna image of can
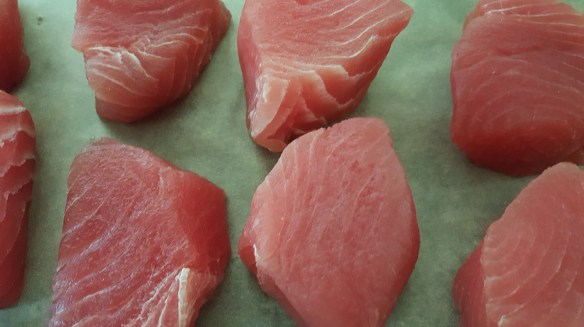
Other helpers for improvisation, include good quality canned tuna (personal preference is for oil packed) which can make a salad heartier, or be used with pasta or beans for a main course salad. Sardines make a good meal with  crackers or bread and fruit. These are good staples in the emergency food kit (which should also contain a can opener–the manual variety) as well. Salmon is part of the pantry, too, for salad or for salmon cakes.

Some other ideas for “pantry” cooking recipes inspired me to add some canned goods to my emergency stash–but that doesn’t include using cream soups and the like for “dump” cooking–that doesn’t particularly appeal to me, but having some carefully selected cans on the shelf can be useful.

There are some freezer things that I have found particularly useful while using the Always Hungry? meal plan adapted for single-serving cooking: chopped kale and spinach, chopped onions lend themselves particularly well to getting green veggies into my breakfast. Instead of the formality of making a fritatta with veggies, I find making scrambled eggs with the veggies much easier and quicker. A handful of chopped onions, a handful of frozen chopped greens quickly sautéed before adding the eggs does the job in a way that fits my morning functionality. If there are some cherry tomatoes lurking in the kitchen, those go in as well. Between supplying that quick handful, the opened bags live inside a zipper-lock freezer bag, right back in the freezer for quick access. I find that i use them so frequently that I don’t even do the vacuum seal–just pressing as much air as possible from the freezer bag will do fine since I buy the smaller bags and use them quickly. Now that I can add starchy vegetables in small quantities I’ve found that the Stahlbush Island Farms frozen butternut squash, sweet potatoes, and beets are good to have for use a handful at a time.

In anticipation of maintaining the weight loss the I have achieved so far (and hope to achieve in Phase 2) there have been two additions to the pantry–the whey protein, and chickpea flour. In addition to the recipes with the meal plan for waffles/pancakes that use chickpea flour, I’m experimenting with making my own crackers from that, rather than the usual wheat-based ones that I like to have around to go with the pickled herring or cheese. Here’s to maintaining weight loss, eating in a healthier way, and enjoying good food.

A son goût!


Always Hungry? Starting Phase 2

Phase 1 was successful–I tarried there a bit longer after my slip, but I can now say that my loss in Phase 1 has got me into double digits–more than I expected from reading the book. I need to lose more, but I’m happy with this for a start. I’ve found that this way of eating is very compatible with my cooking style.  I know that I’m going to have to be careful in Phase 2 as I start adding grains into my meals.

During Phase 1 I’ve given a lot of thought to what I really miss most. While I’m now quite fond of lettuce leaves to provide crunch with tuna salad and cucumber slices  with smoked salmon and some labneh with dill–some things just call for crackers. Lettuce leaves just don’t work well with pickled herring or sardines. Crackers have always been a pantry staple to go with my quick tuna or egg salad. They are one of the things I miss most. Don’t get me wrong, I miss fresh, home baked bread, and pasta, too. I was surprised how high on my miss-it list they were. I need to find a substitute for the saltines, or wheat thins that I reach for.

I found an article from The Huffington Post on chickpea flour (besan or gram flour) with lots of pictures and recipes: crackers, cookies, fritters, and crepes to mention only a few. Since legumes are permitted even in Phase 1 (lots of garbanzo beans there, if you remember) I have to try making chickpea crackers–and maybe pasta. How delightful to be able to have my crackers (in moderation, of course)! Kind of like having my cake and eating it too. A little experimentation as I work through Phase 2.

I had a dinner this evening that wasn’t in any phase of the Always Hungry? plan. I enjoyed every bite. I hope that I am well enough into the style of eating that I can just pick up tomorrow and continue without problems. I am looking forward to more grains in the meals.


Always Hungry? Another improvisation

Pork is one of my favorite meats, and it is not on the list of approved protein sources, although I assume it is in the category of “game and other meats” so I’m improvising a Phase 1 meal with a pork chop this evening. After reading a recipe from The Kitchn for 20160322_163300“Sweet and Spicy Braised Cabbage” my mouth was set for pork. The sweet part is going to prevent me from having that to go with my pork chop this evening (save this one for Phase 2 or 3).

I thought about taking  the lazy way out for vegetables and carbohydrate–use some of the mixed greens and borlotti beans that I had with my tuna steak, with  an addition of a little extra seasoning for the second time around, but that just did not tingle my taste buds today. So, sautéed kale this evening. I have a large bag of kale that I’m first going to sauté  simply with olive oil and then add seasonings to what I’m going to have with the pork chop–leaving the “extra” for later use to season differently  for later use. (I do quite often to avoid wasting food because I’m a picky eater who doesn’t want the same thing over and over.)

Supper this evening was part of this pork chop cooked on my cast iron griddle as described for pork neck steak–smoking hot griddle, first two minutes on each side, then turned at minute intervals until it reached an internal temperature of 130 degrees to allow for continued cooking while resting. Kale sautéed with black-eyed peas, and a side of sautéed apple (not good enough to eat out of hand, but fine when cooked). The sautéed apple replaced dessert with this meal. The contrasts of the slight bitterness of the kale, the earthiness of the black-eyed peas, and the sweetness of the apple with the pork did make my taste buds sit up and take notice.

20160322_171559

Ò¿Ó

This slideshow requires JavaScript.