Grocery shopping for one

Do you think about advertising while you’re grocery shopping?  Most likely not! I know that I don’t–but I try to do “perimeter” shopping, making a foray into the center of the store only for specific items–like drain cleaner, paper towels, or dish detergent.  Where I shop, the immediate thing from the entrance is produce (with a big display of locally grown goods), which leads to the meat and fish/seafood counters; a left turn there takes me past the dairy, and refrigerated juices; another left leads me to frozen goods. If I take a right turn at the butcher/fish/seafood counter, I find myself at a counter of prepared fruits and melons (usually in big quantities that are too much for one).  Next in line is the bakery and then the delicatessen.  Continuing through those, I end up at the Asian food bar,  the rotisserie chickens and other prepared meats, and the salad bar.  My usual trek through the grocery store most often involves only a quick dash to the dairy case, then meat and deli. I don’t see a lot of processed food on this circuit. I’d never really given much thought to whether or not my shopping was being manipulated by sales-motivated display methods.  The links below contain some information about store layout and methods used to induce us to buy “stuff”–things that we did not come into the store to purchase: impulse purchases.

Õ¿Õ

links of hot Italian sausage
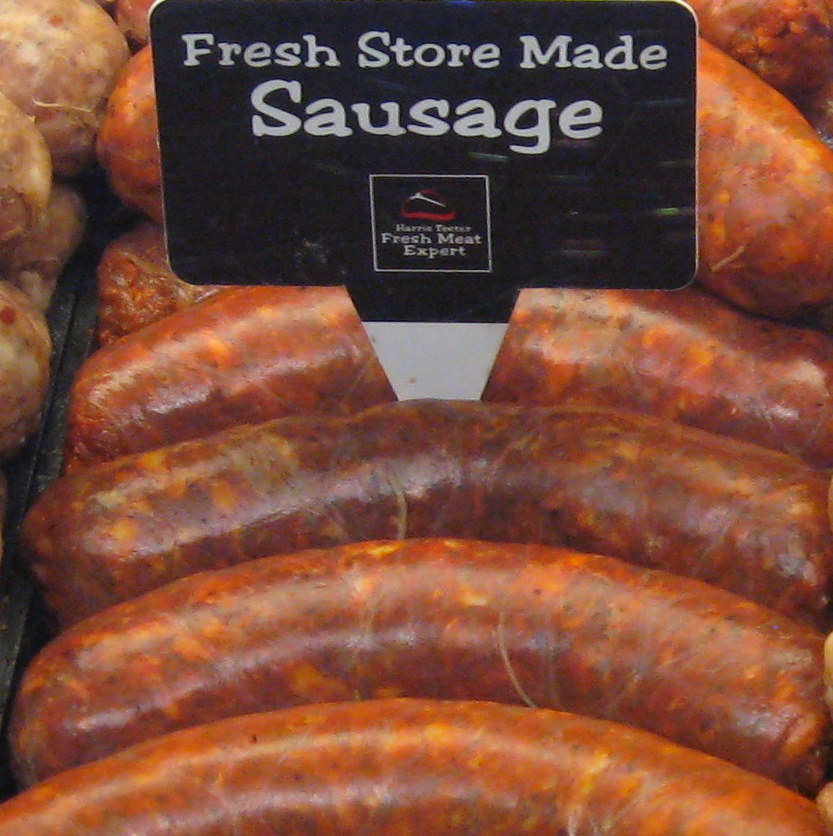
Meat purchases are pretty easy–thanks to chops, steaks, and a butcher/fish counter that will cut to order; packages of  chicken parts, rather than whole birds, and house-made sausages that I can buy one or two at a time. Careful consideration of the dish that I want to make can allow alternative cuts of meet: beef shank instead of large chuck roast for post roast.

The real difficulties come in produce where things are sold bunched, bagged, or otherwise in quantities that don’t fit single-serving cooking. Some produce just grows in too large a quantity–heads of cauliflower, heads of cabbage or lettuce, a whole stalk of Brussels sprouts…waste just waiting to happen unless we make a serious effort to prevent it.

Ò¿Ó

One of the difficulties of cooking for one (or even two) is the produce that goes bad while waiting quietly in the refrigerator for you to do something with it.  I love peppers–and I like variety, but I simply cannot use a whole red and orange or yellow bell pepper before they begin to get a little mushy around the edges, no matter how carefully I store them.  So do I do without them?  Even  some ready-to-use packages that are available in the produce department are still more than I want. Buying more than I can use is like throwing money away–and it gets worse if you consider the amount of food waste by consumers after purchase, let alone the waste between harvest and the appearance in the supermarket.

My supermarket likely has something that will help with this dilemma:  a salad bar.

green on the salad bar
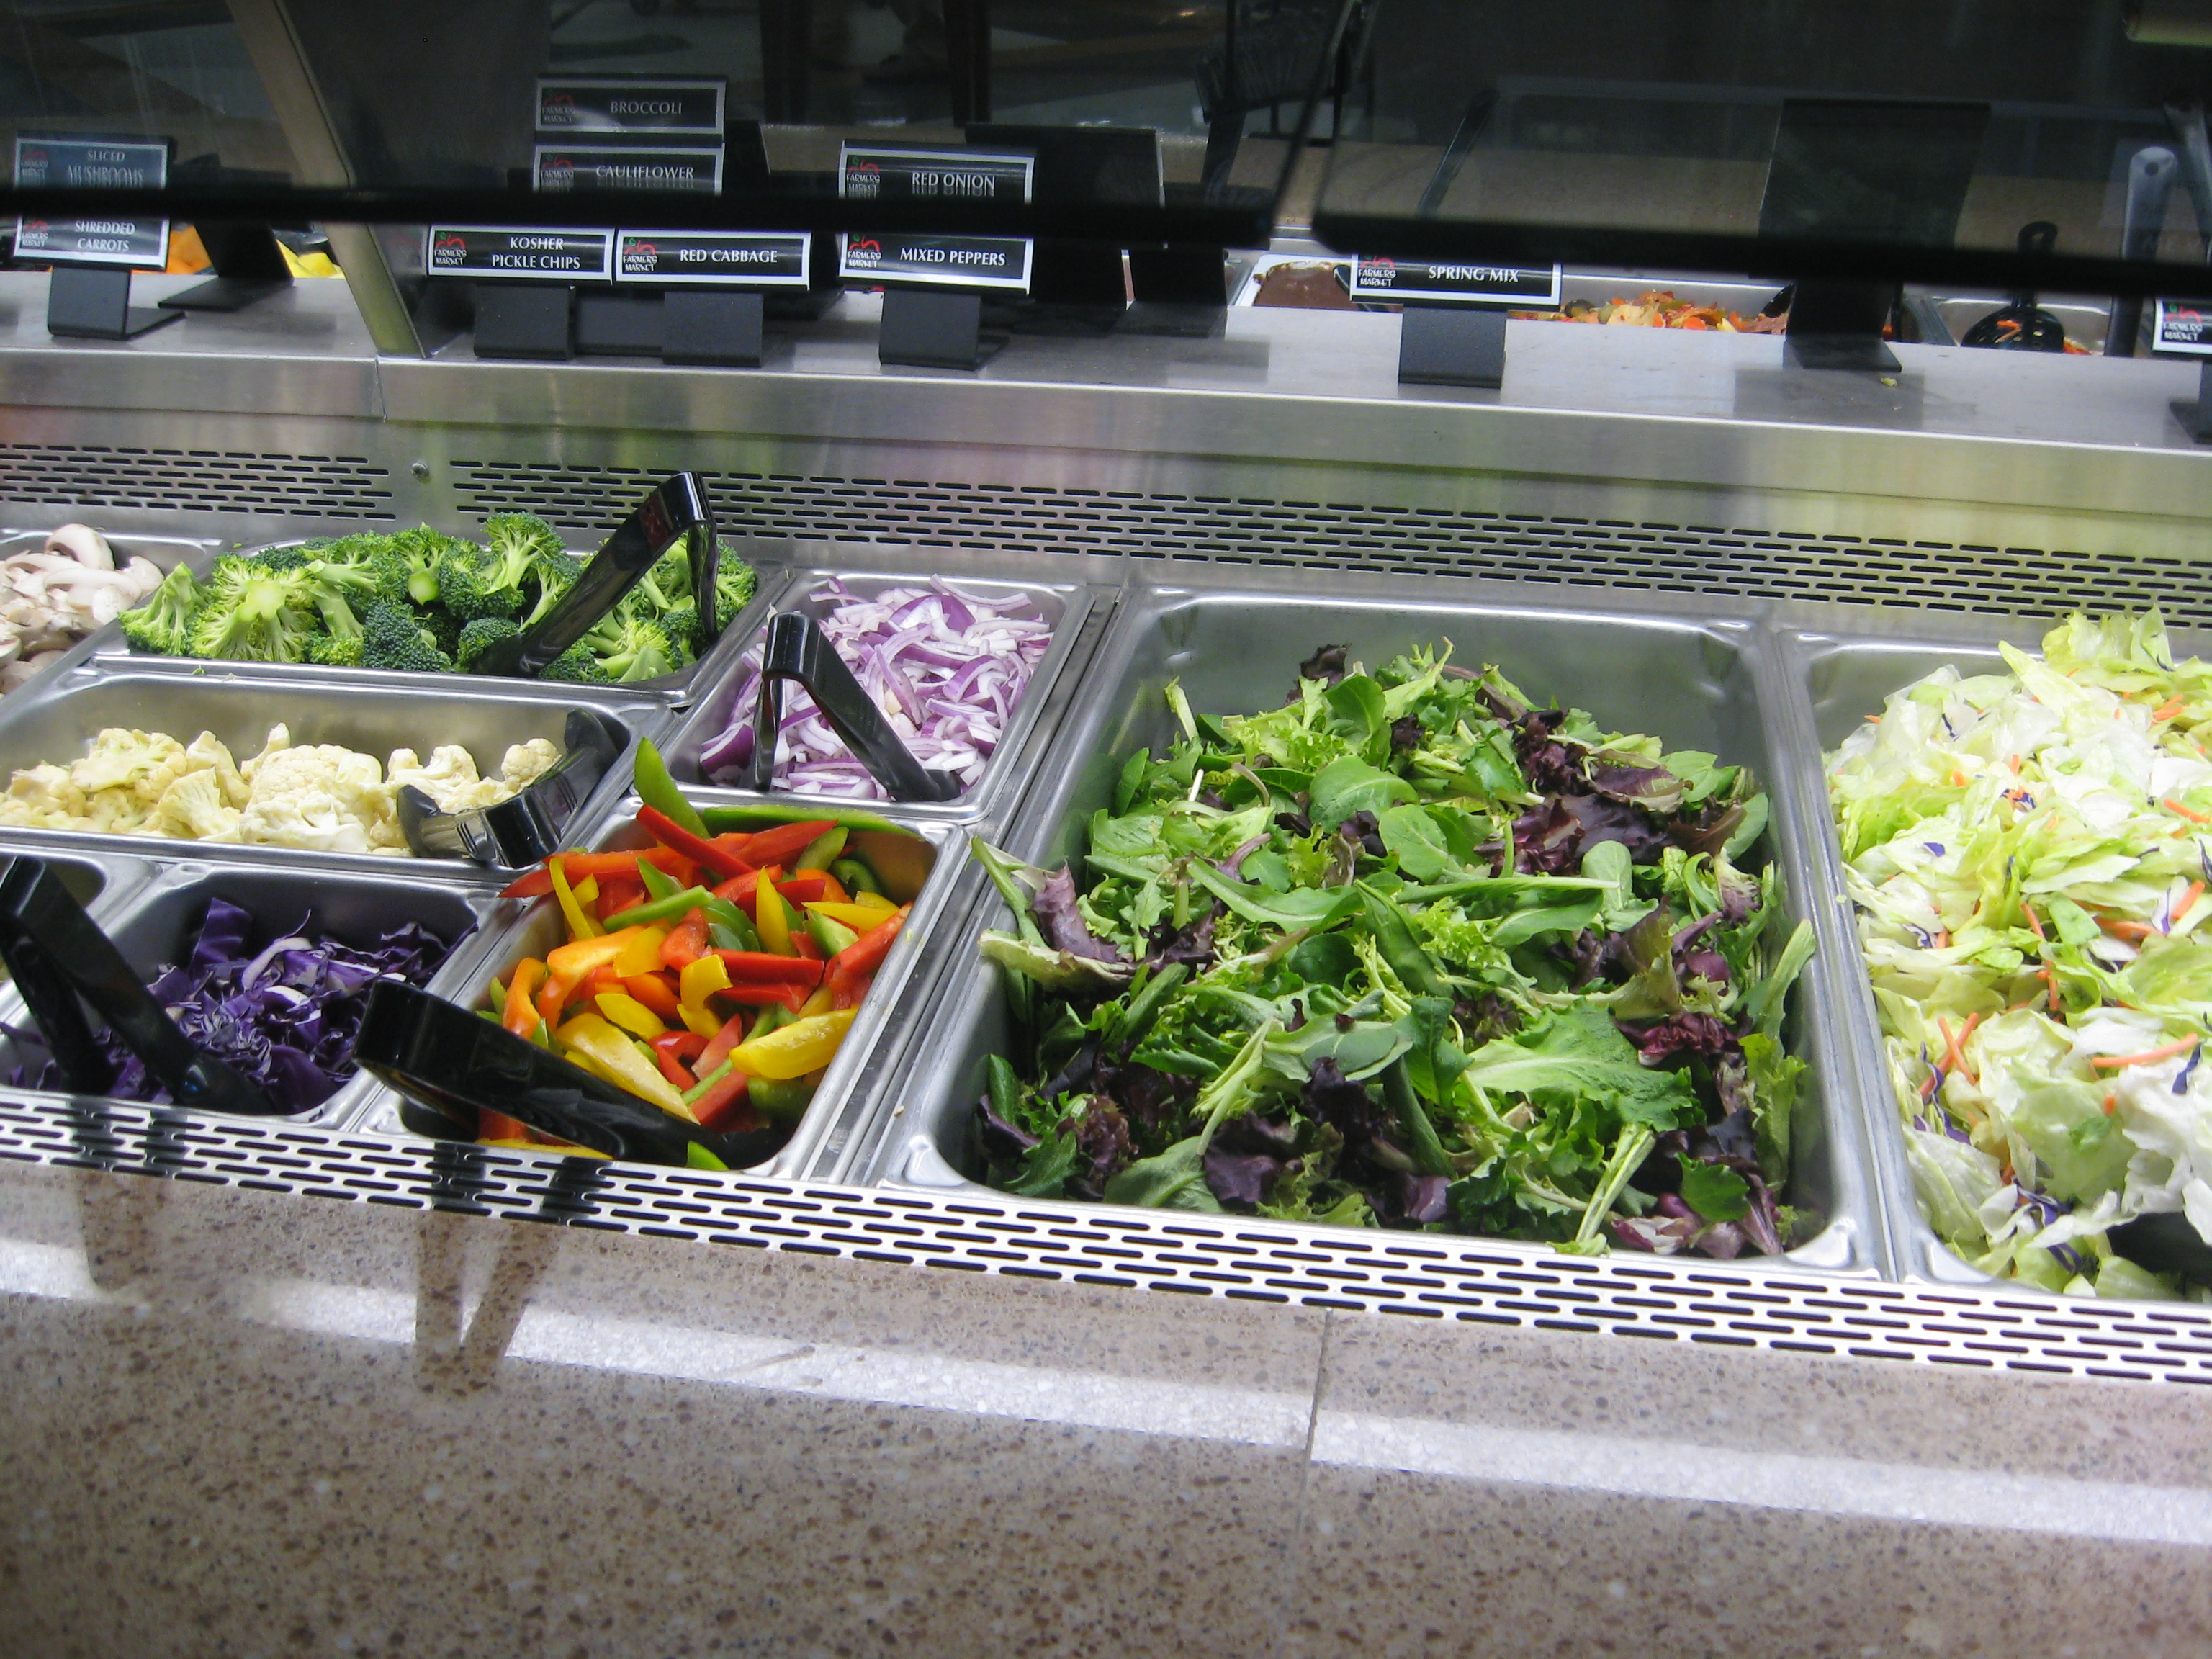
If you’ve always thought of it as a place to make a salad with all sorts of veggies and trimmings, and pour salad dressing on it, top it with some croutons, and take it back to the office to eat  you need to look at the salad bar from a different perspective. Take a closer look at what’s available there to purchase by the pound–thinking about what you need for a meal, rather than making a salad.

As much as I love salads, packaged greens often go bad before I use all of them. My other objection to big prepared baby spinach on the salad bar (Harris Teeter)
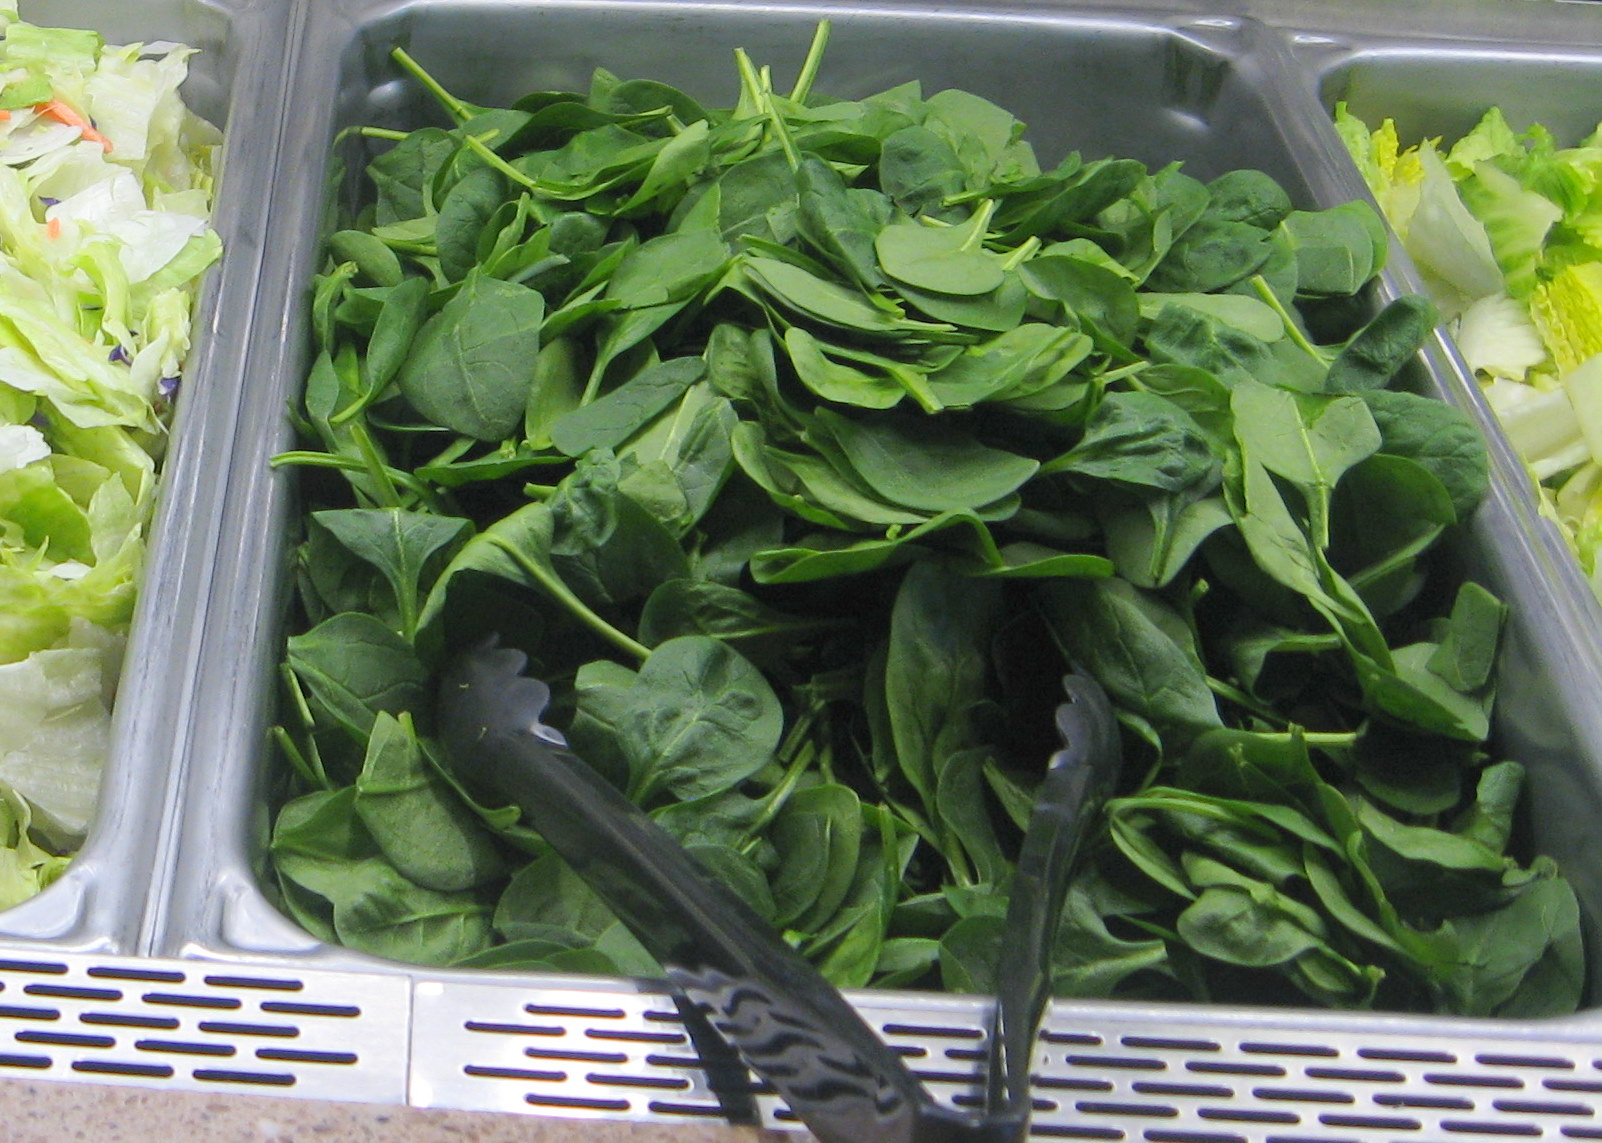
packages of greens is the lack of variety–I simply don’t want spinach as my greens for a whole week.  If your market has a salad bar, you can get single-servings of mesclun, spinach, and other greens from the salad bar. I can also get some that loose greens in the produce department–I’ll purchase that either place, depending on what my schedule is and how salad-crazy I am at the time. Since the salad bar usually has several kinds of greens out, I can have mixed salad greens without buying lots of each kind.

salad bar-broccoli-cauliflower IMG_6051
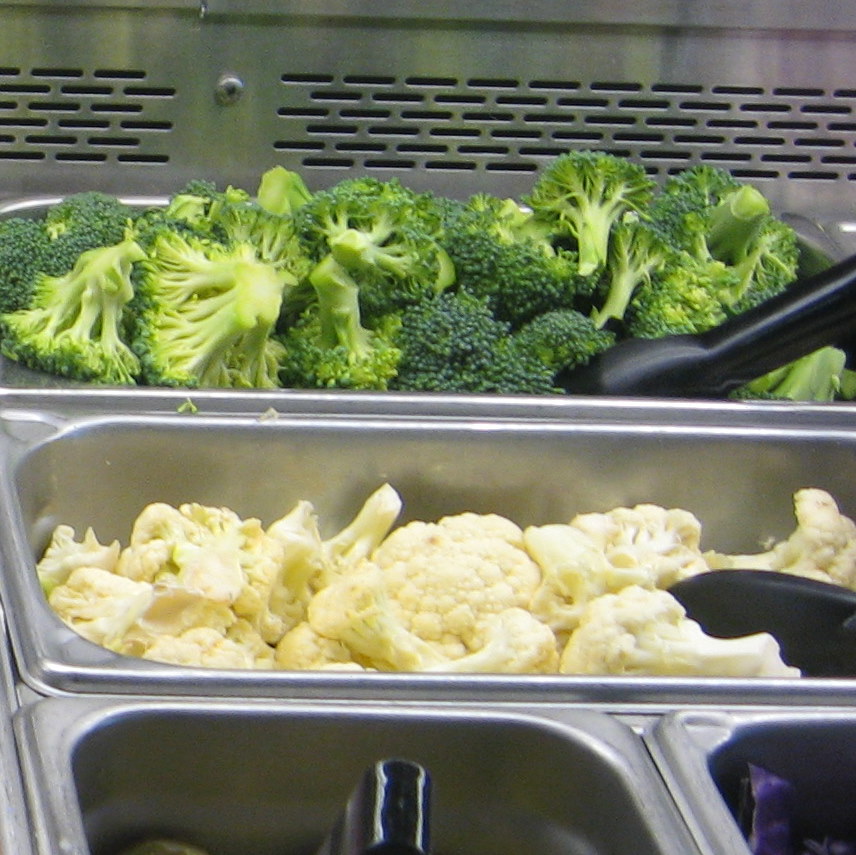
I like cauliflower and broccoli too, but again a head of cauliflower is a bit much, so even at $3.99 a pound it is less wasteful and probably cheaper in the long run for me to buy what I need for a single meal from the salad bar–and I avoid having to do the prep myself–added benefit.

My most frequent purchase from the salad bar is bell pepper strips, for salads, and sometimes for seasonings.  If I need a lot, for example making the dandelion greens and sausages or  chicken with sweet peppers, I will either buy whole peppers, or use frozen ones since they are to be cooked.  The salad bar that I frequent usually has a variety of colors, so I can have that without red, yellow, orange, and green going bad in the fridge. (I prepared bell peppers on the salad bar (Harris Teeter)
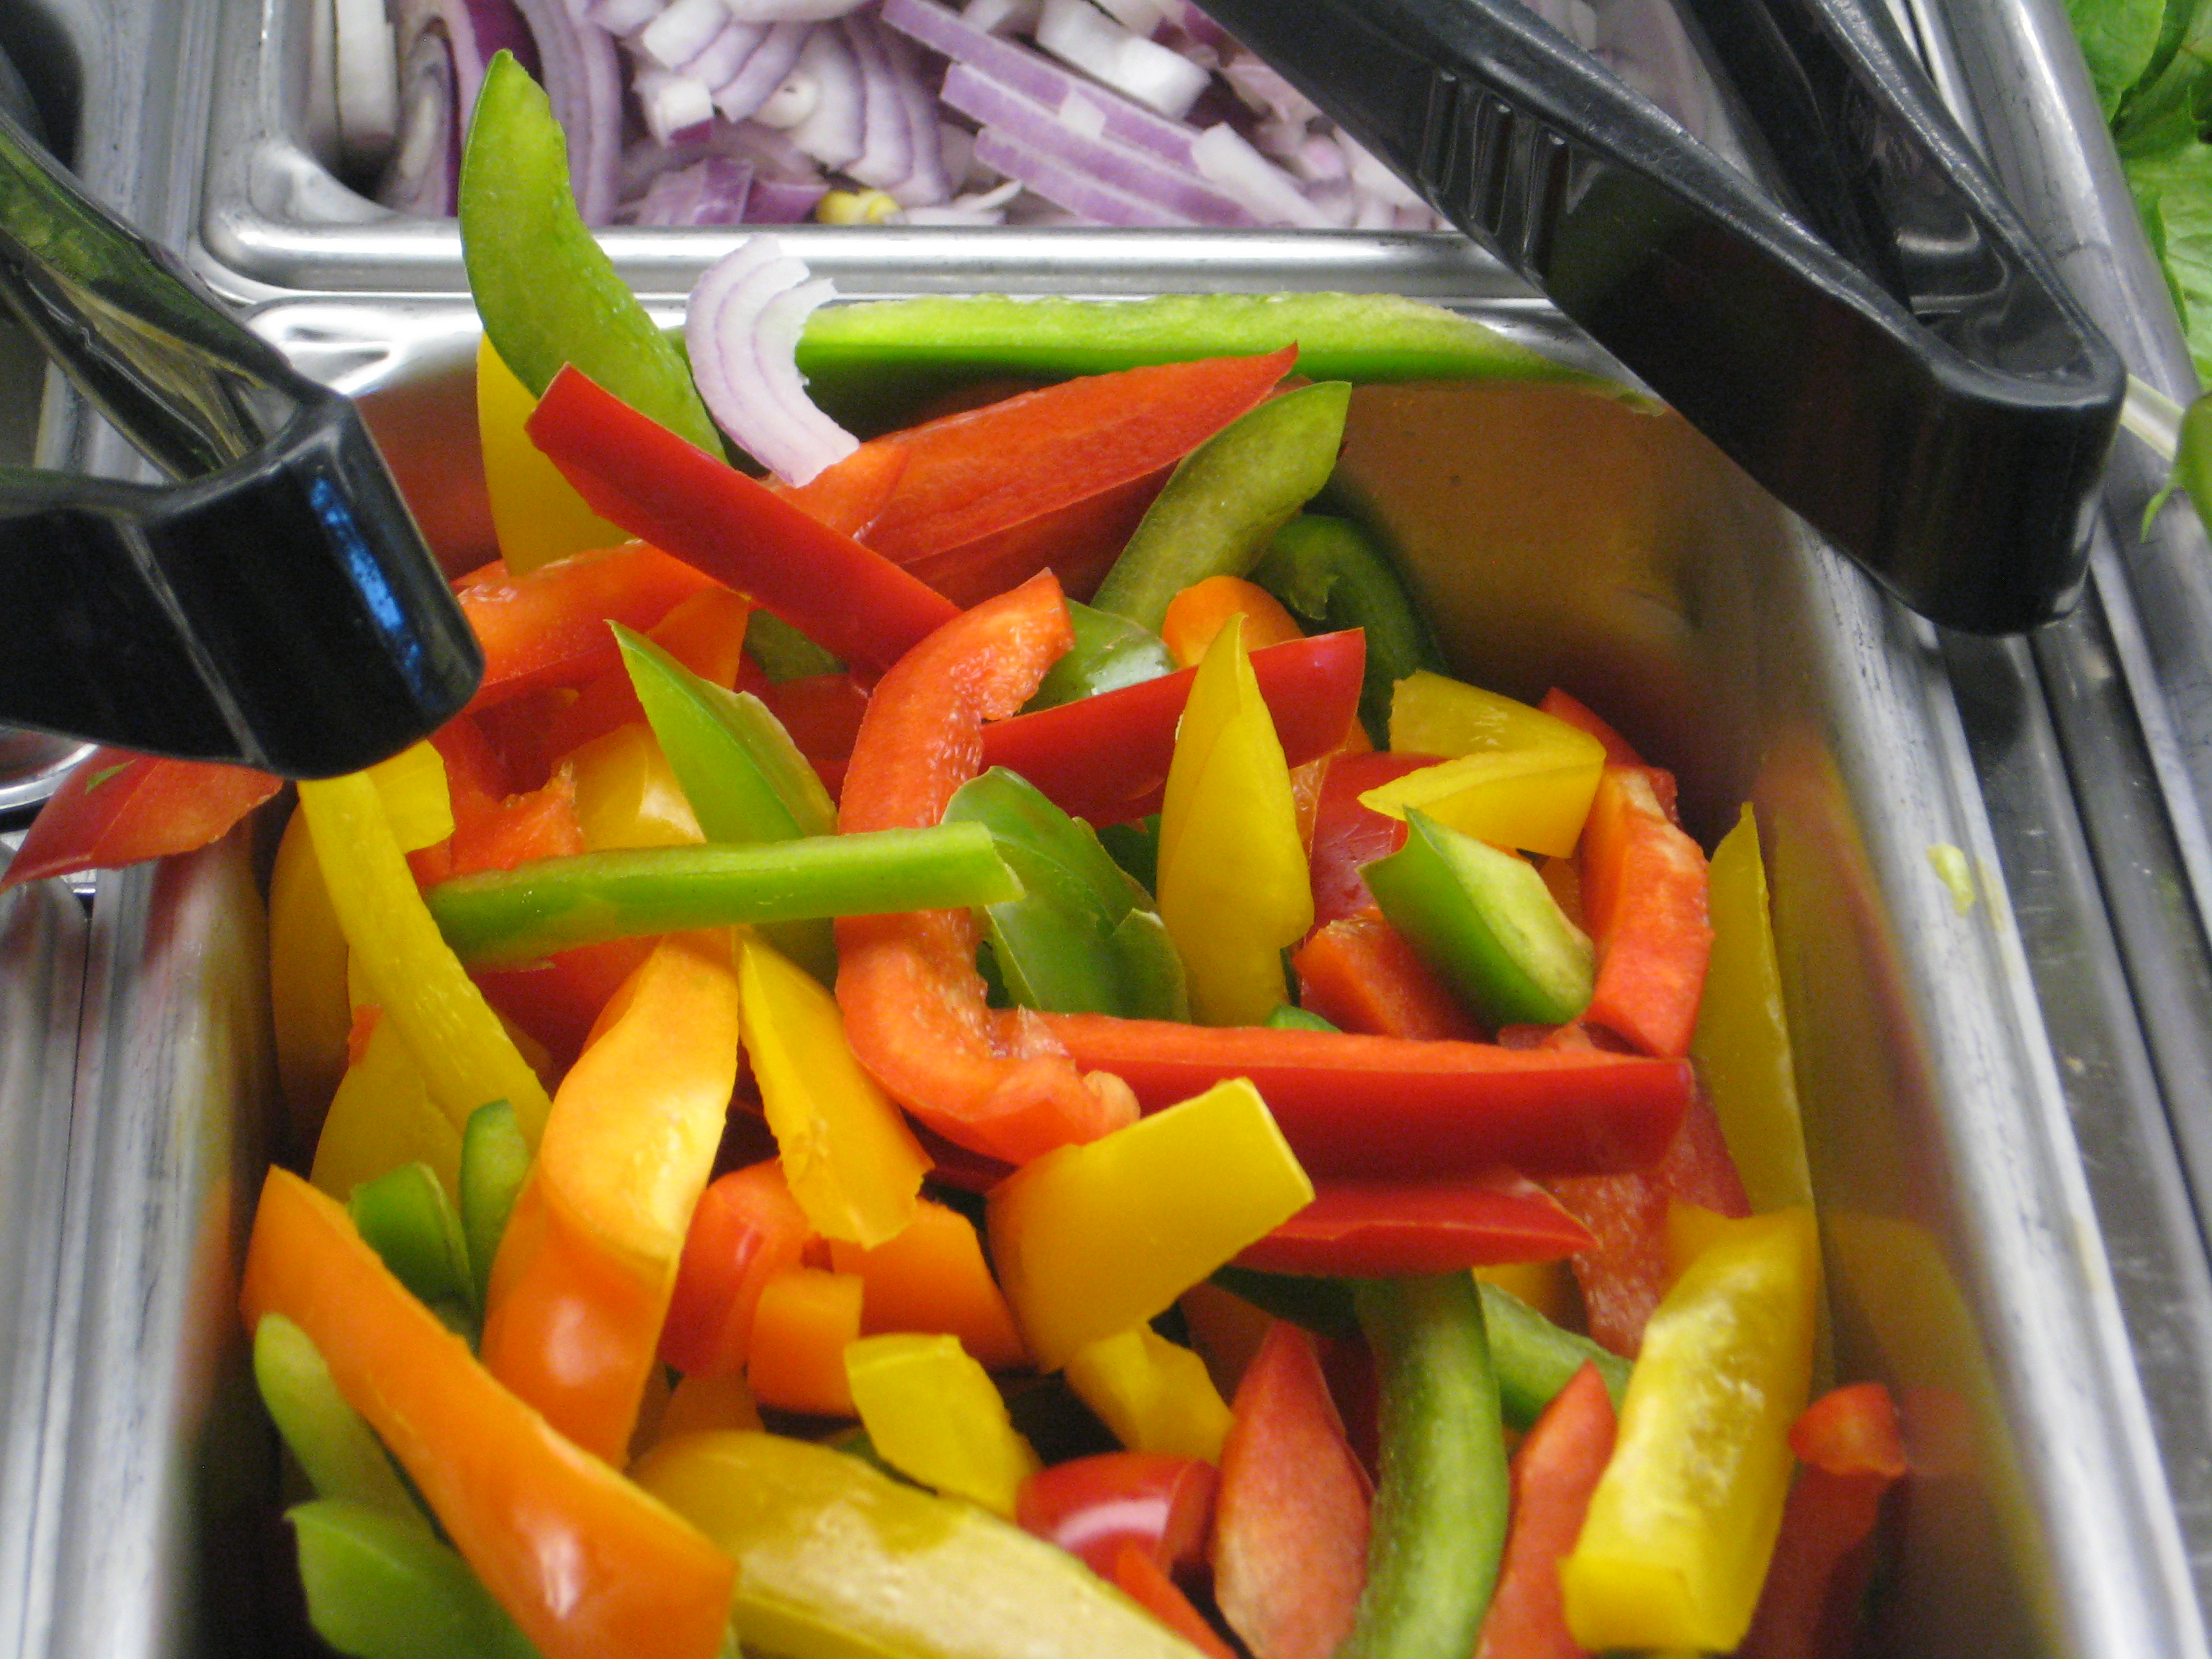
have to admit, somewhat shamefacedly, that I’m one of the people who will stand there and pick out the red, orange, and yellow and leave the green ones behind.)

I don’t buy tomatoes off the salad bar–I think that the refrigeration changes the texture of them, so I usually get grape/cherry tomatoes from the produce section. They seem to be one thing that I use easily before they get funky.

Onions and whole carrots keep well julienned carrots on the salad bar
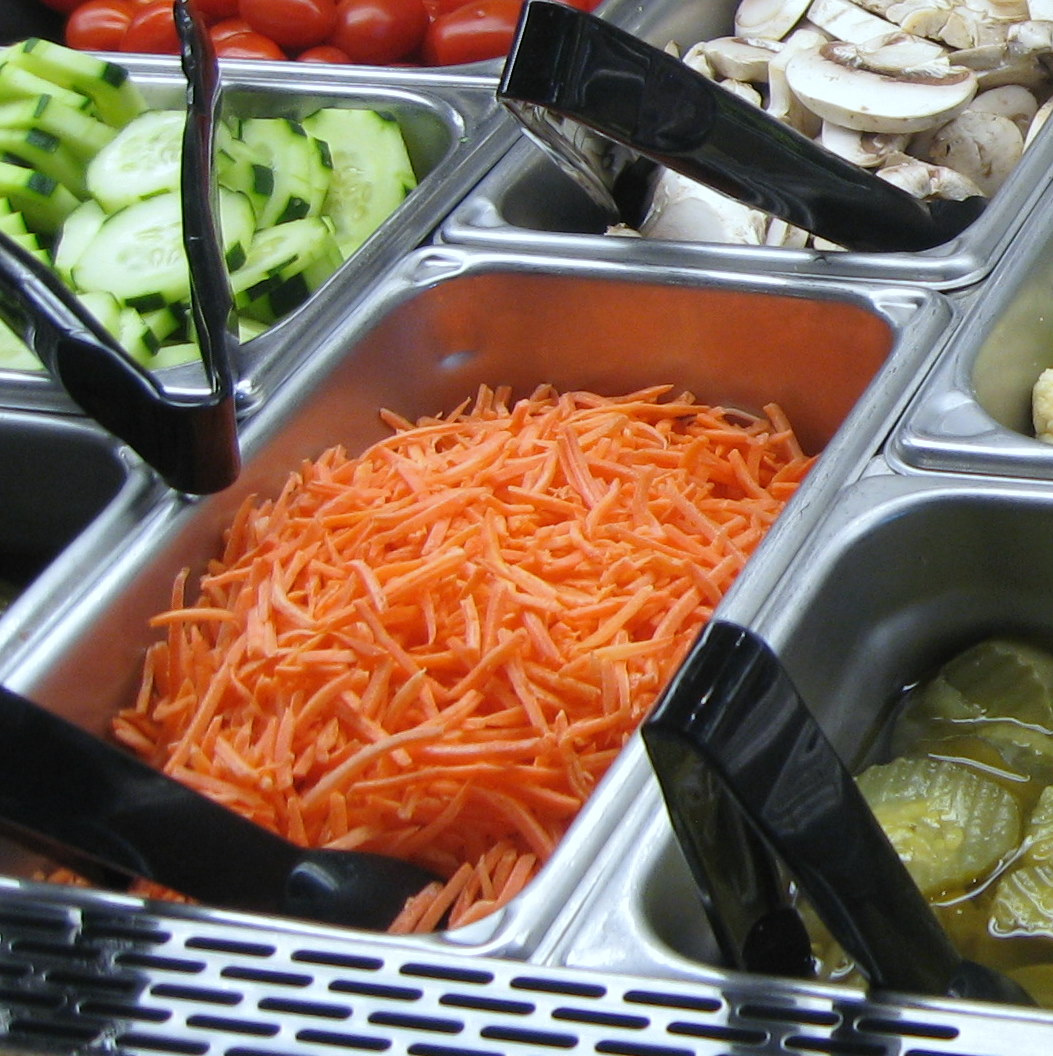
enough that I buy those in the produce department most of the time and keep them in the fridge; but if I want  julienned carrots to make a quick serving for a meal or for a salad–I may just take the lazy way out and use the salad bar rather than the packaged ones in the produce department. That’s my idea of convenience food.

I don’t often by cucumbers from the salad bar since I prefer the English ones–and the salad bar usually features the American slicers so they are not worth the per pound price. Other things that may be purchased from the salad bar include sliced mushrooms, julienned radishes, or fresh mozzarella when you want just enough for one serving.

Another frustration of buying produce for one is fruit. As much as I like cantaloupe, honeydew, berries and other fruit, getting variety leads me to use the fruit side of the salad bar often. I can usually find assorted berries, mangoes, pineapple, and melons there.

Most of the items on the salad bar really aren’t that heavy–and considering that you have avoided the waste of unused produce, it seems to be a reasonable price.  Even some of the heavier items like melons, broccoli and cauliflower, are a bargain for me since it allows me to have variety in my meals and minimizes waste.

Not everything I want is on the salad bar, so the solo cook has to deal with more produce than you’re going to use quickly. What are the options?

A simple supper

When I did the smoked lamb and goat shanks for the Fourth of July I deliberately added some extras, even after I had allowed for the appetites of my guests.  What was left after our dinner was not “leftover” but was planned (even though I had nothing specific in mind just then) as future food since I thought that these would lend themselves well to improvisation.

I sliced some of the meat very thinly from the cold shanks and used it in a salad.  The goat meat was especially good here, but the lamb made a nice salad addition too.  There was still enough for one all-meat meal, or two meals if supplemented with a grain or beans.

Lamb and beans heating in skilletI had envisioned using the rest of the meat with some cannellini beans  to make a kind of mini-cassoulet that would be topped with bread crumbs and baked briefly to meld the just-added seasonings. That was just not on the program!  It’s been so hot lately that I just did not want to have the oven on even with the air conditioning running, so I opted for a “skillet” meal.

My first step was to sauté some chopped onion (1 medium) until soft and starting to brown, then add  garlic (2 large cloves, minced).  Next I added the chopped meat from the lamb and goat shanks.  I had enough for two servings–and I decided to use it all in this concoction as I though I would like two meals from this as it would only improve with reheating. I added about 1 teaspoon of herbs de Provence(seemed rather cassoulet-like) and a healthy dash of crushed red chili peppers for some spice, and about 2 tablespoons of water.  Finally I drained, rinsed and added one can of cannellini (white) beans to the skillet, which I covered and allowed warm over low heat to hydrate the herbs de Provence and the pepper flakes.

Without further ado it was time to eat. With the last of the bottle of wine that was Lamb with white beans and sliced tomatoesserved with the original meal  it was a very satisfying, and easy, meal. There will be one more serving (and that’s not a “leftover” either–maybe that will make it into the baking dish with the bread crumbs and some rosemary added. This could adapt well to any extra pork, beef or chicken that happened to be hanging about the fridge as a leftover.  All this needed was a salad to complete the  meal.  Dessert was just some fresh fruit.

18 July 2011

Just a quick update here.  I’m glad I made two serving of this.  The improvement on re-heating was fantastic.  The smokey flavor came out more–next time I do something like this, I’ll plan to make it one day and reheat it later.  I’d love to try this with goat!

Another cookbook for single-serving cooking

Cover of Serve YourselfI’m always browsing cookbooks–especially those that appear to deal with single-serving cooking.  A friend recently mentioned Serve Yourself: Nightly Adventures in Cooking for One to me. True to form, I immediately went in search of it–and was pleased to find it available in Kindle format.

I really identified with a statement made in this book: “…we solo artists deserve just as varied a diet as anyone.  While I love having some leftovers around that can morph into new dishes, I also appreciate the beauty of starting and finishing a single cooking project on a given night.” (Kindle location 173)

One of the things that I find delightful is that there are suggestions and recipes that are incredibly helpful in allowing morphing leftovers.  These include condiments (to use not only on leftovers) but suggestions on using those extra ingredients that seem to be the bane of single-serving cooking–such as what’s left of that bottle of wine that you opened to go with dinner yesterday evening.  Personally I think that this is a book worth having in your library if you cook for one, but I suggest that, at least, you check the local library and peruse this one.

I’d also recommend his website for fun reading of his “Cooking for One” column for more thoughts on cooking for one, and more recipes.  Even cooking for one it can still be a son goût!  

Pork stock

Not an instance of absolutely great planning, but here I am as the thermometer hits the 90s making pork stock.  Well…I never said that I was the greatest planner in the world–strawberry ice cream and stock-making in the kitchen all at one time.  My favorite meat supplier (Meadow Lane Farm, Louisburg NC)  had great meaty pork neck-bones at the market this past Saturday so I had to bring some home–so despite the heat it’s stock-making time.

These are very meaty bones, so I’ll have some meat to use after the stock is finished.  Since there is so much meat on these bones, and I want to use it, I’m not doing the quick stock–but rather the stove-top method (now you’re sure I’m not great at planning, right?).  But when you have the opportunity to get pork neck-bones, you take it.  Meadow Lane farms is doing more pork (as well as beef) so next time I can plan to do this is cold weather.  (I’m glad I’ll have more access to pork…love that “other white meat”.)

Basic Stove-top Pork (or Meat) Stock

Ingredients: 

  • about 4 pounds meaty pork neck bones
  • 2 medium onions, chunked up
  • 2 medium carrots, chunked
  • 3 bay leaves (dried ones)
  • about 2-3 teaspoons salt
Preparation:
  • Rinse the bones well.  If you feel that there is any old, or “off” odor, or they’re very bloody, blanch quickly in one change of water.
  • Add aromatics–onions, carrots, and bay leaves
  • Add water to cover.
  • Bring to a boil quickly, and then reduce to keep a bare simmer, and leave for about  2 or 3 hours.  Test after about 2 hours–when the meat is fork-tender and “fallin’ off the bone” (a country expression that means really tender), remove from heat.
  • Strain to remove bones/meat and aromatics.
  • Cool stock quickly in an ice bath, stirring frequently to help cool evenly;  then freeze or refrigerate. (Do not put the hot stock in the freezer or refrigerator as it will (1) warm up the refrigerator and affect everything in it, and (2) it does not cool evenly and quickly so that you could have bacterial growth.)
  • When the bones are cool enough to handle, remove the meat and save for another use.
I want a neutral white stock, so I’m not roasting bones.  The meat from making this stock may be a bit less flavorful than had it not been used to make stock, but it will still be good to use for  eating.  I don’t add celery to my stock unless I’m making stock for a specific recipe that needs it.  Carrots and onions, and bay leaves provide some sweetness and depth.  Because I may want to use the stock in a recipe calling for reducing it, I don’t add much salt; I do add a little, because I think that helps develop flavor of the stock as it cooks.   (Salt is for more than just making things taste salty!)  The meat and the stock will both likely need to have additional salt added to taste, but now I have stock that I can use in a reduction sauce if I wish. 

There was a bit of cursing in the kitchen as I removed the meat from the bones because I tried to do it before they had cooled quite enough, but for my efforts (sweaty through they were) I have bit over a gallon of pork stock that is cooling in the refrigerator to be de-fatted.

I have about a pound of very tender, succulent pork to use for another purpose, maybe a chili verde since the garden is rife with green chili peppers.  The meat recovered after making stock is not as flavorful as it would be had I cooked it primarily to use  just the meat, but it’s certainly great for a dish that is supplemented with herbs and spices like that.  I could also use it in hot and sour soup, or posole.

My active cooking time was about 45 minutes from setting the stockpot on the stove to washing the stock pot.  That includes the time to remove the meat from the neck bones!  Although not the ideal time of the year to make stock–it’s well worth the effort.  (Have to have some priorities–right?)  In the winter, I’d have put the pot in the oven for the cooking time, but I thought that, perhaps, the stove-top (very low simmer) would be a bit cooler way to do this. (No, I’m NOT planning to check that out any time soon!)

Pot roast with brown gravy

You’ll notice that I said “gravy”–this is too much of a comfort food to use “sauce” because what you’re getting is plain, down-home gravy that needs bread or potatoes to complement it.

After I got my Christmas present (See The Petit Brasier) I had to give it an immediate test run.  What better to test than a favorite braised dish:  pot roast.  This was nothing fancy at all.  You’ll note that I’m not even saying it had a sauce–I really did mean good, old-fashioned, down-home, satisfying brown gravy, lots of onions, and good tender beef.

Even though I say I dislike leftovers, there are some exceptions and pot roast is one of the exceptions.  Sometimes I get the great big chuck roast and make a lot of it and put it in the freezer in single-serving packages, right with the chili, the stock, and some soups so that I can have an “instant” meal–the microwave is great for defrosting and individual portion.  I don’t always want to have to pack and freeze leftovers, so with the small braiser, and a cooperative butcher or meat department at the supermarket, I can make a small pot roast that’s good for two, or maybe three meals since there are some very easy ways to kind of spiff it up for the reruns.

This is really not a recipe–it’s a happening–quantities are approximate as the amount of oil you need will vary with the size of you pan, the amount of mushrooms and onions you are going to sauté–just use what you need.  (Improvise! Wing it!  Just do it–it will work.)

Ingredients

  • 1-1/2 to 1-3/4 pound piece of chuck roast
  • 4 or 5 small onions (or 3 medium to large ones) sliced moderately thinly
  • 2 teaspoons flour, plus flour for dredging the beef
  • about 3 tablespoons olive oil (divided as needed for  sautéing mushrooms and onions.
  • 8 ounces of mushrooms, sliced (more if you really like mushrooms)
  • 1 to 1-1/2 cups of water or stock
  • salt and fresh-ground black pepper to taste
  • about 8-10 medium garlic cloves.

Preparation

  1. Pat the pot roast dry with paper towels and dredge in a flour seasoned with salt and pepper.  Let it stand while you cook the onions and mushrooms.
  2. Slice the mushrooms and sauté in a little of the olive oil until they release their liquid and brown.  When brown and liquid has evaporated, remove to a bowl.
  3. Add a bit more olive oil, and sauté the sliced onions until they start to brown and caramelize.  When partly browned, remove to a bowl with the mushrooms.
  4. Add the additional olive oil, as needed, and brown the beef well on both sides. Put it to the side for final assembly.
  5. Take the rest of the olive oil, and the 2 teaspoons of flour, and brown the flour in the oil until it turns a nice golden brown and smells toasty.  Turn the heat down, add the stock or water to the browned flour.
  6. Add the sautéd onions and mushrooms, and return the browned roast to the pan, with the onion/mushroom mixture around the sides, sprinkle the garlic cloves over the top.
  7. Bring to a simmer on the stove top, cover and place in a 295-300 ° F oven and cook until fork tender–about 2-3 hours (unattended).  Check periodically to see if you need to add more liquid.  You need just enough to make nice thick gravy, and the onions are going to cook down to help thicken the gravy.

For that first meal, all you really need is a salad, maybe a baked potato….or some noodles.For the second serving, stir a tiny dollop of sour cream into the portion of brown gravy for this serving to add some tang and be a bit “stroganoff-ish”, add some steam-sautéd (See Cooking Vegetables Quickly) carrots, or spinach as a side.   What about the third?  As you reheat, add some tomato paste, or some tomato sauce to the last bit for a different taste.

It’s pure unadulterated comfort food.  Even if it’s not a single serving, it’s an appropriate quantity for small-time cooking, but it sure has big-time taste.  It’s great what having the right size pan does for cooking for one.

A son goût!

That fourth chicken thigh…

As I mentioned in my previous post regarding what to do with a package of four chicken thighs when you are cooking for one (and the cat) and don’t do leftovers, chicken soup was in the making with some leftovers (rice, garbanzo beans) as a start.

The broth from cooking those four chicken thighs was so intense that I was able to add a bit of water to it, so I have two servings of chicken soup.  (Soup being a leftover that I tolerate better than other leftovers.)  To keep the time invested to a minimum, I did use a convenience product:  frozen soup mix vegetables .   I do use those for winter use since it lets me have a lot of variety without purchasing all the individual vegetables;  I can throw a handful or so into something for quick soup.  As you can see there was okra, peas, corn , celery, potatoes, green beans, and onion.Not having any canned tomatoes open, I used some of the grape cherry tomatoes, halved and tossed into the mix.

I boned the chicken thigh and added it to the broth and veggies, popped the whole thing into the microwave for six minutes to cook the veggies.  The broth from cooking the thighs had been seasoned only with a bit  of salt to allow for maximum flexibility in what I could do with the meat, so it was a tad bland. I supplemented the previous seasoning with a dash of herbes de Provence, and some crushed red pepper flakes to add a bit of zing.  Made and great bowl of soup

chicken soupGiven lots of veggies, the rice, and beans, and the very flavorful broth, the fourth chicken thigh provided reasonable portion f meat for the two servings of soup.  When we consider that most of us eat much more meat than we  need nutritionally, I was very pleased with the flavor of this quick meal.   All I added was a green salad with cucumbers, radishes, grape tomatoes, black grapes, fresh herb leaves, with a drizzle of extra-virgin olive oil and a squeeze of lemon juice.   With the addition of a glass of red wine (from a box) it was a very satisfying meal.  I have no idea of a calorie count–but I do think it was a healthy meal, particularly for evening when I know I’m going to be very sedentary.

Admittedly, there is a snack for later in the evening: some black grapes, grape tomatoes, and a few nuts, maybe pistachio, or Brazil nuts, or hazel nuts, or a mixture (only a tablespoon or two, though).

Lots of flexibility in terms of what you can do when you’re making a small quantity.   I suspect that the remaining serving, which will be used in a day or two, will get some additional “perking” before it becomes a meal, but I know I’m starting with a good base of tasty broth and a bit of meat.  In looking over what’s likely to be available , I suspect that I’ll add a bit of cabbage, and maybe some chile pepper to that last batch–but who knows.

Even though I bought the more expensive, free-range, organic chicken I think it was economical:  essentially five meals from that one package of chicken.  The extra flavor from the chicken paid off.

A son goût!

Take four chicken thighs…

If you are going to cook for one, you need to get away from recipes that specify exact quantities–it’s a step toward learning to improvise as you cook.  I’d urge you to take a look at Kitchen Express by Mark Bittman–you don’t have to buy it, thought it’s a great book to have; go to the library and check it out. (It’s also available for Kindle, too)  Other simple, and simply good recipes can be found at The New York Times, and at Mark Bittman.com.  You will find recipes that are easy to do for one because they are “quantity-less” in the sense of the typical recipes.  They don’t call him “minimalist” without a reason–a very few ingredients can make some wonderful eating.

Now for those four chicken thighs, cooked as described in “The Microwave in my Kitchen”, here’s what has been done with some, and what is intended for that fourth one:

1.  Chicken salad for a sandwich, quickly made by adding some minced red onion, a bit of cutting celery (See Herbs page) leaves and stems, salt, fresh-ground black pepper, a squeeze of lime juice (or lemon juice), and a drizzle of extra-virgin olive oil.

2.  A warm meal of chicken with  part of a can of chickpeas left from a previous use.  Sautéed a handful of onion in olive oil until softened, added a big clove of garlic, the chicken cut into bite-sized pieces, added some halved grape tomatoes, about a tablespoon of chopped sun-dried tomatoes, a dash of Syrian oregano (still growing on my deck); finish with salt and fresh-ground black pepper to taste.   Add a  single-serving salad of mixed greens and had a quick, satisfying meal.

3.   The third piece went to make some quick chicken hash for Sunday breakfast as follows:  In a 12-inch nonstick skillet sauté a handful of diced onion  in olive oil until just starting to brown.  Add two minced garlic cloves (I like lots of garlic),  and cook for two or three minutes.   Meanwhile, open a can of diced potatoes (I told you this was quick–obviously you can start with raw potatoes and sauté them until tender) and brown them lightly. Rinse and drain the potatoes, add to the skillet and sauté until they start to brown.

Remove half the potato mixture–this is destined for another use.  Remove the meat from the chicken thigh if it was bone-in and dice the meat.  Add this to the potato mixture in the skillet, along with some (about 1/2 teaspoon) fresh thyme (again still growing on my deck) and continue to sauté.  When the potatoes and chicken are slightly browned, remove to a plate and keep warm.  Cook one egg (or two if you are really hungry) to medium, and serve over the chicken hash.

The portion of potatoes that you removed from the skillet can be used in different ways: the are likely to become a kind of quick version of a Spanish tortilla by just  warming and adding a couple of eggs and serving with a salad or vegetable.

4.  With the broth obtained from cooking the thighs in the microwave, I plan make a meaty chicken soup using that fourth chicken thigh, using that bit of  rice left  from another meal.  I’ll add more veggies, perhaps a bay leaf, and some of my “lazy” favorite (and only) herb mix, herbs de Provence. I’ll see when the time comes–since I don’t do leftovers, I probably shouldn’t do predictions either.

There will be a follow-up on that fourth piece of chicken to let you know where my improvisation lead me.  I’ll give you another example, using a recipe from Kitchen Express for a lentil soup that just blew my mind (See An Awesome Lentil Soup).  It was such an unexpected combination of flavors, and it is one that I keep using to improvise with other ingredients, as well as coming back to the original.  It’s a recipe where I could also make use of the last piece of chicken.

“Convenience” foods for cooking for one

Time frequently seems to be of the essence when cooking–for one or for many.  There are some things that I discovered that save me lots of time–and that means that I’m much more likely to cook a meal, rather than do carry-in, or reach for the peanut butter jar!

When you see “convenience” food, I dare say your first thought is processed, open-heat-and-eat food.  That’s not what I’m talking about here.  I’m thinking of things you prepare yourself with choice ingredients, and freeze, or otherwise “put by” for later uses that can shave time off of recipes.

How many recipes do you have that start with  a “flavor base” like  sofrito (Spanish), soffrito (Italian), mirepoix or mirepois (French)?    Lots, probably.  How many times have you passed on that recipe because you don’t have those, you did not want to spend the time mincing, dicing, or you pulled that bag of celery out of the crisper, and–yuck–it’s no longer fit to use!   Cooking for one, I find celery a particularly frustrating ingredient.  I like celery–but it always seems to go bad in the crisper.

Many flavor bases to start soups, stews, et cetera begin with carrots, celery, onion, diced or minced and sautéed  in olive oil (or maybe butter).  True it’s only a few minutes work to do this–if you have the ingredients.  My solution to this has been to take celery, carrots, onions, and use the food processor to chop a large batch of this useful mixture, sauté in a mild olive oil with just a touch of salt, and then pack it into small containers in lots of a couple tablespoons (or freeze in ice-cube trays and transfer to zipper-lock bag), and put it in the freezer so that when I need it, I have the basic prepared carrots, celery and onions, to which I can add garlic and herbs as needed for a particular recipe, and I’m off to a running start.

I do keep canned beans around as a “convenience” food, but I much prefer to cook my own dried legumes (pulses).  Since that is a time consuming thing, I have found a way to make those into “convenience” ingredients:  cook a large batch until almost fully cooked, and then freeze with some of the liquid in small quantities–a cup or so, whatever you would most likely use.  I’ve found that they hold well in the freezer, and can finish cooking quickly, so that you have the advantage of home-cooked quality, without the time investment.  I’ve done this with lentils (my favorites being the French LePuy) of all sorts.  True, lentils cook quickly and do not require soaking, but I can still save time with these.   I particularly like to do this “precook” with beans since that means that I can have lots of variety and have the convenience of canned, with specialty beans that are very tasty.

Grains can also be done this way too.  That left-over serving of rice that I’m sure I’m not going to use this week gets labeled, dated, and put into the freezer for a quick serving when I don’t want to take the time of cook rice from scratch.

Risotto is another favorite main dish for me–right in my category of comfort food with mac ‘n’ cheese, and tomato soup; I don’t find cooking it to be difficult–in fact it’s rather relaxing, but time consuming.  I’ve tried some of the “quick” recipes (see Risotto post) and have not been too dissatisfied with them, but I’ve also found that I can make a big batch of risotto to the point where it’s ready for the addition of the Parmigiano-Reggiano, and then freeze it is serving-size batches.   It will thaw quickly, and lets me have risotto fairly frequently.   It’s easy to add vegetables or seafood or other quick-cooking things as you finish this preparation.

Another “convenience” ingredient is homemade broth or stock.  While I will admit to keeping canned/boxed broth/stock on hand, I much prefer to have the real homemade thing, and that is not hard to do:  make a large batch on a cold rainy day when it’s good to be indoors; freeze it in small quantities for future use.   I’ve found a very quick way to make chicken broth too.  More about that later.

All these little conveniences can add up to much better small-time cooking with big-time flavor even when cooking just for one.

A new cookbook

A few weeks ago, I had a friend visiting (as a house guest) from California.  We were out and about doing some things that I don’t usually do: visited A Southern Season to browse for housewares and foods, and we visited The Regulator Bookshop. Both were having their summer sales.  As usual, I came home with things that I did not expect to buy.

One of my “finds” at the bookstore was The Pleasures of Cooking for One by Judith Jones.  This is an admixture of philosophy of eating alone as well as some recipes, and, best of all, lots of tips for not having left-overs.  While some of the recipes are for things that cannot be bought in small quantities (like pork tenderloin) she provides recipes and suggestions about make several different dishes from the “left-overs” so that they really don’t taste like left-overs. While this does require some meal planning, the emphasis here is on flexibility and improvisation.  I was impressed that the recipes here were real meals for real enjoyment.  I think that this is a worthwhile addition to my cookbook library.

Keep it cool

Cleaning out the is refrigerator is such a drag!  For those of us cooking for one, it is often triggered by that appalling smell that greets us when we open the door of the refrigerator to get the milk for morning coffee.  It is the harbinger of the lost leftover or the bunch of beautiful leafy green stuff (now transformed into juicy, olive-drab color in the crisper because it was simply too much to use?  How do we avoid this kind of waste?

I’ve always disliked wasting food; I’ve also always had a dislike of most leftovers—they usually taste leftover!  Admittedly there are thing better on the second day—but that does not make them leftovers that I dislike.  It’s true leftover leftovers that I dislike so I’ve always looked for ways not to have them.  Frequently, that involves sharing the pot of soup with a friend and putting some in the freezer, because I am constitutionally incapable of making a small pot of soup!  Most of my neighbors understand about my “food crises”.

The implications of my dislike of leftovers and having too large a quantity of something was brought home to me recently when I was reading about sustainable agriculture.  In Just Food by James E. McWilliams was a discussion of the carbon footprint of food.  We typically think in “food-miles”, but he introduced the concept of “life-cycle assessment” which looked at the energy consumption of food production from seed to its appearance on the table.  There were some startling statistics there—the greatest energy consumption, according the studies cited by this author, is in production, not transportation.  What really hit me was the studies on food waste:  1.28 pounds per day per typical household (p. 28).  So?  I know I’m not a typical household, just me and the cat, but I had to wonder about the amount of waste from my food use. (Admittedly, the cat usually leaves the bits of carrot and onion from her tiny part of the beef stew, but let’s not get too picky here.)  I am interested in environmental responsibility, carbon footprint; so I need to waste less food.  How can I do that?

Assuming that I cannot buy smaller quantities, I obviously must be more efficient in my use of whatever quantity I purchase.  So I need to do some “prep”, not just put what I don’t use into a plastic bag and put it in the refrigerator.  There are two primary causes of spoilage (changes in texture and flavor that make food inedible):  microbial action, and the plant’s own enzymes (On Food and Cooking, Harold McGee, p. 166).  Obviously just simple refrigeration is not enough for my rate of usage–in order to prolong the viability, I need to protect against microbial action and against the action of enzymes.  That would suggest at least blanching the extra green stuff (or any other color veggies) before I refrigerate or freeze them.  Not anything too time consuming in that.

Blanching is a simple technique: In this process, food is simply immersed in boiling water for a short period (depending on thickness) and then plunged into ice water.  This is enough to kill surface microbes and to inactivate enzymes, so my green stuff should stay edible longer.  The down side of that is it may be an extra step–I certainly don’t want that.  Cooking also achieves these ends–so maybe I can sauté my greens in some basic way that will allow me multiple uses and eliminate the extra step (and energy expenditure) and still preserve them; however, despite the cooking, the food still needs to be treated as a “leftover” (not eaten within two hours of cooking) and safety precautions for “leftovers” observed.  The rule of thumb seems to be 4 days for things like cooked meats, chicken, et cetera; if it smells off, don’t eat it even if it’s less than four days.  Lots of additional information is available from some of the links above.

Toscano kale, or other greens can be sautéed quickly with some basic seasonings, for example, a mild olive oil, a bit of salt and then have additional seasonings added as needed for other uses.  I’ve done this basic thing and use the prepped greens in pasta sauce, filling for an omelette, as a side dish with some red pepper flakes and garlic added…very flexible and the entire batch of greens got used!  Planned, flexible leftovers!

That raises the question of how long can I store something like the cooked greens in my refrigerator and still not lose taste or have a health hazard.  First the refrigerator should be set to hold a temperature of 40 ° F  or less (USDA) or less.  You should keep a refrigerator thermometer (inexpensive and available at the grocery store) to monitor the temperature of the refrigerator.  If it is within that range, you can find suggested time for refrigeration of meats, poultry, seafood at FoodSafety.gov.  But remember that the safety of refrigerated leftovers depends on their proper cooling and storage.  Don’t leave your hot food to cool on the counter.  Put it in the refrigerator right away–that’s what refrigerators are for–to cool things and keep them cold.  See the food safety links for instructions on how to cool foods properly and how to store and use leftovers safely.