Cabbage and pork

Ready for the oven

I guess it’s the cold weather, but seem to be craving simple, warm meat and vegetable dishes. Not very long ago I was making fårikål–lamb and cabbage stew because I found lovely shoulder chops in the meat case.

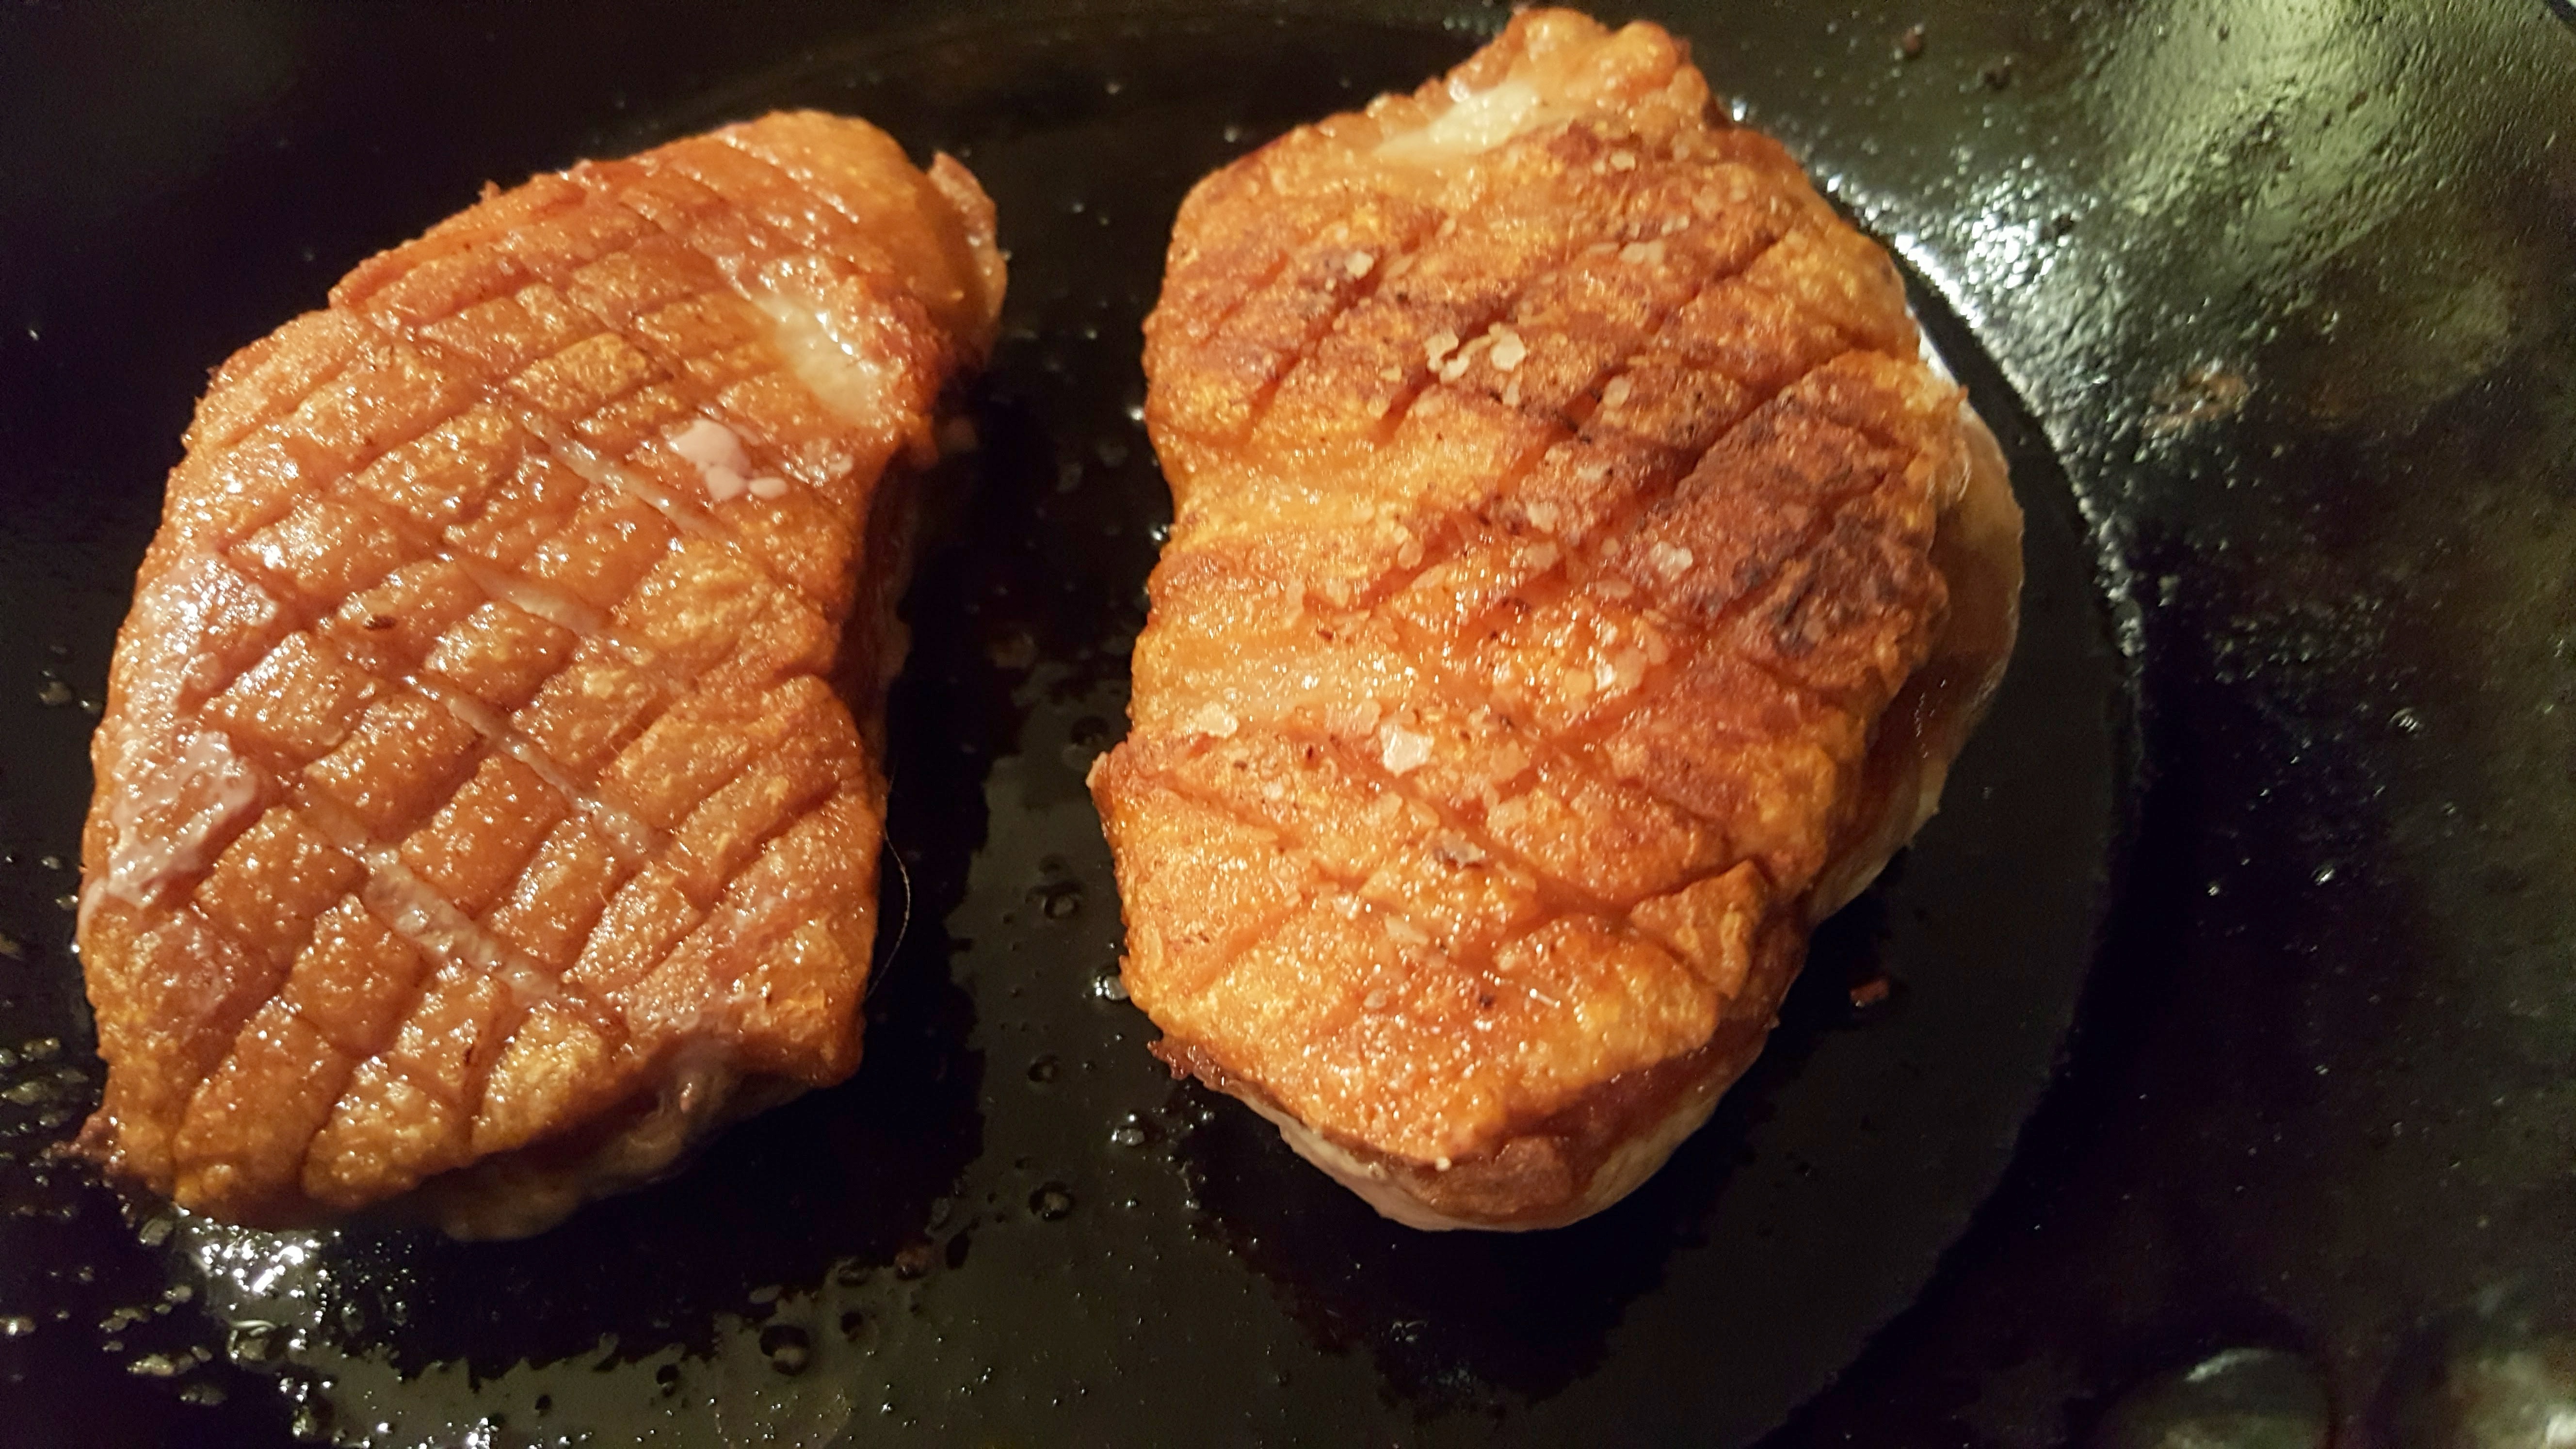
This week on my stroll around the meat case looking for bargains I found a lovely package of pork butt steaks–perfect for making another of my favorite winter dishes: braised pork and cabbage with an unusual twist to the seasoning, thanks to Jacques Pepin (and his wife).

A whole pork butt is just not in the picture when you are cooking for one! Even when you freeze part of what you make–and this does freeze well, and I do want some in the freezer for quick meals, I still really prefer making most things in quantities NOT for eight people. This recipe is one that is SO easy to adapt for cooking for one. Chops or steaks are a good alternative to a whole pork butt.

I almost made this recipe just as it was posted in the original–except I browned only one side of the pork since it was going to finish in the oven. My other modification, was to add just a touch of coriander seed to the spice mixture. For chops or steaks like this, about 30 to 45 minutes with the rub is enough.

This is a great mix of a little spicy, a little sweet, a little sour–not what you usually expect when you hear pork and cabbage!

Not photogenic, but very tasty


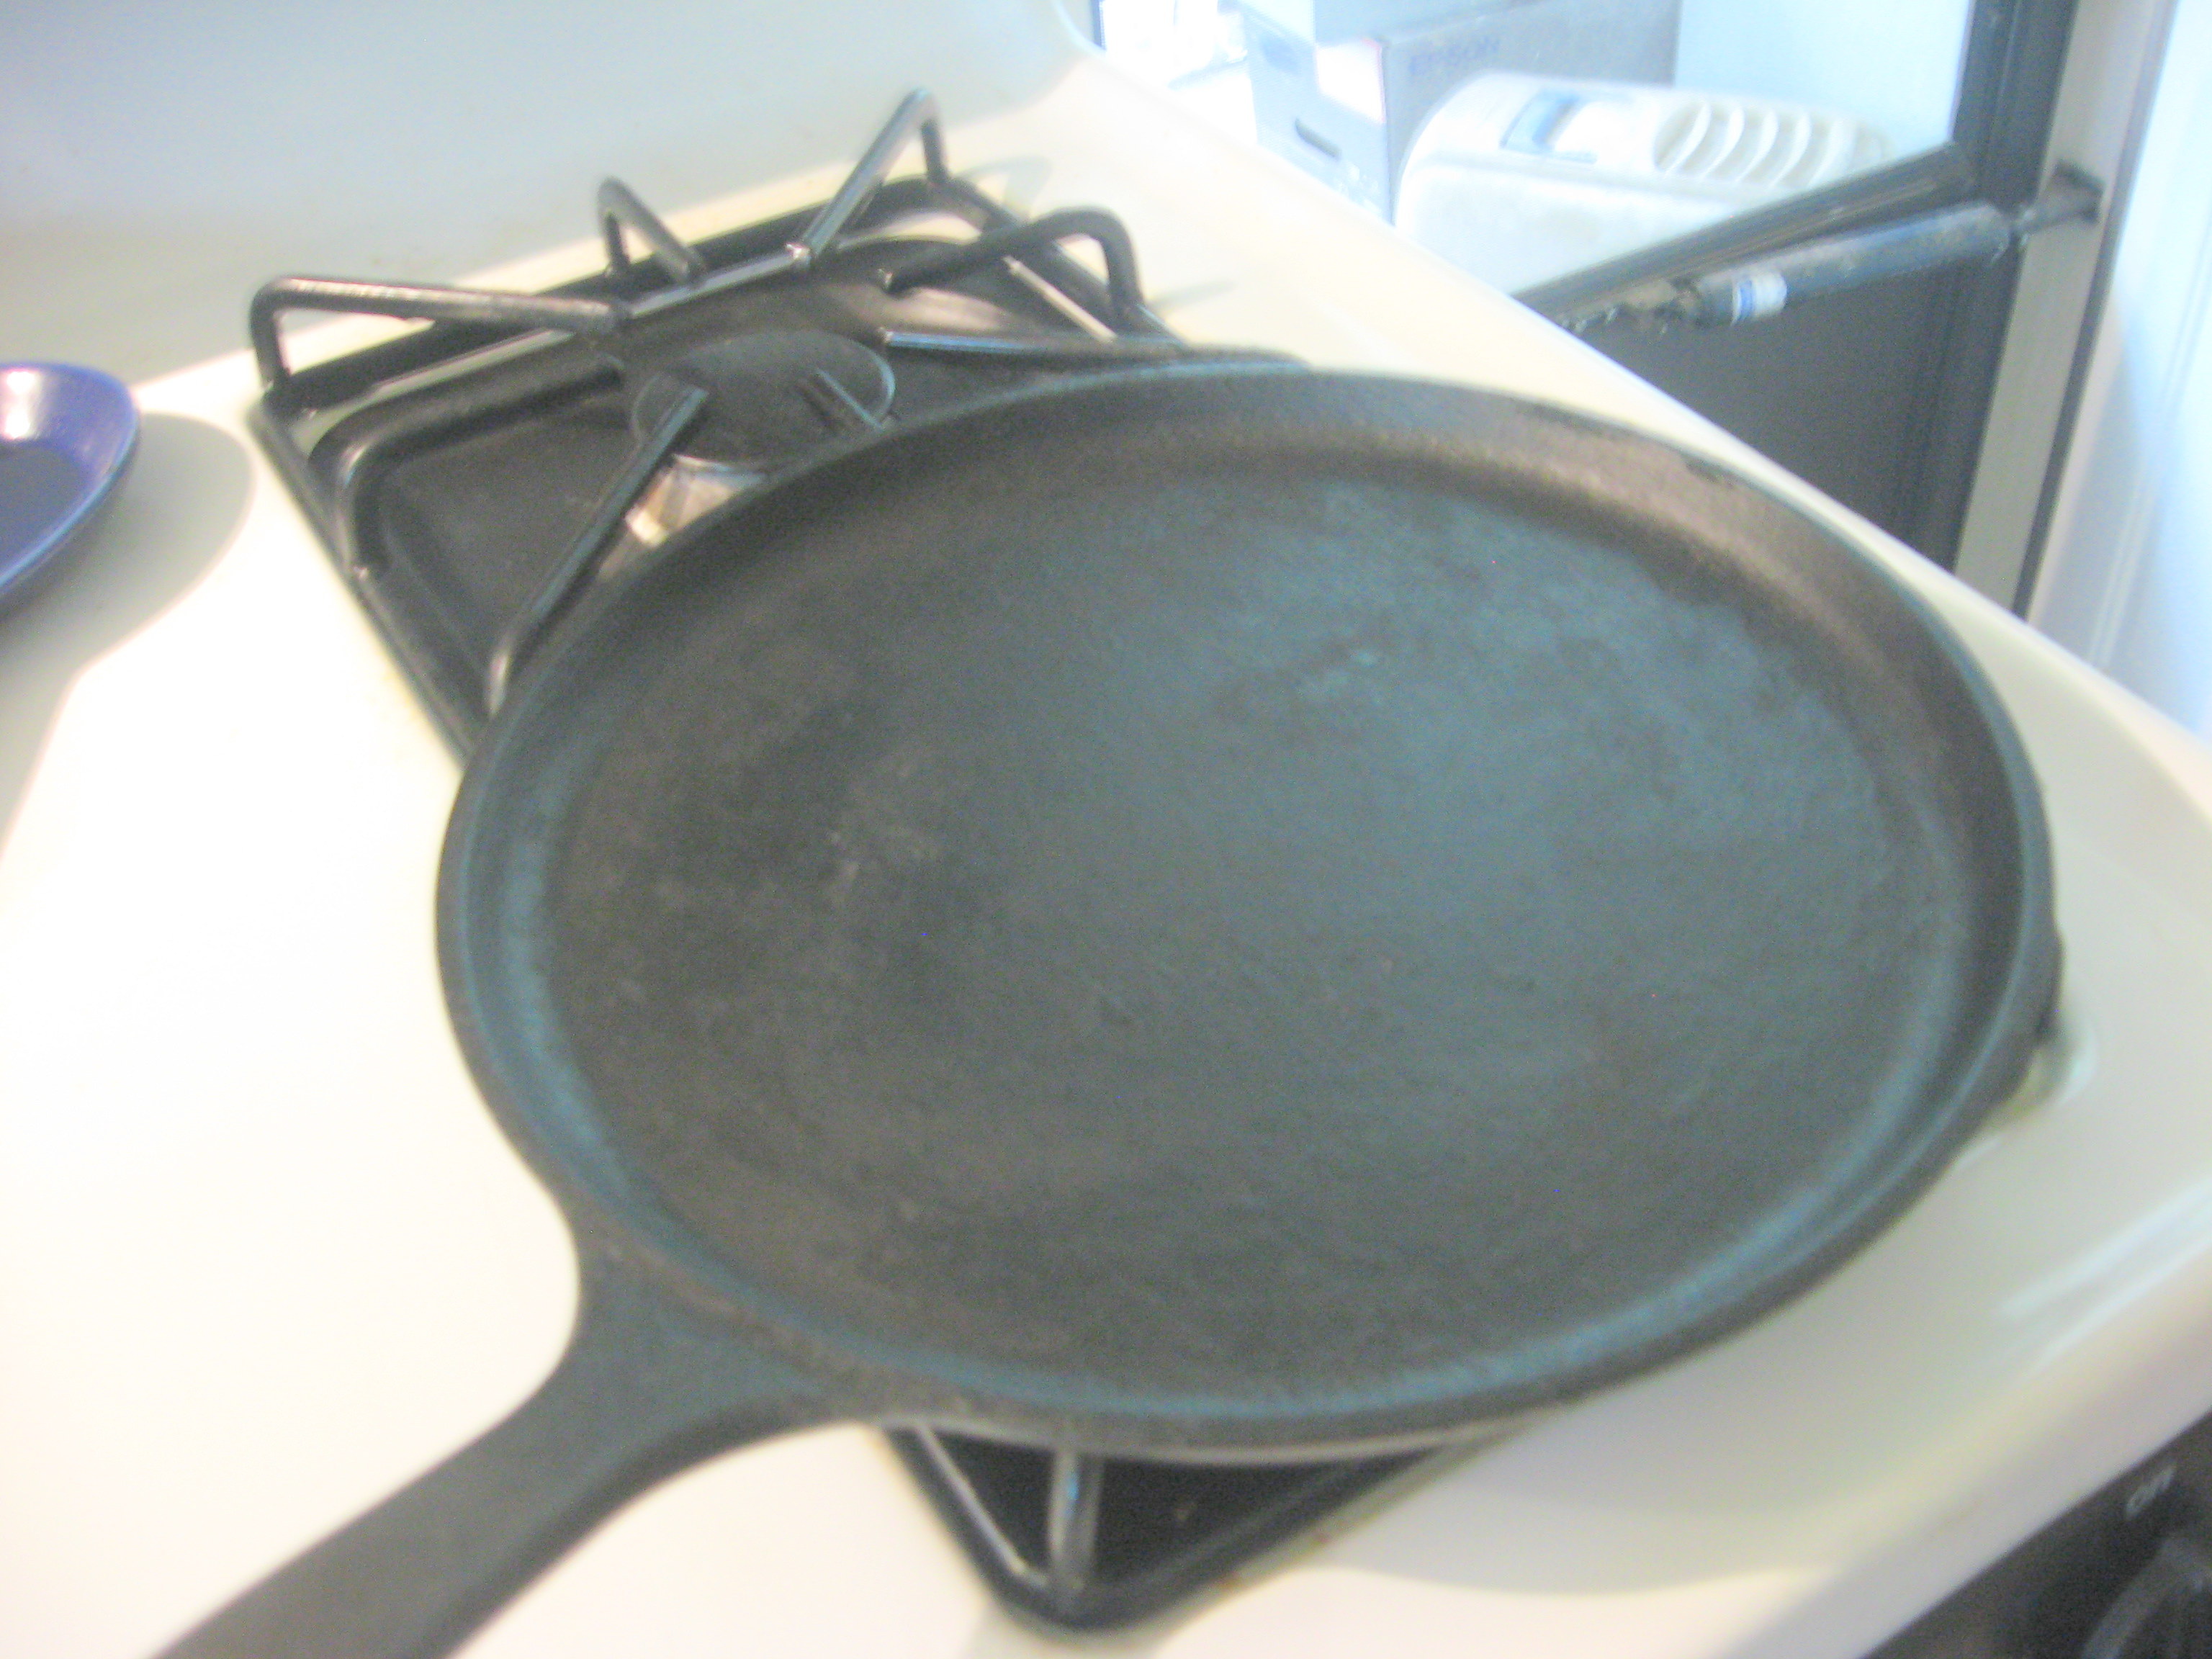
In cold weather–or even just chilly, grey, rainy weather–I love making braises in the oven. I’m heating the house, so the added heat is fine. The aromas of a good oven-braised dish warm the soul too.

A son gôut!

—Ô¿Ô—

Just wing it!

20190105_165634I was planning to have roast turkey thigh, but once the package was opened I discovered it was wings instead!  I had never cooked or eaten turkey wings before, but I love chicken wings rather than white meat.  This turned out to be a happy accident–leaving me wondering why I’d never tried turkey wings before.

Turkey wings look a lot like chicken wings–just much bigger.  “An Anatomical Guide to Chicken Wings” from Kitchn will give you a good start on understanding wing anatomy and how to describe the parts.

My turkey wings were just the “flat” and the tip–no “drumettes” in this package which was fine with me since my favorite part of the chicken wing is the “flat”.

I did a little skulking about on the internet to see what times and temperatures were recommended for roasting or baking turkey wings.  I discovered a wide range of temperature recommendations–from 275°F to 425°F, and quite a range of times–from 30 minutes to three hours.  (Just like with chicken wings if you look.)  After perusing a few recipes I decided that one using “crispy” in the title fit my appetite for this particular meal.

I seasoned the turkey wings (leaving tip and flat together–pure unadulterated laziness as well as the pressure of a looming deadline) with kosher salt and let them sit for about 45 minutes.   Then I patted them dry, rubbed them with olive oil, and put them on a rack on a foil-lined (more laziness) rimmed baking sheet, and gave them a final sprinkle of salt and black pepper.  After baking for 1 hour and 20 minutes I had some seriously crispy wings.  The only detraction was that the meat wasn’t as tender as I might have wished.  But definitely edible!

For my next attempt at turkey wings (yes, there will be another) I’ll try splitting the cooking time starting with just a little water in the baking sheet covered with foil, followed by some open cooking time for the crisp skin.

If you’re one of those people who think there is never enough crispy skin on the Thanksgiving turkey, you’ll love these.  Even the tips can provide some good nibbling if you are one of us.

The bones and the roasted tips from these wings went into the  Instant Pot for a quick little batch of brown turkey stock.  These wings will provide one more meal with turkey soup.

20190105_182447

A son gôut!


—Ô¿Ô—

Chilly weather food

Summer is not my favorite time of the year: I just don’t like hot, humid weather. It makes me kind of listless and wilted.  I don’t mind seeing winter come around because it’s my favorite cooking time.

One of my fall and winter favorites is fårikål.    That’s what I started out to make today since it’s chilly, damp, grey, and seriously pluvial but I got distracted and stumbled on a similar recipe that looked so good. From the North Wild Kitchen, I found slow-roasted lamb shoulder with cabbage.

That seemed easy to adapt to cooking for one.   Since my shoulder chops were nice and thick and it eliminated me having to trim them into chunks–just the thing for a lazy cook.

I have to admit that I didn’t do the apples, although I’m sure that would have been very good with it;  I just didn’t want to go back out into the rain to the grocery store to retrieve an apple! ( I did say “lazy cook”.)

My only modification here (other than using chops) was to cook it in my Romertopf instead of a covered baking dish since I was making a smaller quantity for just me (and the cat).

This is another keeper for cooking lamb and cabbage!

A son gôut!

—Ô¿Ô—

Seasoning cast iron

I have cooking equipment in my kitchen that needs seasoning: double-burner cast iron grill/griddle, a round single-burner griddle, two small skillets (the two-egg size), and a carbon steel skillet.  Once seasoned these take little care.

I’ve always used vegetable oil to season mine. I was interested to find an article recommending beeswax.  Now that I have bees, perhaps I will try that next time my seasoning needs refreshing.  It seems as if it might have some advantages.

—Ô¿Ô—

Autumn delight: quinces

Now I really feel as if fall is here!  I found quinces in the market!  You don’t often see them (they appear in late fall (just before frost), but when you find them, you just have to

quinces on tree

from elderflower orchards

do something with them.  One of the things to do with them is to let them sit around in your fruit bowl and simply perfume the room.

Although they are considered by most to be inedible uncooked, they are wonderful to cook with.  Simply poaching them turns them a lovely rosy shade, and makes them absolutely luscious. Or there is membrillo (quince paste) which is lovely with cheese–particularly manchego

Here is a favorite recipe from David Lebovitz.  I’ve included the recipe below, but you really should read the additional information from his blog.

—Ô¿Ô—

Poached Quinces

(From David Lebovitz’s living the sweet life in paris)

Quince are not usually raised commercially so you won’t find many picture-perfect specimens. Expect a few bruises and scrapes, but avoid fruits with soft, dark spots. Like pears, quince ripen from the inside out, so later in the season, you might find fruit that’s past its prime when you cut them open. I look for firm quinces and lift them to my nose; if they have a nice fragrance, there’s a good chance they’re good candidates for poaching.

Some recipes advise soaking the peeled quince slices in lemon-tinged water to avoid browning. I’ve never done that, but instead, I simply slip them into the warm poaching liquid and any trace of discoloration soon disappears. Of course, this recipe can be halved, or increased.

7 cups (1.75l) water
1 cup (200g) sugar
1/2 cup (150g) honey
1 lemon (preferably unsprayed), cut in half
1 vanilla bean, split lengthwise

6 large, or 8 medium, quince

1. Mix the water, sugar, honey, lemon and vanilla bean in a large non-reactive pot and turn it on to medium-to-high heat. You can add any additional spices or seasonings, as indicated above, if you wish.

2. While the liquid is heating, quarter, peel, and remove the cores of the quince. Make sure to removed anything tough for fibrous, being very careful with the knife. (The intrepid can wear one of these.)

3. As you peel and prepare the quince quarters, slip each one into the simmering liquid. Once they’re all done, cover the pot with a round of parchment paper with a walnut-sized hole cut in the center and place it on top.

4. Simmer the quince (do not boil) for at least an hour, until the quince are cooked through.

Cooking time will vary, depending on the quince. They’re done when they are cooked through, which you can verify by piercing one with the tip of a sharp paring knife. It’s not unusual for them to take up to 2 hours, or more.

Serve warm, or at room temperature. To store, pour the quince and their liquid into a storage container and refrigerate for up to one week.

You can also use these poached quince to make my Quince tarte Tatin.

♦♥♦

Thank you, David Lebovitz!  Wonderful recipes on this website.  It’s a go-to for desserts.

—Ô¿Ô—


One-pan cooking

It’s really no secret that I don’t like washing dishes–I know some people say that they do, but I simply don’t believe it (I can kind of understand liking ironing, but…). It’s not as wv5220x
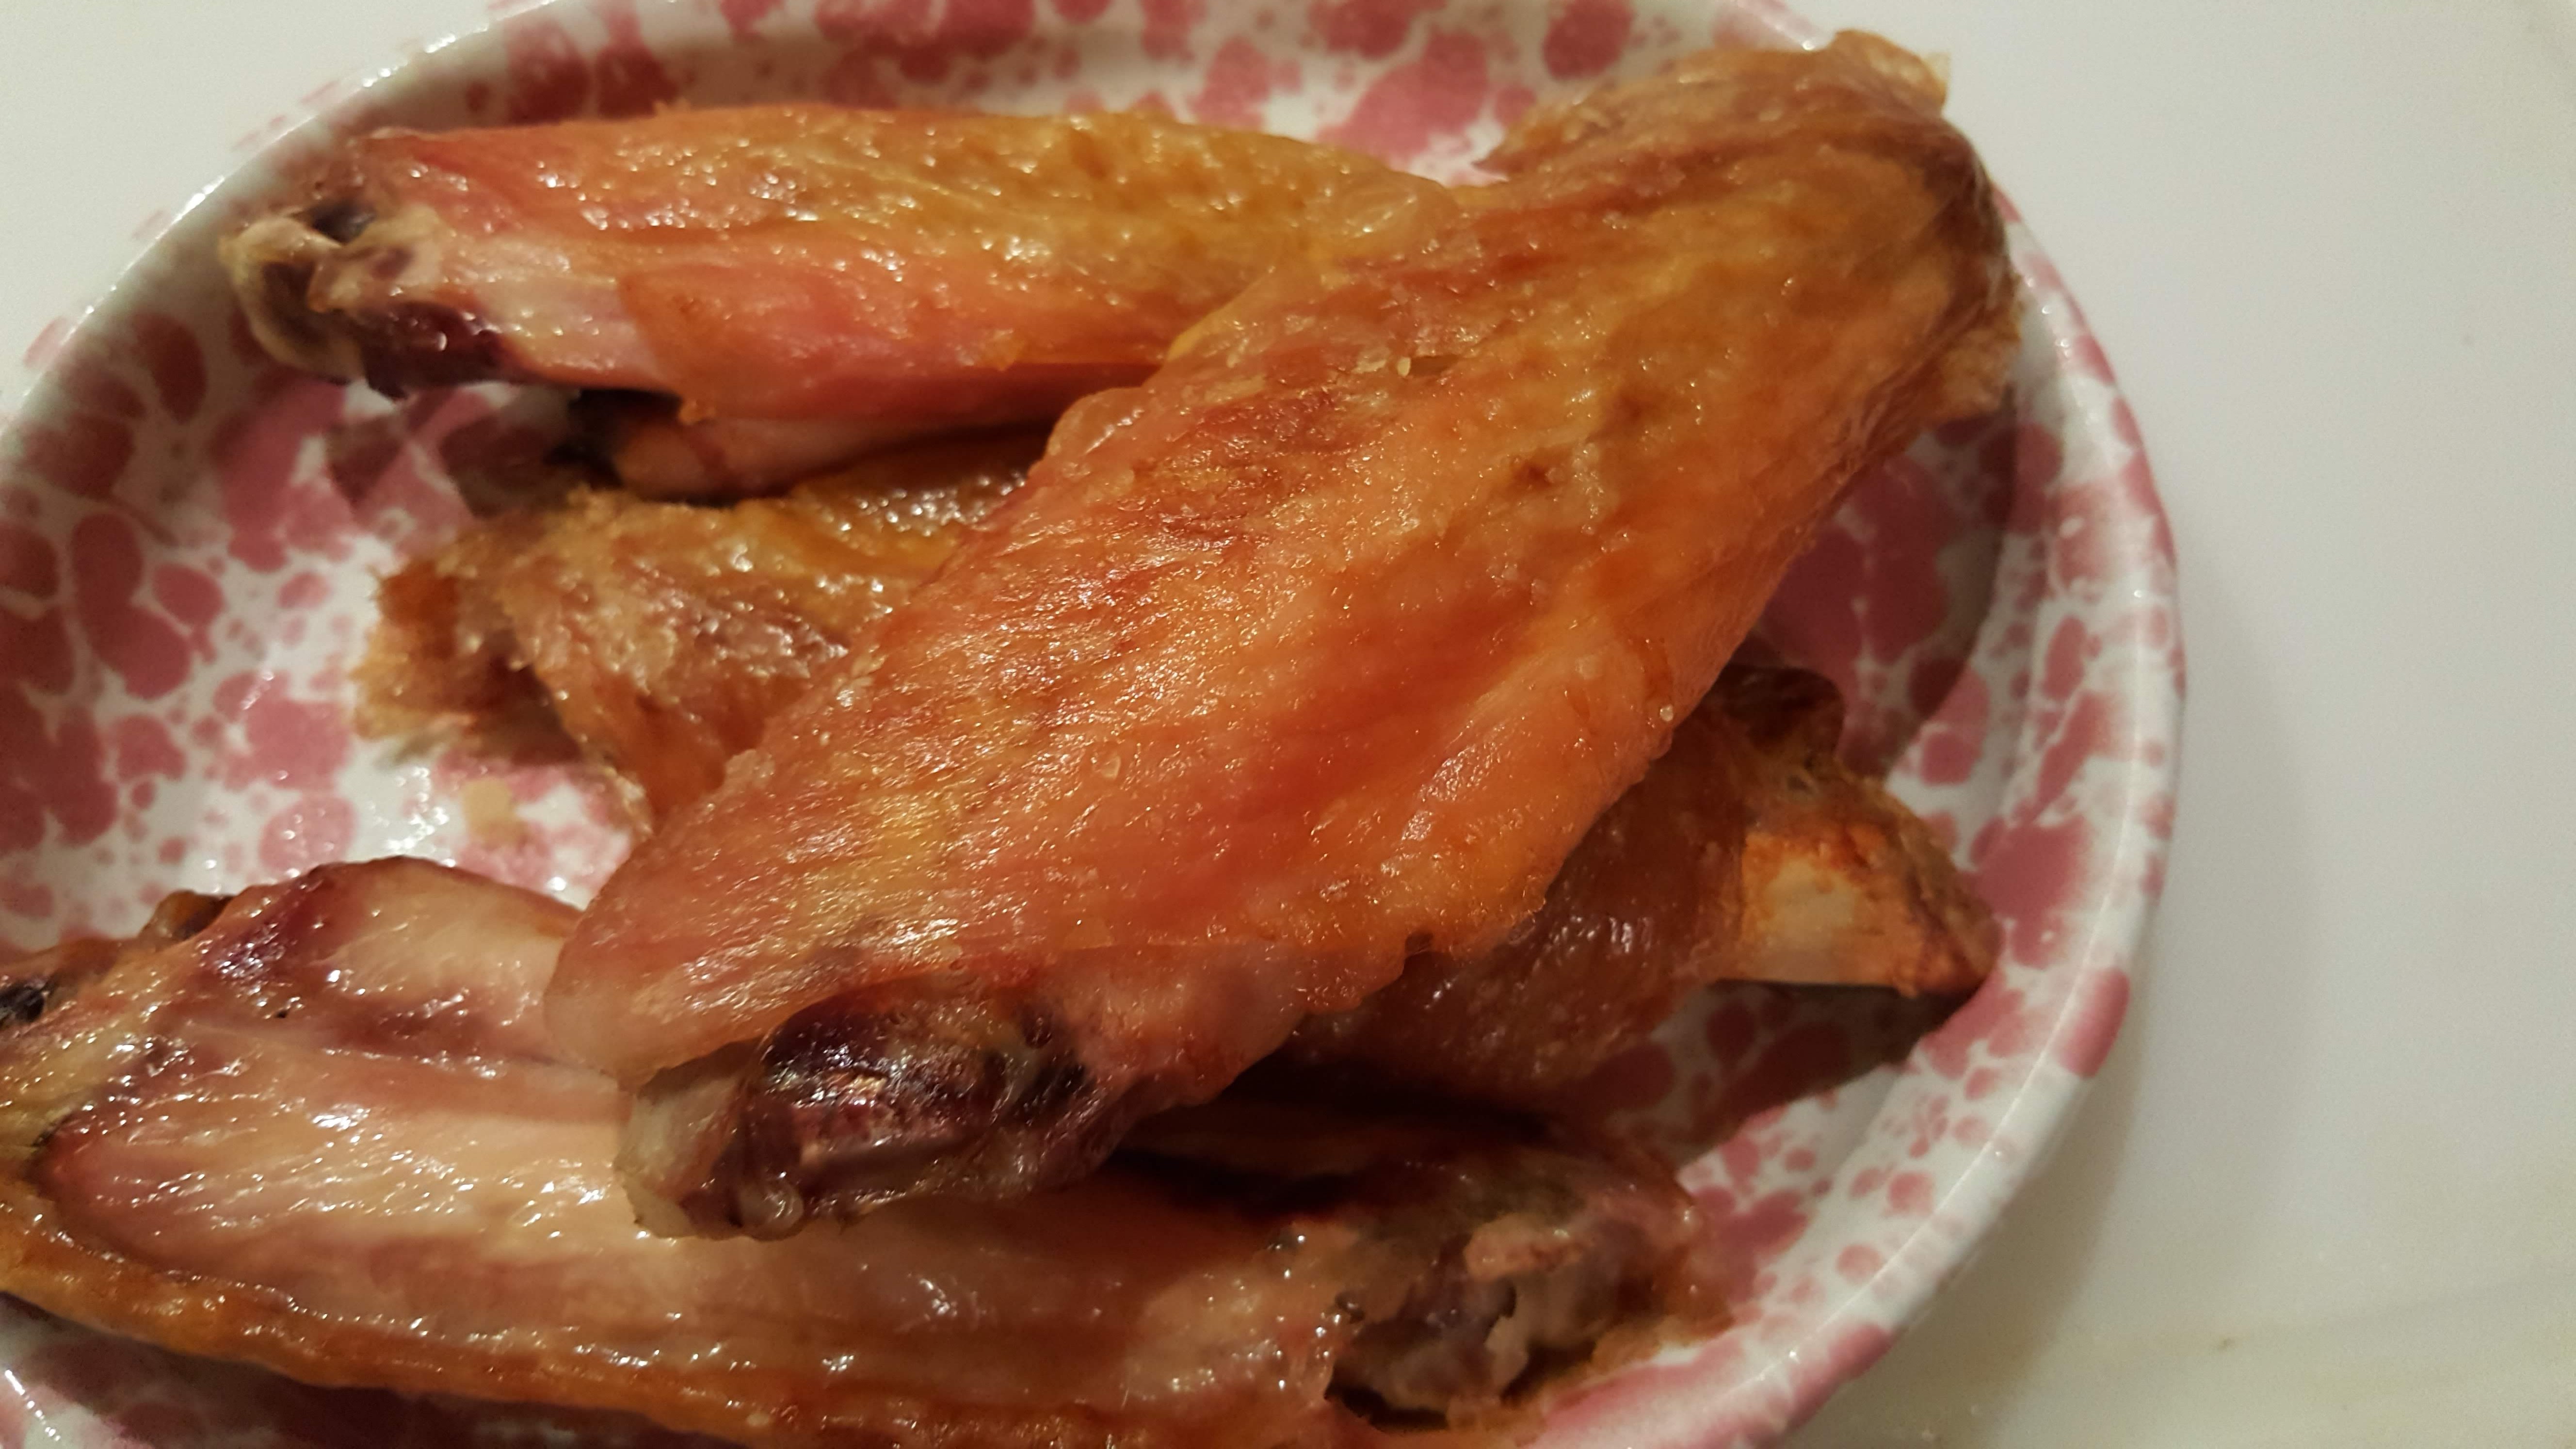
though I’ve never mentioned “one-pot meals” here and it’s pretty obvious that I don’t feel a huge need for recipes, but sometimes some guidelines are nice.

In perusing the internet I see lots of recipes that can be done in one pot–or maybe a sheet pan. These are so easily adaptable for single-serving cooking, use things that come in “chunks”,  and that it’s possible to buy in appropriate quantities.  For winter cooking I’ve got no problems using the oven as it simply contributes to heating the house. I’ve bought a one-quarter (9 x 13 inch) sheet pan to prepare for winter meals.

Summer is another matter–no oven use for this person.  I don’t want to add any extra heat, but cooking on a single burner would be within my limits (maybe actually doing it on an induction unit, too.)  Today, I found an article in Bon Appetit Basically that provided some guidelines for building a one-skillet meal that seems very amenable to improvisation–in other words a how to approach.

I’d suggest you take a look at the full article, but in summary:

  1. Cook your protein first. For quick-cooking things like shrimp, etc be sure to undercook just a tad.
  2. Add aromatics of your choice.
  3. Deglaze with your choice of liquid.
  4. Add vegetables; quick-cooking ones are best but that leaves a lot of options.
  5. Add pre-cooked grains if you wish.
  6. Return to protein to the skillet, to reheat if necessary.
  7. Serve!

If you do this in a well-seasoned cast iron skillet the cleanup is going to be really simple. Even better, if the skillet can also go in the oven you’ve even more flexibility in finishing off you one-skillet meal. (Tonight, my skillet will contain some good onion sausage and kohlrabi leaves with a few aromatics–onions and garlic.)

A son gôut!

Cast iron cooking

I grew up with cast iron–and I still love it. I have some enamel cast iron cookware (Le Creuset), but I also use the plain black cast iron stuff that is a workhorse in the kitchen, for example, my griddleLodge is a readily available brand., likely even at your local hardware store.

Plain black cast iron is a great way to add some useful items to your batterie de cuisine inexpensively.  Sure, it does have some limitations, but lots of advantages, too. Sure, Le Cruset enameled cast iron is wonderful, colorful, but not an inexpensive way to get the advantages in your kitchen (and it also has some disadvantages).  One thing about cast iron: it is heavy! Seriously heavy–that’s part of what makes it desirable, but can make it difficult to handle; skillet-shaped pans can with dual handles rather than the long handle of the skillet can be a good idea if you are concerned about the weight.


There seem to be some misconceptions and myths surrounding this versatile cookware. The concept of “seasoning” seems to induce a particular hesitancy for some. Even though I’ve used it for a long time (not willing to give away how long) and feel comfortable with it, there is an online course with Clifford A. Wright (a favorite food person of mine) on cooking with cast iron (through Craftsy).

One of the things I’ve always liked about Clifford Wright’s recipes is the focus on flavor, without a bunch of frou-frou stuff–it’s like black cast iron–just the basics. He also stresses looking and tasting as part of the cooking so that you can learn to improvise as you cook what you want to eat as you like it. This orientation carries right into this course. If you need an introduction to the care and feeding of cast iron, this is worth every penny.  The recipes that are demonstrated are available to download as PDF document.

This really gets to the heart of single-serving, simple, delicious, easy cooking for one! One of my favorite “helpers” for this kind of cooking has become fused and infused olive oils.  I especially like Bull City Olive Oil as a source since I can taste the oils before I bring them home. If I’m unsure how I’ll like it in actual cooking, I’ll get a “mini”–just enough to try a few different ways in my kitchen: new addition for me is dill infused oil. I like dill, but it’s not a flavor that’s at the top of my list–so it will be interesting to see if I want (need) a bigger bottle of the oil–(I’m thinking just a drizzle to finish off griddled salmon).

Another thing I liked that there is no focus on high-tech equipment–the recipes are demonstrated using kitchen equipment like an old-fashioned, hand-cranked egg beater. You won’t watch the videos and then feel you need to run to the cookware store for equipment!

Basic techniques are explained and demonstrated very well, and recipes that are easy to adjust for cooking for one.  There are recipes from around the world to bring some adventure to your cooking for one–all this with inexpensive black cast iron.

(Disclaimer: no affiliation or monetary considerations from anything mentioned here–just personal opinion and my (opinionated) preferences here).

Improvise! A son gôut!


It was a good kitchen friend….

Krups rice cooker IMG_3796I’m sure that you’ve gathered from my posts that I really like my Krups multifunction pot: rice cooker, steamer, slow cooker, and even a bit of sous vide thrown in. It was a good kitchen friend…and I hope to pass it on to someone who will care for it as much as I did since it’s still in good working condition.

Some time ago a friend loaned me his “extra” pressure cooker, and I like it a lot. I kept thinking that as much as I used beans that it would be useful for me to have a pressure cooker–not just because of the beans, but because it would be a good way to do summer cooking when I don’t want to tax the air conditioning; however, I just never got around to adding another thing to the kitchen. I even decided which I would buy when I did add it. A Fagor that could be used with an induction unit. As a proficient procrastinator, I just never got around to buy the pressure cooker. Now I’m glad that I didn’t.

I did add the DASH yogurt maker (yes, homemade is better) to my batterie de cuisine and I’m glad that I did, but that, too, is going to a new home where it will be appreciated.  Are you wondering yet what is going on in my kitchen?


You’ve probably guessed–the Instant Pot has invaded my kitchen. I’ve now had it for eleven days (as of 01 October 2017). It did not linger in the box. It was unpacked and used the day after it arrived. So far it has been used at least once a day every day that it has been here.

This wasn’t a spur of the moment purchase. I did a lot of research before I decided to purchase one, and a lot more before I decided which one I wanted to buy. I read a lot of reviews, perused a lot of recipes, checked out the Facebook Instant Pot Community, and went so far as reading America’s Test Kitchen/Cook’s Illustrated reviews of the multifunction cookers which were pretty damning)–but I bought it anyway because I think that once I “get a feel” for how it works it will be a great kitchen appliance.

I’ve made my lamb and garbanzo bean stew in it, cooked my steel-cut oatmeal in it, made soup, and a number of other things already. Yes, there is a bit of a learning curve in terms of seasonings, but I find it really pretty intuitive (although I did let my OCD show and read the manual). So far I’m pleased with this new addition to my kitchen. It would appear that a few other single-use appliances will need to find new homes–even the egg cooker.

My morning breakfast quandary of food versus functionality has been solved. I think that one of the most pleasurable things since cool weather has finally arrived here is my morning bowl of steel-cut oatmeal. Frankie, the cat, has steadfastly refused to cook it. I’m often working before I’m ready to cook. Now the Instant Pot has taken over that job. Using the “pot-in-pot” technique (which was one idea that helped persuade me that I needed the Instant Pot) I can put breakfast on before I go to bed, and it’s hot and ready to eat when I’ve finished my first round of cafe latte.

Another plus for me was that the Instant Pot has a stainless steel liner (so you can saute right in the pot)’. The Krupps multifunction pot to which I am bidding farewell had a nonstick liner so required some care in using it. (Yes, I’ll give the stainless steel inner pot due respect to that it doesn’t get scratched up, too–because that’s just the way good cookware should be treated.)

So–at this point, despite its yeoman’s service in my kitchen for quite a number of years, this is a requiem for that useful appliance–and hope to find it a good home and I’ll be embarking on more cooking adventures with the Instant Pot.

—Ô¿Ô—

P.S.  It remains in my kitchen for the sole purpose of taking the mashed potatoes to our Thanksgiving Day gathering since it does that better than the Instant Pot–it’s a bit lighter and easier to tote around.

Ò¿Ó


Bouillabaisse–for one or two.

I’ve decided that one of the things that I should always have in my freezer is some good quality frozen fish.I like it packaged in individual servings so that I’m not trying to figure out what to do with the remains of a meal of fish. True, a bit of “leftover” baked, broiled, or even pan-fried fish can be turned into chowder…or tuna or salmon can be “re-purposed” into a salad. However, as much as I like fish, I’m not really into it as a leftover so it’s either get it from the fishmonger/supermarket, or in individual Cryovac packages. I do like variety in my fish so I usually check out the fish counter at my local Harris Teeter or The Fresh Market anytime I’m there–and if lucky, come home with something special like monkfish,  “manager’s special” tuna steaks, or wild-caught salmon. I do bring home the occasional tilapia (though with some thought to the downside of the farm-raised fish).

I love Chilean sea bass but that’s just not in the budget for everyday fish although my freezer does have some that I found at Costco. My favorite standby fish is cod. Firm, tasty white fish that lends itself to cooking in many different ways. Again, my favorite source is Costco.

I’m also fond of reading recipes–if only for inspiration rather than mindless to-the-letter following. Skulking through my inbox today I found an email from Bon Appétit that provided some interesting reading: recipes for cod–an interesting collection that all looked tasty.

One particularly caught my eye was poached cod with tomatoes and saffron–which brought to mind another cool-weather favorite that I don’t make all that often unless I’m making it for friends: bouillabaisse. Looking at this recipe made me wonder why I hadn’t made an effort to make mini-bouillabaisse for myself. It’s really just poached fish in a yummy tomato soup.

Though bouillabaisse typically has lots of different kinds of fish and seafood in it, I could certainly start with a single-serving size piece of cod and add a couple things. My Harris Teeter fishmonger is used to me ordering strange quantities, so probably wouldn’t bat an eye over two shrimp and a scallop–or maybe even a clam or two.

Taking this basic recipe for poached cod, I’d need to add a couple things to recreate the taste of the traditional bouillabaisse: most notably some fennel and pastis (licorice-flavored aperitif).

Mini-bouillabaisse

Ingredients

SERVINGS: 4
  • one 4-5 ounce skinless cod fillet
  • 2-3 shrimp
  • 1-2 scallops, clams, or muscles.
For the poaching liquid (from the Poached Cod with Saffron)
  • 2 tablespoons olive oil
  • 2 garlic cloves, thinly sliced
  • 1 teaspoon Aleppo pepper or ½ teaspoon crushed red pepper flakes
  • 1 14.5-ounce can whole peeled tomatoes (with juice instead of adding water)
  • ¼ cup dry white wine (keeping this instead of using  fish stock)
  • 2 bay leaves
  • Pinch of saffron threads
  • Kosher salt and freshly ground black pepper

Adding for traditional bouillabaisse flavor:

  • scant 1/4 cup diced fennel
  • 2 to 3 teaspoons pastis/Pernod (season to taste)
  • 1/2 medium onion or 1 small leek

Preparation

  • Sauté leek and/or onion in olive oil until softened.
  • Add garlic and sauté until fragrant but not browned.
  • Add tomatoes, wine water, fennel, bay leaves, pepper, and salt and simmer 10 to 15 minutes to let flavors meld. Reduce to a bare simmer.
  • Add cod filet and about 3 minutes later add the shrimp, scallop, clams, or mussels and continue to cook for another 3-4 minutes (until the shrimp begin to curl, the scallop is opaque, and clams or mussels open.

If you want to bulk this up for extra hungry people, add cubed potatoes while the soup base is simmering and cook until almost tender; then add fish and continue as above. There is more soup/sauce here than is needed for one serving. Put it in the freezer for the next time you want bouillabaisse for one–you’ll have a quick meal–even if it is only a fish filet without the extra seafood.

A rather traditional accompaniment to bouillabaisse rouille, a garlicky “mayonnaise” to dollop into your bowl but I don’t always make it. Bouillabaisse can be eaten without it.  My favorite is the version by Anthony Bourdain with the roasted red peppers, egg yolk, and lemon, and lots of garlic. My most often-used version of  rouille uses a mayonnaise base as it’s faster and easier (from Saveur). Traditionally this would be made with soaked breadcrumbs or egg yolk and  other ingredients into which olive oil is emulsified–like mayonnaise. The mayonnaise version is easier for single-serving, solo cooking. (If there’s any left over it’s good on a sandwich or with other meat since I don’t use the fish stock in it.)

Rouille (my version)

Ingredients

  • 2 cloves garlic mashed to paste with pinch salt
  • 1/4 teaspoon sweet paprika
  • 1/3 cup mayonnaise
  • pinch of saffron threads
  • pinch of cayenne pepper
  • a squeeze of lemon juice, to taste

Preparation

  • Blend garlic, paprika, saffron to a paste with a few drops of water if necessary.
  • Add to the mayonnaise
  • Add the squeeze of lemon juice to taste, and salt to taste.
  • Thin with a few drops of water if necessary.


Tuna, lovely tuna!


Tuna_20170709_140604

those lovely tuna medallions

Wow! While skulking through Harris Teeter supermarket I noticed that they had beautiful tuna “medallions” for only $6.99 per pound.  The chunks are not a problem for me since if it were steaks I’d need to cut them up anyway. The main thing is the quality and the price. It’s time replenish my supply of tuna confit.

Since my last post on tuna confit, the recipe from that post, which was from Fine Cooking, I’ve been perusing sous vide recipes and have come up with some modifications for the seasonings, and the method. I’m using the method from ChefSteps this time around (with a little modification of seasoning and cooking time and temperature). One modification was to infuse the oil with some additional herbs suggested in other recipes, and then straining/filtering the oil before packing the confit (in Mason jars).

Tuna Confit (2017)

Ingredients

  • tuna (about 2 pounds)
  • salt and sugar (4:1 ratio) for the dry cure/dry brine
  • extra virgin olive oil, about 4 cups (enough to cover) the tuna

Infused oil ingredients

  • extra virgin olive oil (about 4 cups)
  • Turkish bay leaves (2 or 3 depending on size)
  • sprig of thyme
  • sprig of rosemary
  • smashed garlic cloves (about 3)
  • black peppercorns (about 2 teaspoons)
  • red pepper flakes (just a dash)
  • zest of one lemon (removed with a vegetable peeler)

Preparation

  • Infused oil:
    • Place the oil in a slow cooker or multifunction pot on the warm setting and add all seasonings.
    • Allow oil to infuse for several hours (a temperature of about 150°F) then cool the oil to room temperature.
  • Tuna:
    • dry cure/dry brine the tuna for about 30 minutes then rinse, transfer to plate and let it dry.
    • put the tuna into 500  mL jars, pouring oil around each piece, adding enough to cover the tuna in the jar
    • cook in a multifunction pot on the warm setting for two hours
    • cool tuna and refrigerate

__Ò¿Ó__

When I tasted the oil, the flavors were a bit strong so I diluted it with an additional cup of extra virgin olive oil before using it to pack the tuna. Since the oil had lemon zest added during the infusion–I didn’t add lemon zest to the cans as the ChefSteps recipe had suggested. I think that would have been just too much lemon for even me–and I do like lemon!

My “medallions” were a just little thicker than the usual tuna steak so I allowed them just a bit of extra time with the dry cure (about 45 minutes) before rinsing and allowing them to air dry. There was a big difference in the firmness after that short period of dry cure.

After rinsing and patting dry with paper towels, I left them sitting on parchment paper for about 30 minutes to air dry, turning them over just once, then packing them in 500 mL Ball/Mason jars, adding oil to the bottom of the jar, and then after each piece of tuna

__Ô¿Ô__

The ChefSteps recipe suggested cooking the tuna at 113°F  for 1 hour and 30 minutes. My experience has been that, even though I love sashimi, I like my cooked fish cooked just a bit more. Part of the reason for making confit is not to eat it immediately but to be able to keep it longer as my replacement for “canned tuna”–so I’ve opted for a higher temperature–actually a lot higher temperature–more in keeping with the original recipe.

The jars of tuna in olive oil were put into the slow cooker on the warm setting which should give me about 160°F. I know that’s not going to be as lush and velvety as if it were cooked at a lower temperature. But preservation is part of the objective here (I mean, that was certainly the original goal of confit). I want this to last (in the fridge) for a bit.

Jar size was a bit of a problem–three of the medallions were simply too large to be sure that they would remain submerged under the oil, even allowing for shrinkage with cooking. Since the jars were going to be sealed, I didn’t want to take the chance of having to open them to add more oil. So–extra room in the jar with only two medallions in each.

No matter how this turns out it will be hands down better than most canned tuna (unless you spring for the really expensive stuff) and a lot easier than doing it on the stovetop or even in the oven.


Dry_cure_20170709_141321

dry curing

post_dry _cure_20170709_145716

air drying after curing

Packing_20170709_153235

starting with oil in the jar

Packing_2_20170709_153301

add tuna

Packing_3_20170709_153704

leaving some headroom in the jars

cooked_20170709_183505

it’s tuna confit!


__Ò¿Ó__