Cooking monkfish

TGIEOT—yes, that’s a bit more than TGIF!  It’s end-of-term.  The Spring term was the school term from hell, starting right at the end of Fall term!  Over the winter break I had unexpected course preparation to do for two online classes—switching from Blackboard to Sakai—for content management.  Top that off with an ongoing indexing project, and it’s—well, let’s just say it left very little time for cleaning, cooking, or writing!  Then, add to that a hard-drive failure for my computer….but it’s over now.

I’ve taken some time to work on revising the on-deck herb garden since I had plants that needed to go into their home pots, and a couple of days to do nothing but have quality time with the cat.  All that has left me yearning for some relaxation time and some really good food—cooked by me.

My day was absolutely made when I got my email delivery of the “Fresh Catch” specials from my local Harris Teeter this morning: they had monkfish! In terms of favorite fish, that’s right up there with Chilean sea bass for me.  Needless to say, I scarfed down my morning coffee and headed right off to HT.

fennel, leeks and garlic ready to roast

fennel, leeks and garlic

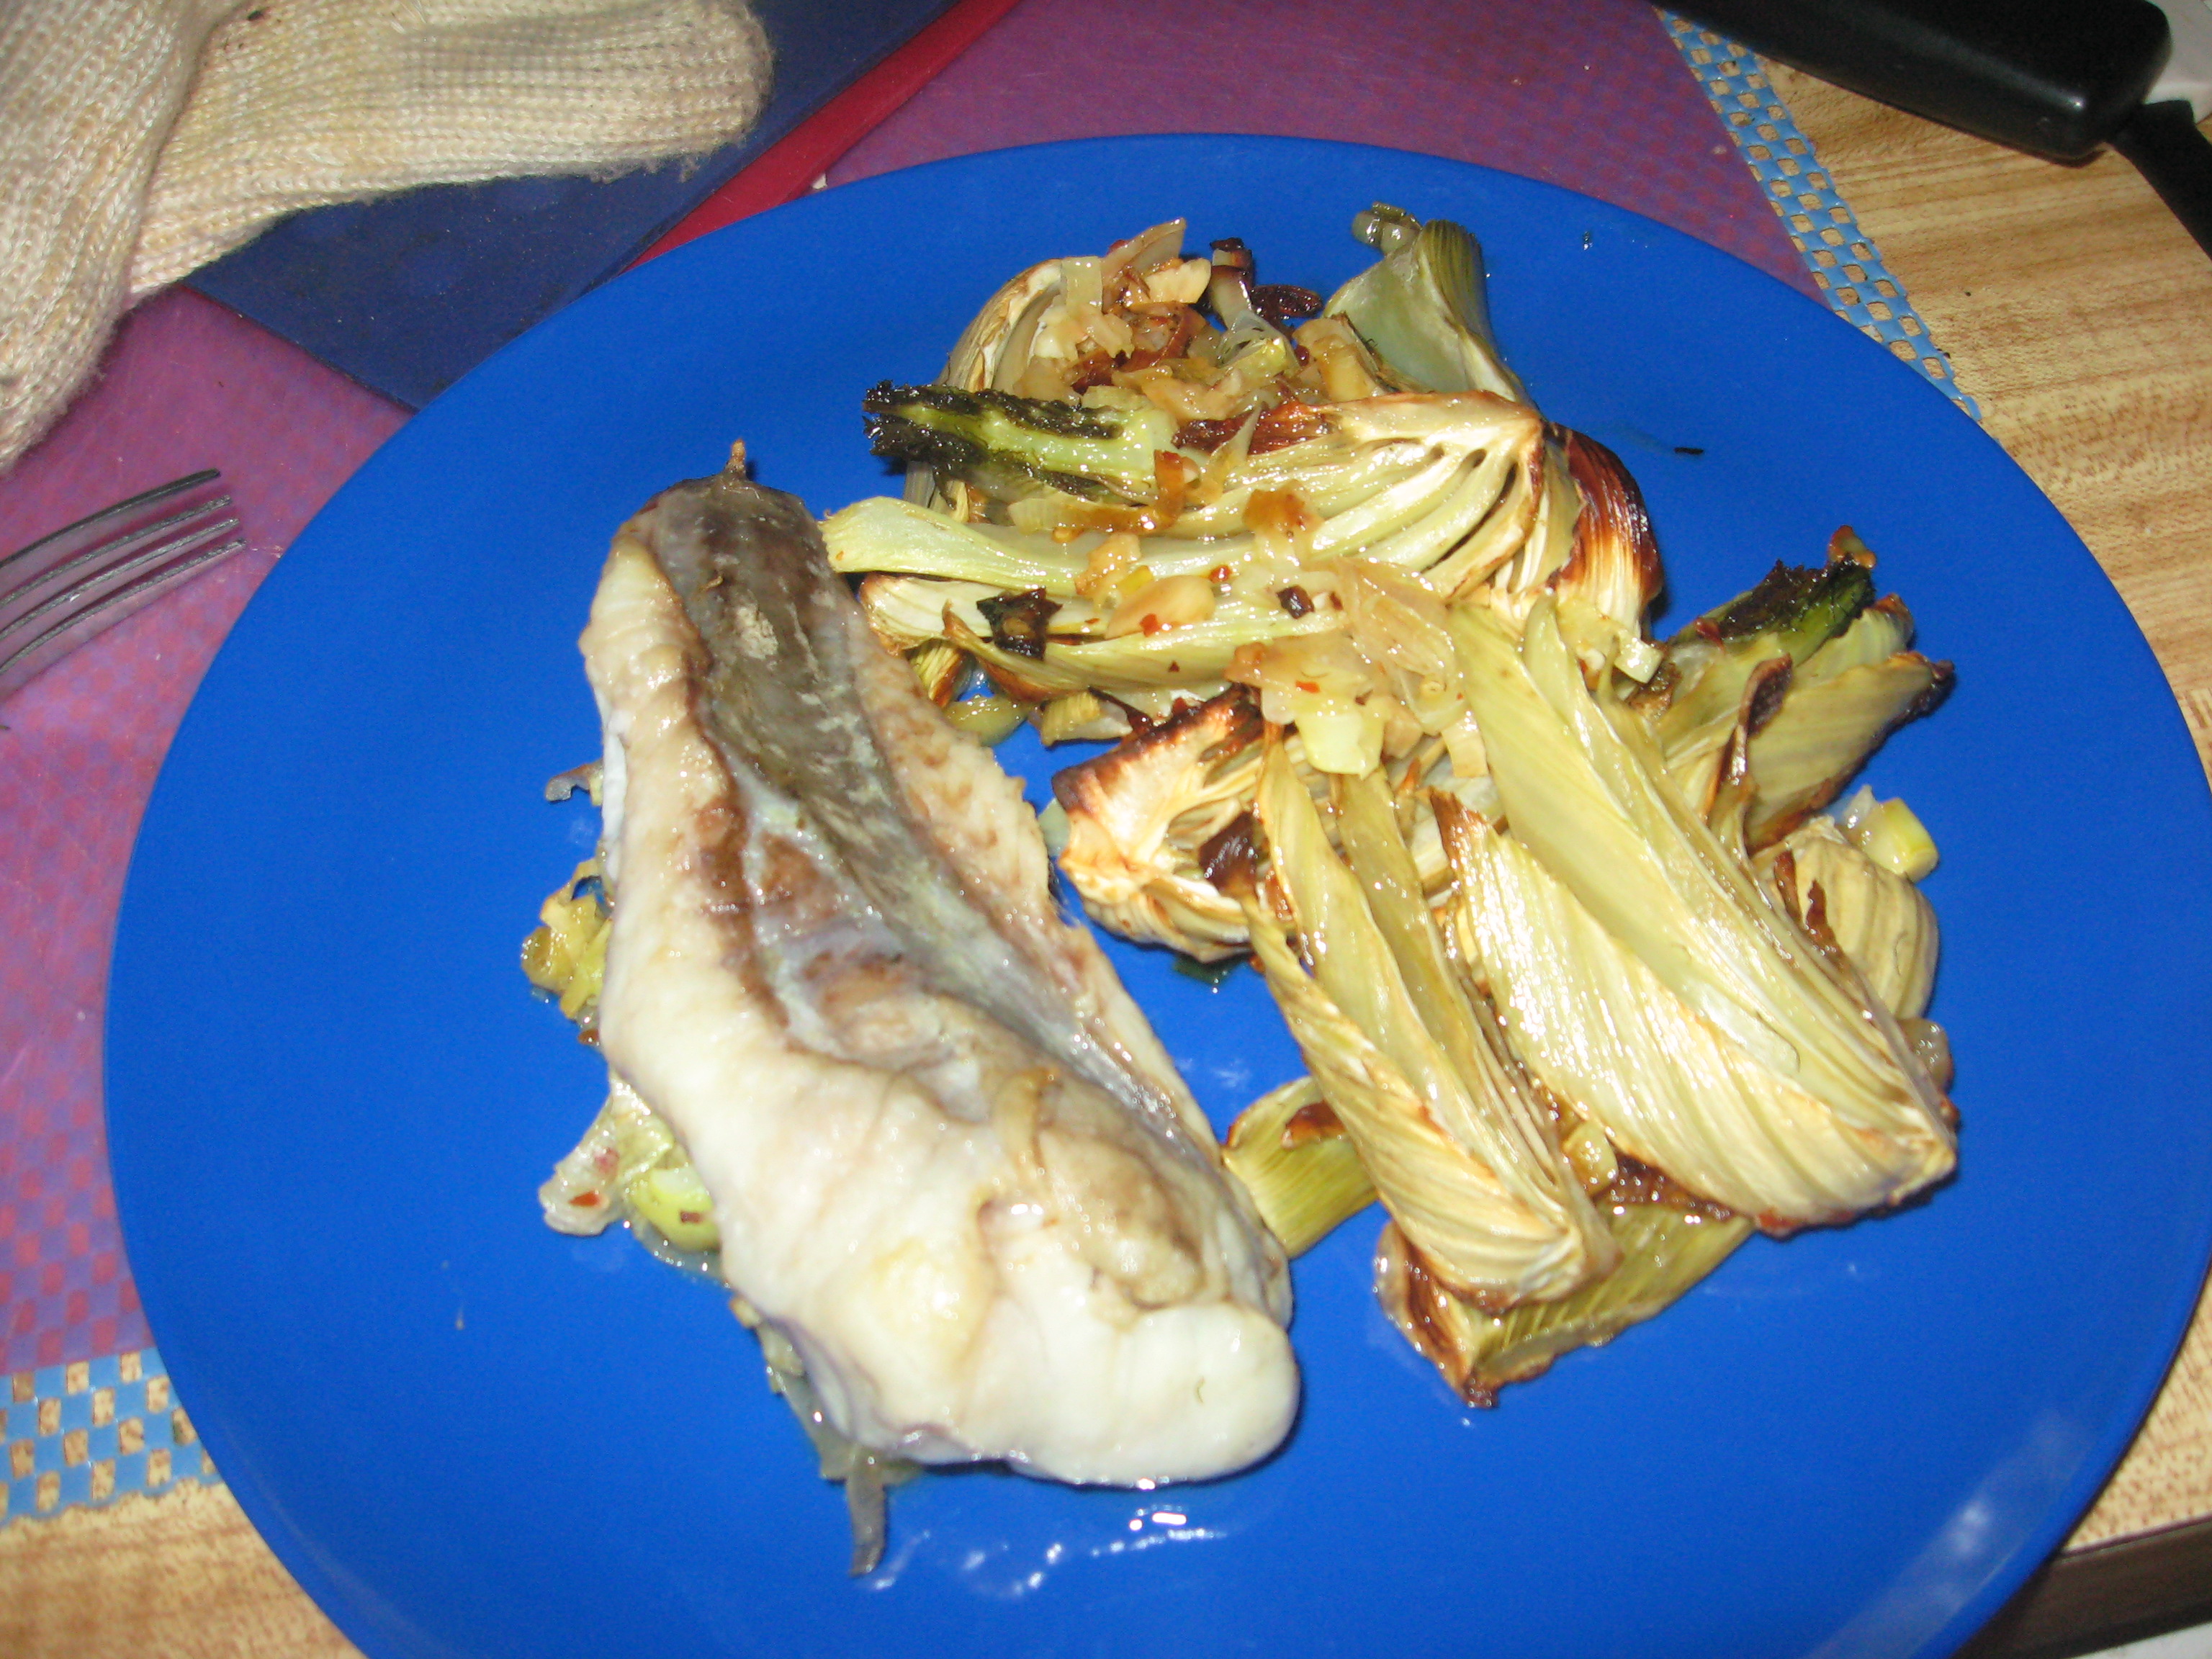
Supper this evening was roasted monkfish, with roasted fennel with leeks, garlic, and a dash of red pepper flakes, with a nice un-oaked chardonnay.  The fennel was an in-store, spur of the moment thing since it looked so gorgeous.

Even though it is warm this afternoon, I opted to cook in the oven because I wanted roasted fennel as well. I’ve done monkfish in hobo-pack style before but I thought I’d try roasting it this time and see if I couldn’t have a one-pot dinner.

monkfish

monkfish

I’d seen a post by Edward Schneider in Mark Bittman’s NY Times column (Diner’s Journal) about roasting monkfish, and the differences in monkfish on both sides of the Atlantic. After reading that I salted my monkfish for about an hour, and then roasted it.  I did manage to make a one-pan meal out of it. Since I had to allow about 40 minutes for the fennel to roast, I started that first.  After about 15 minutes, I laid the monkfish on top of the leeks, pushing the fennel wedges to the side, and popped it back into the oven for about 15 minutes.  I used very simple seasoning on the fish—olive oil and salt before going into the oven, and nothing for than fresh-ground black pepper and a pat of unsalted butter after it came out of the oven. So very simple—so very good, and even healthy.

(The only thing I wish I had done differently would have been to add some sweet red (or orange or yellow) bell pepper with the fennel. A glass of un-oaked chardonnay complemented the meal very nicely.)

IMG_7553

Trying to keep the New Year’s resolutions…

I’m really trying to keep my New Year’s resolutions, though sometimes I think that I should simply resolve each year to try to do better on keeping LAST year’s resolutions.  But it’s a new year, new start, so here goes!

I’ve just gotten back from the grocery store–with only one thing that wasn’t planned–That was a veggie that I’ve never seen in this Harris Teeter before–a Boniato (Cuban sweet potato). While I gripe loudly and constantly about how crowded the grocery store always is on Sundays, it’s what seems to work for me–so I gripe and still shop on Sundays–unless I ran out of milk on Saturday!

The grocery shopping took a bit longer than usual, but I went with the idea of doing some meal planning on the hoof.  (I like to shop by what looks good and what’s on special, so meal planning at home doesn’t necessarily work for me.) I went with a set number of meals in mind–and the meat (at least vaguely) in mind, then walked around looking to see what was on special, and what looked good–in other words,  produce and meat.

Knowing that we can expect some cooler weather over the next week did influence my shopping, and so did the fact that I’m still knee deep in course prep for the medical terminology courses that I’m teaching.  I need cool-weather dishes that I can pop into the oven (Römertopf is out on the counter–and I can scarcely believe that I’ve not posted about cooking something in them before this.)

The result of my meal planning on the fly was this and I’m going to keep you posted on how well I succeed with this–hoping for some peer-pressure here:

  • It’s really too-warm-for-the-season weather here today, so I’m having something light (and “leftover”)–cod re-warmed with the tomato sauce that I brought home from the Italian restaurant, and cauliflower and black olive gratin (had all the ingredients in the fridge except the cauliflower.  I purchased enough for one good-size serving from the salad bar–cheaper than a whole head of cauliflower when I know part will likely go to waste.)
  • Lamb (shoulder chops to be cut up) braised with veggies–in the Römertopf–with an under-appreciated vegetable–turnips.  Personally I love them raw too, and like the sweetness that they add to soups, so they get used a lot.  Doesn’t hurt that they store so well either.
  • Chicken thighs to roast (most likely Römertopf  again) with some root vegetables (have carrots, turnips, parsnips, and some cabbage).  There will be at least two meals from the chicken thighs.
  • Since I have some lovely ham stock (courtesy of a friend sharing ham and the ham bone with me) I’m going to make some bean and kale soup for one warm cozy supper.
  • While I was perusing the New York Times Health section and stumbled onto a recipe for a turnip gratin that is a possible for a side dish with some of the chicken.
  • Then last, but not least, is a fresh black pepper and onion sausage that most likely headed into the Römertopf with some potatoes, to be accompanied by some cabbage that’s been quickly microwaved with a bit of extra-virgin olive oil.

After my meal planning, I’ve got a couple servings of meat (chicken thighs and pepper-onions sausages) that are flexible and should lend themselves to other things if my appetite doesn’t fit my plans.  The sausages could always end up in another “one-pot” dish.  There are also some salad makings in the fridge, and some fruit (Fuyu persimmons, apples, and oranges) for dessert.

One of the things that I like about recipes like those for the cauliflower-black olive gratin and the turnip gratin, is that even though they say “serves 6” they are SO easy to cut down to size for single-serving cooking.

So that’s my plan for this week–regular cooking that is healthy, and doesn’t promote waste from things that just don’t get used.  There are some lunches to be made during the week since most of my courses are online this term–meaning I’m home to fix brunch or lunch for myself.  Maybe that Boniato will fit there.

I’ll be posting more about these meals, but, please, wish me luck with the New Year’s resolution!  Now, off to the kitchen to do the cauliflower-black olive gratin to go with my cod in tomato sauce!

After-holiday sales…love ’em!

My favorite most-frequented supermarket is my local Harris Teeter, though I do occasionally wander into the Kroger. I’m a pretty frequent shopper since I don’t do well at meal planning.

Right after the holidays I always seem to find  some goodies in those end-of-holiday-season, reduced-price carts that I wouldn’t purchase otherwise.  Last year it was black truffle oil which has been put to good use this past year, and even recently when I was trying to do some wine-food pairing. (It’s been drizzled on baked potatoes too–my serious, decadent comfort food.)

A couple years ago, I was planning to do a roast goose (obviously requires friends in attendance).  When I got to the checkout, the price of the goose was SO low that I got a second one.  Good thing because we had snow and ice on the day I’d  planned the dinner.  You really can’t undo the thawed goose, so I toured the neighborhood within walking distance with impromptu invitations to eat goose–and found willing neighbors.  (These who missed that got to help eat the second goose when the weather permitted.) So the freezer case has become a place that I also skulk through at this time of the year as well as those “manager’s special” carts.

Two Whole Pheasants- Pheasant Meat

Dinner!

This year so far my “find” is pheasants on sale. I’m planning a pheasant dinner with friends shortly.

I get the pleasure of planning the meal, picking a wine, and then eating and drinking with good company. It’s in the planning stages now–braise or roast? Maybe the Romertopf since I do have a very large one?

Perusing recipes and thinking about wine is pleasurable activity. I’m leaning toward a bottle of the Ravenswood “Besieged”, but I might have to check with my favorite wine store before I make a final decision, and after I’ve decided what seasoning these birds will get.

Sugar plums

I think that these are a special holiday treat. Too bad that we don’t see more of them.

Rufus' Food and Spirits Guide's avatarRufus' Food and Spirits Guide

Despite the title, these little treats are quite dense and spicy, but not overly sweet. Feel free to alter the fruit mix. A number of recipes only used dates and apricots. Most recipes we saw called for using a food processor, but we don’t have one and were worried the blender would gum up on the first pulse. If you have the same dilemma just remember to chop the fruit very fine.

Sugar Plums

  • 1/2 cup pecans, chopped very fine
  • 2/3 cup honey
  • 1 tsp ground cinnamon
  • 1/4 tsp ground allspice
  • 1/2 cup finely chopped dried apricots
  • 1/2 cup finely chopped pitted dates
  • 1/4 cup finely chopped dried plums
  • 1/4 cup finely chopped dried cherries
  • 1/2 cup powdered sugar (aka confectioners’ or icing sugar)

Combine nuts, fruits and spice in a large bowl. Using a wooden spoon or rubber spatula, mix in honey stirring to coat evenly. Pinch off teaspoon-sized…

View original post 19 more words

Chilli and Nutmeg Dark Chocolate Bark

I have to try this–I’ve had dark chocolate with nutmeg and love it…and dark chocolate and chili and love that (but then I’m a serious chocoholic anyway).

frugalfeeding's avatarFrugalFeeding

chilli dark chocolate bark

When one really takes time to delve into all things festive it quickly becomes clear that it is unlikely that there will ever be an end to Christmastime culinary possibility. In fact, it turns out that it’s dreadfully difficult to keep one’s blog up-to-date with all that is being produced. The weather is the entity most at fault here, but what can one do? It’s difficult to castigate the weather – it makes a mockery of us all.

Following on from my recent monologue regarding presents and the meaning of Christmas, a little gifting advice may be necessary. For those of you that weren’t aware, chocolate is always a safe bet – is there anyone who doesn’t covet one form of chocolate or another? It is in this spirit that I bring you my recipe for chilli and nutmeg dark chocolate bark; it is both frugal and spectacularly delicious. Perhaps…

View original post 450 more words

Christmas Spiced Biscuits

Sounds like real holiday treat. Good discussion on biscuits (English and American), and scones, too.

frugalfeeding's avatarFrugalFeeding

Frugal Christmas Spiced Biscuits

If there’s one time of the year at which biscuits should be made and eaten in prodigious quantity, it is at Christmas. There’s something clean and joyful about a proper English biscuit that makes them a smidge more festive than, to give one example, a cookie. It’s far easier to pick out individual flavours in biscuits than in food that is excessively sugary – a cookie, for instance, is something of a devilish experience.

Not only are biscuits rather light on one’s stomach, they are also one of the more frugal bakes one can embark upon. Of course, this is largely due to the dearth of expensive superlatives, such as chocolate, that are often added to cookies or cake. Instead, biscuits are often left plain or flavoured with spices or citrus fruits – as is the case in this recipe. Indeed, if the spiciness of these biscuits doesn’t appeal…

View original post 420 more words

A food science cookbook!

Sci of good cooking FC9781933615981Even if you think that you have enough cookbooks, The Science of Good Cooking is one you should at least check out of the library and read.  I’m sure it’s obvious from my posts that I like to understand cooking, rather than just following a recipe slavishly.  You’ve probably also noticed that I’m a fan of Cook’s Illustrated, Cook’s Country, and America’s Test Kitchen, so it probably won’t come as a surprise that I’m recommending this book.

I consider myself a reasonably accomplished cook, and pretty good at improvisation, but I’ve benefited from reading and using this book.  It’s like a cooking school in a book.

While there are lots of good recipes, the presentation is by techniques and concepts to help you understand what actually goes on when you apply heat, or use salt in a recipe, or why the yolk and the white of eggs cook differently.  And there’s experimental data, too.  This book is not just telling you what to do but why to do it–there are experiments to show why a technique works.  Mastering the techniques in this book will give you so much freedom in the kitchen, because you’ll understand the changes taking place while you’re cooking.  The information is presented without a lot of heavy-duty chemistry or physics that you sometimes find in food science books, too.

Every recipe that I’ve used from this book has improved my cooking!  The extra-thick strip steak that I cooked using the technique from this book was the best I’ve ever eaten. Same for the baked fish.

Cucumber mango salad

Photograph of 7 mangoes in case with PLU stickers

mangoes

Yesterday I had a minor food crisis–fruit overload.  I went to Costco (for cat food and laundry detergent) but while walking past the huge stacks of produce I smelled first peaches, and then pears–and then there were the mangoes. The difficult decision was pears or peaches, and/or mangoes.  The pears won over peaches though the peaches smelled as good as the pears, but the price was such that I brought both mangoes and pears home with me. Both were much more reasonably priced than in the supermarket. So it was a no-brainer–I eat all the pears and mangoes that I want and share some with friends and I’m still ahead on the cost. (The pears were absolutely luscious–every bit as good as they actually smelled!)

bartlett pears in case (from costco)

Bartlett pears

That quantity of fruit does have you looking for some things to do other than just eat it out-of-hand.  I had some mangoes that needed to be used; I had eaten lots and shared some, but I needed to eat some more! (Not that eating big, juicy, ripe mangoes is really any hardship.) Saved by inspiration that struck when I started smelling my supper cooking.

I was roasting some pork (on which I’d used a dry adobo seasoning rub given to me by a friend as a birthday present)–just a single big meaty spare rib for supper. This was one that was extra from making the chili con carne--simply would not fit in the pot so it became a small pork roast for one with just a tad left over.

I couldn’t think what to have with it until I smelled the roasting pork with the spicy adobo seasoning, something said “sweet and cool”–I thought of mangoes and cucumbers (which were sitting right there in the refrigerator just waiting to be used).

Not being particularly inspired about what to do with these two things, I headed for my laptop and Google!  As I was entering the “cucumber and ma….” the instant search which I’ve enabled popped up “cucumber and mango salad”.  That sounded just right with spicy roast pork.

I perused a number of recipe sites and blogs and found several interesting ones for cucumber and mango salads (and somehow I thought I was being very original when I visualized that combination):

  • from Daily Bites blog mango and cucumber, lime, ginger, honey (or coconut nectar–something new to explore), and optional cilantro.
  • from Eating Well which added avocado, brown sugar, rice vinegar, canola oil, and fish sauce as well as red pepper flakes.
  • from Herbivoracious  using Thai sweet chili sauce, rice vinegar, mint and cilantro leaves, and toasted sesame seeds.
  • from My Recipes  the simplest of all–cucumber, mango, lime juice and ground red pepper.
  • from Rookie Cookie with the addition of jacima, red bell pepper, honey, rice vinegar, and chile powder.
  • from The Full Plate Blog those basics but with champagne vinegar in the dressing, and suggestions for optional pea shoots (yum!), and slivered almonds, with romaine lettuce.

Those certainly gave a place to start for concocting for what I needed that night’s supper.  Then I found recipes with suggestions for adding grilled shrimp…seems like these need to be explored  much more carefully next time I’m that flush with mangoes.

rosy-cheeked bartlet pear and mango on blue/purple print towel.

pear and mango

Since my adobo rub had given me quite a spicy seasoning for the pork, I decided that I did not want to add chile powder, or even ginger–anything at all spicy to the salad–I wanted something cool and contrasting with the spicy meat.

I opted for the bare basics: cucumbers (the little baby ones), mango, shallot (no red onion in the house),  and since I didn’t have fresh mint (I’ve now killed my second plant), I used frozen cilantro (from Dorot) in the dressing which was just a simple vinaigrette made with olive oil and sherry vinegar (drat–no lime or champagne vinegar) and I didn’t think that rice wine vinegar would stand up to the adobo seasoning of the pork).

Even one mango and cucumber gave me some extra, so I dressed only what I was going to eat right then.  (What was left became another salad, with very thinly sliced pork right in with the fruit, and I added some of those luscious Bartlett pears to it as well–threw that over some mixed greens and it made an awesome lunch. I dressed with a fig-infused white balsamic vinaigrette since I added the pear.

The combination of mango, or other sweet fruit, and cucumber is definitely one that I’ll be playing with in the future–probably with chicken, shrimp  or maybe even crab, or scallops to “bulk it up” a bit for a complete meal.

(I know, it’s not a beautiful plate, but I was too hungry to go outside in the dark to find garnish–I almost didn’t even take a picture.)

A son goût!

pork, cucumber-mango salad

supper

Spicy Peach Chicken Wings Two Ways!

Image

What’s the best way to say this? I. LOVE. TO. GRILL! Now that you know this little secret about me, let me share one of my favorite sauces that I like to make while cooking. First I want to acknowledge that a lot of people are intimidated when it comes to dealing with MEAT and FIRE. This type of cooking has been going on way before Man realized that wearing white after Labor Day was unacceptable. Besides eating sushi or raw fruits/veggies I can’t imagine a more natural way to enjoy food. Regardless of your belief of how and when we got here once Man found fire he also found his love for a Medium T-Bone steak. I’m just saying.

In this article I’m going to share with you TWO different ways to prepare chicken wings. One will be for you go-getters out there who love to put meat on fire, and the other will be for the less adventurous group who likes to play it safe.

If you are ready to receive your fire badge in scouting then you will take the road I love to travel by and go fire up that grill! Even with grilling you still have options on how you actually want to achieve AWESOMENESS. You can use “Propane, and Propane accessories”-Hank Hill or you can use Charcoal. I personally prefer using gas since you can control the heat and when you’re done, you’re done! With charcoal you will have to move up to the advance cooking class since this will require a lot more concentration and skill set to master this form of cooking. Charcoal will definitely give you that authentic home cooked flavor, however it will also give your wings 5th degree burns really quickly if you don’t pay attention!

Ok so enough about that. Let’s cook!

Propane: Cut your grill up to medium-high heat to get the grates nice and hot for the initial sear when you lay the wing down. After placing the wings on the grill for a couple of minutes, lower the heat and flip those bad boys over. At this point there should be a little color as well as grill marks on outside so that you can keep up with when to turn your wings. Keep rotating so that each sides gets crispy brown skin. Don’t wait to long to add the sauce, the last 10-15 minutes of cooking should give you enough time to let the flavors marinate all the way through.

Charcoal:  After you have your nice and red hot you will have to work a lot harder than your gas friend up there because now it’s all about the Indirect Heat method. Ten out of 10 times your grill is going to be extremely hot in the center where you have nonchalantly piled all the charcoal and set it on fire with half a can of lighter fluid. Once you have brought the level 3 fire down to burning red coals you will need to place the wings on the outer perimeter so that you can control how quickly your wings will cook. 

There is no way I’m going to say it will take approximately (fill in the blank) minutes and your wings will be perfect. I can’t sell myself out like that. But I can tell you that the food will let you know when it’s done. Chicken wings start of pale, soft and flabby-just like a newborn baby! Then in the toddler years they will make a lot of noise by hissing and spitting juices everywhere (terrible two’s phase). This is when you have to constantly watch them and move them around to make sure they don’t burn up. Once they become teenagers they have more color to them, stay to themselves and become firmer. They think that they are grown however on the inside they still haven’t developed yet. (I’m 15 and I know everything and my parents are lame phase) And then we come to the adult phase. Now it’s time to sauce em’ up. They have graduated college and ready for the real world. CONGRATULATIONS! You raised your wings right. They have earned the privilege to become a part of the meal.

Now for those of you who choose to bake/broil the wings instead of grilling not only do I give you a serious side eye but I will give you what you need to attempt to duplicate that outdoor flavor without actually going OUTDOORS!!

After seasoning your wings with the dry ingredients (salt, pepper, paprika and garlic powder) your oven should already be on and ready for action at 400 degrees. You are going to lay the wings out in the pan and leave them uncovered. The point is to get that skin crispy as if it had been lying out in the sun all Summer. That crunch is what you are looking for, we want savory crispy wings not soggy chicken pieces. So after 50 minutes (half a Lifetime movie) you want to check and see if those wings have plumped up
and start turning brown like this.

Alrighty then, your wings are ready to be sauced up! At this point you want to add all that finger licking goodness to the chicken so that they can be joined for eternity in flavor heaven. I actually would add the sauce probably around the 40 min mark just so that it gets in there all the way to the bone! Once you have the wings sauced and crispy now it’s time to crank up the heat and cut the broiler on. This will allow the wings to get more color and tighten up the skin just as if you had grilled them. Now is the time to pay attention to what’s going on in the oven instead of pouring that next glass of wine. Things can go from happy-go-lucky cooking time to OH GOD WHERE’S THE FIRE EXTINGUISHER?! Please check on your wings every 5 minutes until they are at the level that you prefer. The sugar in the peach preserves will heat up and become sticky, this will also cause the wings to “burn” more on the outside so unless you want wings that look like tar I suggest you watch them carefully.

This is what I have come up with after cooking in the oven and plating.

So below you will find the recipe for the Spicy Peach Sauce that I have talked about this whole time. The great part about this is the fact that almost any sauce can be substituted based on whatever flavor your palate is looking for at the time. I love complex sauces that make you think about what you are actually tasting. If you are going to eat something good, you might as well do it right!

Ingredients

  • 2 tablespoons table salt
  • 1  teaspoon black pepper
  • 1 teaspoon smoked paprika
  • ½ teaspoon garlic powder
  • ½ stick butter
  • 2 ounces of minced garlic
  • ½ cup peach preserves
  • ¼ cup hot sauce
  • 1 tablespoon soy sauce
  • Sesame seeds (optional)

Preparation & cooking

  • Prepare wing mixture in advance to let them marinate.  Mix salt, black pepper, paprika and garlic powder in a small bowl.
  • Add chicken wings and toss to coat.
  • Grill the wings.
  • Melt the butter in medium saucepan with the garlic.
  • Stir in the peach preserves, hot sauce, and soy sauce. Cook until syrupy and thick (stir so it doesn’t clump) about  5 minutes.
  • Transfer sauce to a large bowl.
  • Add the wings to the sauce and toss.

Enjoy!!!!

Chilli con carne redux update

I’ve finished the “fast” version of the chilli con carne that I posted about in Chilli Con Carne Redux!  I’ll concede that it’s only sort of faster in terms of the active prep time–it still needs to cook long and slowly, but it is a success.  I don’t think that I can tell the difference (tasted side-by-side with the more laborious version from the freezer) and friends have given it the nod of approval.  So here are the changes and additions to the original chilli con carne that I posted.

  • After the bacon browned, 3 tablespoons of tomato paste was added while the onions were sautéed, and this was browned–again to enhance the umami, not to add tomato flavor.
  •  None of the meat (pork or beef) was browned before adding liquids.
  •  Added bay leaves to increase the earthiness (used five large for this 6 pounds of meat).
  •  Added Mexican oregano–about 2 rounded teaspoons. (You really do want Mexican oregano for this–much different flavor than Turkish or Greek (Mediterranean) oregano–after all it is an unrelated plant, but worth having in the kitchen if you like chili.)
  •  Sun-dried tomatoes (about 1/2 cup chopped) were added for more umami even though this was NOT made in a slow cooker, I was not aiming for tomato-flavored chili.
  • During the cooking time I tasted some in a bowl with a little fish sauce added (yep, I did get up the nerve to try this) and it tasted wonderful; so I added about 4 or 5 tablespoons of fish sauce.  (I suspect that if you don’t have fish sauce a couple of anchovy filets thrown in would have the same effect.)
  • The final thickening was one with a brown roux made with masa harina.  For the fat in this roux I reserved about 1/4 cup of the fat from the de-fatting step.  I heated this and made sure that all liquid was evaporate, then added about 6 tablespoons of masa harina and cooked it until it was a medium brown and toasty smelling.
  • Because of my work schedule, this was cooked in a lower oven (about 195° F) for about 10 hours.

After another run on this I’ll have to post a revised recipe for the “fast” and easier version, but if you feel so inclined you can work with these changes–after all chili con carne is one of those things that really doesn’t need a recipe to be followed strictly.