…and now it’s turkey soup!

Remember those turkey thighs that I roasted a couple days ago? They have really been a bargain.  I spent about $5 on the package of thighs–two small-to-medium ones.

I had my roast turkey with sides of potatoes and cabbage (with juniper berries). Then I had two full-size sandwiches, and a half sandwich for lunches. Now I’m finishing the turkey thighs with a very hearty bowl of soup (and a  glass of good wine).

small Rival Crockette

a crockette

I popped those thigh bones (with what meat wasn’t easy to carve for sandwiches) in to my tiny little single-serving crock-pot to make some stock–I just added a little salt, a bay leaf, the brown stuff that I deglazed from the roasting pan, and enough water to cover the bones. After slow cooking overnight, I removed the thigh bones.  The meat just fell off into the pot.

In the same little crock-pot (don’t want extra dishes to wash), I added a small handful of barley, some dried mushrooms of various sorts–including shiitake, chanterelle, and porcini. The other things that went into this soup were the leftover cabbage (with juniper berries) and a few potatoes that were roasted with the turkey.  (You may be thinking that this is pretty heavy on starch, but to finish the soup, I added some green stuff.)
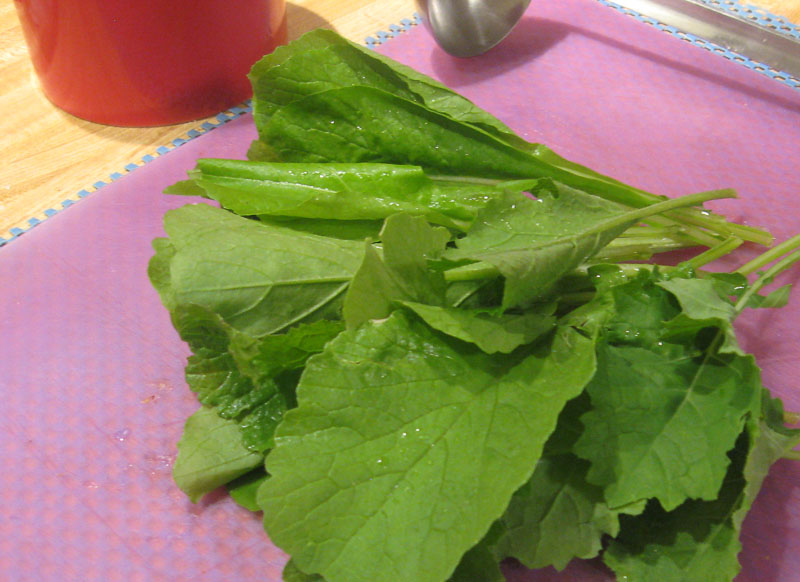
small leaves of greens

mixed greens

About half an hour before I was ready to eat, I went out to the garden (which I share through the good graces of a neighbor) and picked a good size handful of small kale, turnip, and mustard greens.

After washing, I cut these in bite size pieces (though that was almost unnecessary as they were really not as big as my hand). They went into the crock-pot; in about 20 minutes they were still bright green but tender.

I did a final adjustment of salt using French Grey sea salt, and finally added several drops of black truffle oil to finish the soup.

-<>^<>-

I’ve had my bowl of soup for supper this evening–and it looks as if I’ll get one more meal out of those turkey thighs–with the barley, and the amount of meat that was left on the bones, there is easily another serving of this soup for lunch or supper tomorrow. (I’m sure that by the time I reheat it, those greens won’t be quite so bright green, but the flavors may have melded with the other ingredients so it should be good–maybe even better than this evening.

bowl of soup with greens

a warm, hearty supper

-<>^<>-

I opened a bottle of wine this evening that was a completely unknown to me. It was a limited release called “Dark” from Apothic. I was completely beguiled by the description that said that it “blends dark fruit flavors of blueberry and blackberry with opulent notes of coffee and dark chocolate”.  How could I possibly pass that up? (I found it while shopping at Harris Teeter–just after I had bought a case of something called “Besieged”–more about that one later.)

I was surprised how dark it was when I poured it into the glass! (I even tried to take a picture–but it just looks almost black–so forget that.) It is definitely a “big” wine and right out of the bottle it was fruity and mellow–but after breathing for a bit it lives up to its description.

I thought it might overwhelm my bowl of turkey soup, but with the juniper berries, the rather emphatic mushrooms, the flavors of the greens, and the truffle oil, it turned out to be a great combination.  Fortunately there is some of the wine left for tomorrow’s soup! This is one time when I’m looking forward to the “leftovers”.

It’s turkey time–again!

At the risk of being considered heretical, perhaps even un-American, and definitely not in the proper holiday spirit, I’m going to come right out and say that turkey would be my last choice for the main course of a holiday feast.  I’d much rather have duck, goose, roast pork, prime rib, or even roast chicken, (unless we’re going to talk wild turkey).  The problem is that it’s an achievement to get a whole turkey to be edible (and I do have a friend who does that well, so I eat her turkey–it’s the best I’ve had when the bird is roasted whole). The problem is the turkey–not the cook!

It seems to me that turkey is all about presentation, and NOT about cooking it to the best advantage. We’ve bred turkeys to have a huge chunk of breast meat, which really isn’t that flavorful. That white meat is attached to the legs, dark meat.  Now dark and white meat cook very differently, and here they are attached to the same bird, so that you have to cook them together–a real cooking dilemma.

Not to mislead you, some of the same problems exist with chicken, or Cornish game hen/poussin, though it’s easier to find ways to have both come out reasonably well on the smaller bird. The white meat still is not as flavorful as the dark, even on free-range chickens. I do use the breast meat–I usually cook it separately from the dark meat, but do sometimes roast a whole bird (French style in a dutch oven, in the Romertopf, or sometimes just uncovered in the oven). 

It’s not that I don’t like turkey–at least occasionally–even the white meat.  I just want it like I want all my food–to have the best taste and texture possible. It’s always seemed to me that when you have two things as different as turkey legs and breast, that you should not try to cook them together–neither will be at its best.  Cook’s Illustrated has provided a recipe for optimizing turkey, and it involves taking it apart, but it also provides for stuffing, and presentation, too. I’d like to try this out with a whole turkey to see how complicated it is to get it done.

I’ll buy turkey breast fillets almost any time for a quick sauté–just like I’d do chicken breasts, but I still like dark meat best. I’m actually glad to see turkeys in the market–especially the pieces–light and dark meat separately. While you can almost always get turkey breast and sometimes even the drumsticks, what I really like are the thighs–without the drumsticks attached. I was happy to find turkey thighs at Harris Teeter when I went to do my marketing yesterday.

roasted turkey thigh in roasting pan

turkey my way

Yes, even though turkey-eating season is about to get into full swing, I came  home with a package of turkey thighs–and tonight I had roast turkey–thigh that is.

It’s ideal for cooking for one–and inexpensive as well. One roasted turkey thigh will give me several meals: hot roast turkey, a cold turkey sandwich, and a serving of turkey soup.

-<>^<>-

Since I was working on an indexing job today, I really did not get fancy with my turkey thighs. I just let the thighs sit for a couple hours in the refrigerator, uncovered, so the skin would dry.  I plopped them into the roasting pan with some wedges of potatoes, and salted the skin liberally so it would be crisp and golden brown. Then, into the oven (350°F) for about an hour, and out came my roast turkey.

roast turkey thigh partially carved

ready to serve

I let it rest just like a whole bird, and then carved off my supper. Since I was after as few dishes to wash as possible, I made a cabbage dish that I wanted to try, and had potatoes roasted right along with the turkey–no gravy or stuffing tonight. (Cook’s Illustrated did give instructions for making stuffing with the disassembled bird, and I do want to try to adapt that for my single-serving quantity–but just not today. It was an easy, inexpensive, and tasty meal.

I’d eat more turkey if I were able to get thighs year round.  I’m looking forward to more roast turkey in the next few days as I have another thigh that’s been roasted.  I suspect there will be more than one turkey sandwich, and some will end up in with the bones in some hearty turkey, barley or lentil, and mushroom soup from my tiny single-serving size slow-cooker.

plate of turkey

A pork and kale braise

It’s been chilly, cloudy, and grey–just the kind of weather for soups, stews, and braises. It’s also time to get the freezer stocked with some quick, easy food as I’ve got indexing projects coming in–some while I’m still teaching this Fall term.  With lots of grading to do as well, I wanted something that would take care of itself while I worked–so out comes the all-purpose “rice” cooker for some slow-cooked food.

I’m a great fan of pork almost any way you fix it so when I found a package of boneless pork ribs–just the ticket for the slow-cooker–while I was doing my grocery shopping on Thursday it obviously went into the cart. Big package, but on special, so it came home with me to make a lazy meal, and some to go into the freezer for quick meals when I’m really busy, or when I need comforting, peasant-style food. Can’t pass up inexpensive on something I really like.

Braised pork and kale from the slow-cooker

Ingredients

  • boneless pork spare ribs, about 2 pounds
  • 1 packaged of frozen, chopped onions
  • chopped kale, one frozen “family” pack
  • 6 large garlic cloves
  • 1 14.5-ounce can of fire-roasted tomatoes
  • 2 tablespoons of Hatch chili powder
  • 2 teaspoons of kosher salt, adjust to taste as needed when cooking is finished

Preparation and cooking

  • cut pork into about 2-inch pieces
  • add half package of kale and onions, mixing
  • layer in pork, sprinkle with salt, chili powder
  • add remaining kale and onions
  • add fire-roasted tomatoes with juice
  • close the lid and set for 8 hours
  • shred pork using two forks (if desired)
  • check seasoning and adjust as necessary.

No, no pictures as  this is NOT a photogenic dish, but it sure is tasty! And there’s certainly nothing like complicated technique involved here.

Great served with a side of spicy black beans, or garbanzo beans, or just a big bowl on its own. This particular time I had a roasted winter squash as a side with it. (Now, to turn the rest of the winter squash into another meal–maybe stuffed with some Sicilian sausage that also went into the grocery cart.)

There was more liquid than I had anticipated when this was finished cooking, so after packing some in zipper-lock bags to go into the freezer (with SOME juice), the extra juice with some kale and some shredded pork is going to turn into soup–details will evolve when it’s used–but that’s an additional meal out of that pack of spare ribs!

Turnip greens…

Loose mustard greens

While having leisurely Sunday morning coffee I was browsing through the Huffington Post and discovered a presentation on rediscovering mustard greens (though I didn’t realize that they were lost or misplaced). If mustard greens need rediscovery, then perhaps turnip greens need rediscovery (or just discovery) too. One of my favorite things to do with heartier greens (those that need longer cooking, unlike spinach) like collards, mustard, kale, dandelion, or chard is to braise them with sausages for a one-pot meal that is easy to make in any quantity–and reheats and freezes well.

Just recently I was the happy recipient of a LOT of turnip greens from a gardener who likes the bottoms–the turnips and not the green tops. Some of these were older–so a bit spicier, with some of the “horseradish” tang that you find in mustard greens as well.

Even though it was warm weather, I had just started an intense indexing project and wanted some easy food–braised greens with sausage.  No need for a recipe and certainly not labor-intensive or needing a lot of attention while it cooked. (I thought about using the pressure cooker, or the slow cooker but just did this on the stove-top this time)

hot italian sausage IMG_6092I started by dicing and sautéing a large onion, then added a mix of sweet and hot Italian sausage, removed from the casings, to brown lightly.  Of course it needed garlic–about half a dozen large cloves, minced. (The garlic mellows a lot during cooking.)  Since the greens had their own “heat” and I had used hot Italian sausage, I didn’t add the hot red pepper flakes that I would have used with other sausages, or other greens–e.g. kale or collards.

Once the garlic had sautéed enough to become aromatic, I added the washed and cut up greens (still wet from washing) and a can of diced tomatoes. In a tightly lidded pot, I left this over low heat until the greens were almost tender–about 45 minutes. (Since these were older turnip greens, I did remove the stems before cooking.)

In went one can (rinsed) of pinto beans (not on the low-carb diet, but…) and continued to cook about 30 minutes more to let the beans pick up some of the flavor of the greens and the sausage. Home-cooked dried beans would have been better, but since I didn’t have any of those in the freezer, and hadn’t planned ahead–canned ones had to do for now.

And there you have it, a quick supper, and a couple of servings for the freezer for several more quick, comforting meals.  Since the greens were spicy, the sweet Italian sausage added a nice counterpoint. I’m glad to have some tucked away in the freezer since I suspect that will be the last of the turnip greens for the summer–as the weather gets hotter the greens get a bit more assertive. If I’m lucky and there are more, I’ll probably do this again, but omit the hot Italian sausage. Or think about doing this with lamb sausage…so many possibilities, and so easy–and reasonably healthy as well.

All you need to add is a glass of a nice sassy, robust red wine, and maybe some good crusty bread (if you’re not on a low-card diet). A son goût!

Trying to keep the New Year’s resolutions…

I’m really trying to keep my New Year’s resolutions, though sometimes I think that I should simply resolve each year to try to do better on keeping LAST year’s resolutions.  But it’s a new year, new start, so here goes!

I’ve just gotten back from the grocery store–with only one thing that wasn’t planned–That was a veggie that I’ve never seen in this Harris Teeter before–a Boniato (Cuban sweet potato). While I gripe loudly and constantly about how crowded the grocery store always is on Sundays, it’s what seems to work for me–so I gripe and still shop on Sundays–unless I ran out of milk on Saturday!

The grocery shopping took a bit longer than usual, but I went with the idea of doing some meal planning on the hoof.  (I like to shop by what looks good and what’s on special, so meal planning at home doesn’t necessarily work for me.) I went with a set number of meals in mind–and the meat (at least vaguely) in mind, then walked around looking to see what was on special, and what looked good–in other words,  produce and meat.

Knowing that we can expect some cooler weather over the next week did influence my shopping, and so did the fact that I’m still knee deep in course prep for the medical terminology courses that I’m teaching.  I need cool-weather dishes that I can pop into the oven (Römertopf is out on the counter–and I can scarcely believe that I’ve not posted about cooking something in them before this.)

The result of my meal planning on the fly was this and I’m going to keep you posted on how well I succeed with this–hoping for some peer-pressure here:

  • It’s really too-warm-for-the-season weather here today, so I’m having something light (and “leftover”)–cod re-warmed with the tomato sauce that I brought home from the Italian restaurant, and cauliflower and black olive gratin (had all the ingredients in the fridge except the cauliflower.  I purchased enough for one good-size serving from the salad bar–cheaper than a whole head of cauliflower when I know part will likely go to waste.)
  • Lamb (shoulder chops to be cut up) braised with veggies–in the Römertopf–with an under-appreciated vegetable–turnips.  Personally I love them raw too, and like the sweetness that they add to soups, so they get used a lot.  Doesn’t hurt that they store so well either.
  • Chicken thighs to roast (most likely Römertopf  again) with some root vegetables (have carrots, turnips, parsnips, and some cabbage).  There will be at least two meals from the chicken thighs.
  • Since I have some lovely ham stock (courtesy of a friend sharing ham and the ham bone with me) I’m going to make some bean and kale soup for one warm cozy supper.
  • While I was perusing the New York Times Health section and stumbled onto a recipe for a turnip gratin that is a possible for a side dish with some of the chicken.
  • Then last, but not least, is a fresh black pepper and onion sausage that most likely headed into the Römertopf with some potatoes, to be accompanied by some cabbage that’s been quickly microwaved with a bit of extra-virgin olive oil.

After my meal planning, I’ve got a couple servings of meat (chicken thighs and pepper-onions sausages) that are flexible and should lend themselves to other things if my appetite doesn’t fit my plans.  The sausages could always end up in another “one-pot” dish.  There are also some salad makings in the fridge, and some fruit (Fuyu persimmons, apples, and oranges) for dessert.

One of the things that I like about recipes like those for the cauliflower-black olive gratin and the turnip gratin, is that even though they say “serves 6” they are SO easy to cut down to size for single-serving cooking.

So that’s my plan for this week–regular cooking that is healthy, and doesn’t promote waste from things that just don’t get used.  There are some lunches to be made during the week since most of my courses are online this term–meaning I’m home to fix brunch or lunch for myself.  Maybe that Boniato will fit there.

I’ll be posting more about these meals, but, please, wish me luck with the New Year’s resolution!  Now, off to the kitchen to do the cauliflower-black olive gratin to go with my cod in tomato sauce!

Beet (and other) Röstis

One of the things that we often want in cooking for one (just as in cooking for four or six) is fast and easy, and a technique that can be applied to a number of dishes. I’ve mentioned steam-sauté as a great way to cook vegetables quickly–but here are some other ideas for quick cooking.

Beets image from Swallowtail Garden seeds

beets

Beets can normally take quite some time to cook since they are dense and hard.  One of the ways to speed up cooking is by grating or shredding a dense vegetable–think about hash browns!  You can use a similar technique with beets (or carrots, parsnips, cabbage)–cut them into small pieces so that they will cook more quickly.  Here is an example adapted from Marion Morash’s Victory Garden Cookbook: 

Grated Sautéed  Beets

Ingredients

  • 4 medium beets
  • 4 tablespoons butter, or olive oil
  • Fresh lemon juice
  • Salt and fresh-ground black pepper
  • Chopped fresh dill weed or parsley

Preparation

  • Wash, peel, and coarsely grate beets (If small and tender, peeling is not necessary)
  • Melt butter in a covered frying pan.
  • Add beets, and stir to cover with butter or oil.
  • Cover and cook for about 10 minutes, until just tender.  (You could add a bit of water or stock–like steam-sauté technique if needed to keep from burning.)
  • Season with lemon, salt and pepper and serve.

Although this will serve four, it’s easy to cut this down to a single-serving size–there’s really nothing to measure or adjust–it’s easy to eyeball the amount of butter and quantity of beets needed.  What could be simpler!

If you want to get just a bit fancier with your veggies, you could make röstis.  This gives you different flavor and texture for very little extra effort.

 You’ve probably heard of rösti–maybe just as “potato pancakes”.  A potato rösti at its simplest is just grated (shredded) potato, mixed with a little flour to help hold the potatoes together (and maybe some Parmigiano-Reggiano), which is sautéed  in a little butter until tender, brown, and crispy.  It’s simple, quick, and yummy–and even better, it’s easily made for one or two people as it’s really not a fussy recipe:  small for a side dish, or a bit larger for a main course.

Here is a basic potato rösti recipe from Mark Bittman’s Food Matters cookbook Kindle location 1464).  This recipe makes four substantial servings, or 12 snack size röstis. Röstis are typically shaped into a cake, but can also be baked in muffin tins or on a cookie sheet

Potato-Parmesan Rösti

Ingredients

  • 1/4 cup olive oil, plus extra for greasing pan and your hands.
  • 1-1/2 pounds waxy potatoes (new potatoes, or red potatoes)
  • 1 onion
  • 1 tablespoon coarsely chopped fresh rosemary or thyme
  • 1/2 cup grated Parmesan cheese
  • 1 tablespoon whole wheat flour
  • salt and fresh-ground black pepper

Preparation

  • Heat oven to 350° F and grease nonstick muffin tins or backing sheet.
  • Grate the potatoes and onion (food processor, or by hand).
  • Squeeze dry with paper towels.
  • Put in bowl, add Parmesan, flour, and oil (if baking–omit if sautéing).
  • Sprinkle with salt and pepper.
  • Divide between muffin tins and press down, or press into cakes.
  • Bake or sauté until crisp and golden–about 30 minutes.
  • Let cool for 10 minutes before removing from pan.
  • Serve warm or at room temperature.

Obviously, this technique will work well with other vegetables–such as beets, carrots, squash, cabbage.  You can see that this is easily cut down for a single serving: you’ll want about one-fourth this amount:  1 tablespoon oil, 6 ounces potato, 1/4 onion, a healthy pinch of rosemary, 2 tablespoons Parmesan, and a scant teaspoon of flour for one large cake, and the cooking time should be about the same since the recipe calls for dividing into cakes. Making these in single serving sizes, I opt to sauté them rather than bake them.  I omit the oil from the mixture and add a little to the skillet.

This technique can be used with lots of other vegetables–one of the advantages being that the shredded vegetables will cook more quickly than whole veggies.

Another recipe from Mark Bittman is for beet rösti from his column in the New York Times:

Beet rösti

Ingredients

  • 2 pounds beets (3 very large or 4 to 6 medium)
  • 2 teaspoons coarsely chopped fresh rosemary
  • Salt and freshly ground pepper to taste
  • 1/2 cup flour
  • 2 tablespoons butter
  • Minced parsley or a few rosemary leaves for garnish.

Preparation

  • Trim and peel beets as you would potatoes.
  •  Grate them in food processor or by hand (For a single serving, I’d use a box grater.)
  • Begin preheating 12-inch nonstick skillet over medium heat.
  •  Toss grated beets in bowl with rosemary, salt and pepper.
  • Add about half the flour; toss well, add rest of flour, and toss again.
  •  Put butter in skillet; heat until it begins to turn nut-brown.
  • Scrape beet mixture into skillet, and press with spatula to form a round.
  • With medium to medium-high heat–the pancake should gently sizzle–cook, shaking pan occasionally, until bottom of cake is nicely crisp, 8 to 10 minutes.
  • Slide cake onto a plate, top with another plate, invert the two plates, and return cake to pan.
  • Keep cooking, adjusting heat if necessary, until other side is browned, another 10 minutes or so.
  •  Garnish, cut into wedges, and serve hot or at room temperature.

 This can be readily adapted to other vegetables–carrots, parsnips, rutabagas, turnips–which have about the same texture and density as beets. Once you’re familiar with the technique, you can use vegetables with different textures:  summer squash–just squeeze them thoroughly to remove moisture, and remember that they will cook more quickly than beets.

Tuna salad

Not that there’s anything wrong with traditional American tuna salad, but there are lots of other things to do with  tuna.  I like tuna, but I don’t want “tuna salad” in the traditional sense every time, so I’ve come up with lots of variations.  Some of the best are made with the “leftovers” from grilling a lovely big tuna steak or with my homemade tuna confit.

My “salad” might have onion and celery (if present in the refrigerator) but it’s certainly not a requirement; no mayonnaise either (though I do like the stuff).   Home from work, not going back out to the grocery store; it’s warm enough that I don’t want anything hot for lunch.  What have I got to work with from the pantry and the refrigerator?

If you think about the basic American tuna salad, it has very few ingredients:  usually mayonnaise, celery, onions, and maybe hard-boiled egg, or sometimes pickle relish.

Personally I find the usual supermarket canned tuna to be unappetizing–dry and crumbly if it’s water-packed white albacore, sometimes mushy  and fishy lacking in any real texture,  so I understand why it’s often hidden in the mayonnaise, but there are now  reasonably priced alternatives available.  If I don’t have homemade confit, I’ll be using a single-cooked canned tuna that more nearly approximates the quality of European canned tuna.

Starting with good quality  tuna, unless you want to go all the way and make salad à la niçoise you really don’t need many ingredients.  You don’t really want to overwhelm the tuna (since we are using good tuna here) so the components you need are:

  • some contrasting texture and flavor ingredients
  • just a bit of oil
  • a little acid to brighten it up.
  • fresh-ground black pepper
  • some fresh herbs for extra flavor

Starting with a six-ounce can of tuna, here are some possible things to do:

  • For something light, refreshing  and crunchy for a sweltering day, I like to use diced cucumber, scallions, red onion or sweet onion like Vidalia (depending on what’s in the fridge), fresh-ground black pepper, salt (if the tuna has no added salt), about a teaspoon of very fruity extra-virgin olive oil, a squeeze of lemon juice, and some finely chopped spearmint.
  • For something really quick, I’ve  added some  fresh onion, sweet bell pepper,  diced chile peppers for texture and some salsa  from a jar.  Chipotle salsa can give you a warmer, smoky taste.
  • If you want a heartier salad, add to your tuna some drained, rinsed white beans (great northern or cannellini are my favorites), tomatoes, chopped onion, green or black olives, some extra-virgin olive oil or aïoli (easy to make a quick version if you have decent mayonnaise in the fridge) and some fresh oregano.
  • If you have some pesto in the fridge, try chopped onion (almost always use this), diced tomato, capers, or olives. If there’s pasta around, that can be added too.
  • I usually have a jar of a fruit salsa in the fridge as well and that makes a good start.  Add sweet onion like Vidalia or Walla Walla, more fruit such as peaches or mango, some ripe bell peppers.
  • Black beans, diced tomatoes, onions, chile pepper, ripe bell pepper (I’m just not fond of green bell peppers so I don’t use them), celery, and even some corn and a vinaigrette with a light touch of chilli powder added.
  • For an oriental take on the tuna salad,  a bit of sesame oil (the kind from roasted sesame seeds) with some ginger, green onions, a little garlic if you like, with cucumbers, celery.
  • That extra serving of roasted vegetables–even potatoes–with cherry tomatoes, and a splash of vinaigrette, maybe some fresh thyme.

Obviously, a many of these suggestions would work equally well with chicken if you have that instead, or don’t like tuna.  It’s easy to improvise a quick salad if you start with a serving of meat. The possibilities are really almost endless–just follow your own taste.

A son goût! 

Caponata!

The first time I tasted “caponata” it was mostly eggplant, and it was absolutely buried in tomato sauce.  I liked the concept, but it had kind of languished until I was looking around the kitchen at the tomatoes and eggplants that I had there.  This has been such hot, humid, torrid weather that I’m turning into a very picky eater…must be flavorful, room temperature or cold.  Needless to say I’ve eaten a lot of melons and fruits…and raw tomatoes in caprese salad, but I really needed to do something with the tomatoes and eggplants.

I decided to go looking for a recipe for caponata that looked like something I want to eat with grilled or griddled king klip since that was on special in the market today.  I started by going to EatYourBooks.com to search for caponata recipes among the books that I own (that I’ve put on my bookshelf there).  I found that I had 6 recipes for caponata.  I don’t know if it’s the weather, or what, but none looked like something I wanted to tackle this afternoon.  So I went searching online in the blogs that I like to check on.

On All Things Sicilian and more, I found a recipe that “felt” like something to do this afternoon, and it seemed loose enough that I could do it with what I had–oriental-type eggplants and little grape tomatoes.  It involves several steps, but it’s seemed approachable. A slight variation put a little garlic and some red pepper flakes into the mix as the olives that I had were marinated in those things.   Admittedly I did take a few liberties with the recipe but I think it worked well.  I did not improvise with the agro dolce–I kept those proportions.

My only real variation (other than the tomatoes) was that I treated the eggplant as described in my post on how to cook eggplant (as suggested by Cook’s Illustrated: salted very lightly, microwaved it, pressed it) and I was able to sauté all the eggplant in about a tablespoon of olive oil.

Here is the recipe from All Things Sicilian blog–the best I’ve ever tasted.  (You should go to this blog and read for more information about caponata.)

Ingredients

  • extra virgin olive oil, 1½ cups (more or less – depending how much the vegetables will absorb)
  • eggplants, 1-2  large, dark skinned variety,
  • peppers, 3, preferably 1 green, 1 red, 1 yellow (variation of colour is mainly for appearance, but the red and yellow ones taste sweeter)
  • onion, 1, large, sliced thinly
  • red tomatoes, 2 medium size, peeled and chopped, or 2 tablespoons of tomato paste and a little water
  • capers, ½ cup, salted or in brine
  • green olives, ¾ cup, stoned, chopped
  • celery, 2-3 tender stalks and the pale green leaves (both from the centre of the celery)
  • white, wine vinegar, ½ cup
  • sugar, 2 tablespoons
  • salt and freshly ground pepper 

Preparation

For caponata vegetables

  1. Cut the eggplant into cubes (approx 30mm) – do not peel. Place the cubes into abundant water with about 1 tablespoon of salt. Leave for about 30 minutes – this will keep the flesh white and the eggplant is said to absorb less oil if soaked previously.
  2. Prepare the capers – if they are the salted variety, ensure they have been rinsed thoroughly and then soaked for about 30 minutes before use, and then rinsed again.
  3. Cut the peppers into slices (approx 20mm) or into rectangular shapes.
  4. Slice the onion.
  5. Slice the celery sticks and the green leaves finely.
  6. Peel, and coarsely chop the tomatoes (or use tomato paste).
  7. Drain the eggplants and squeeze them to remove as much water as possible – I use a clean tea towel.
  8. Heat a large frypan over medium heat with ¾ cup of the extra virgin olive oil.
  9. Add eggplant cubes and sauté until soft and golden (about 10-12 minutes). Place the drained eggplants into a large bowl and set aside (all of the vegetables will be added to this same bowl). If you want to, drain the oil from the eggplants back into the same frypan and re-use this oil to fry the next ingredients – the peppers.
  10. Add new oil (to the left-over eggplant oil) plus a little salt and sauté the peppers,until wilted and beginning to turn brown (about 10-12 minutes). Remove the peppers from the pan and drain the oil from the peppers back into the same frypan. Place the peppers in the bowl with the eggplants.
  11. Add a little more oil to the pan and sauté the celery gently for 5-7 minutes, so that it retains some of its crispness (in more traditional recipes, the celery is always boiled until soft before being sautéed). Sprinkle the celery with a little salt while it is cooking.
  12. Remove the celery from the pan and add it to the eggplants and peppers.
  13. Sauté the onion having added a little more oil to the frypan. Add a little salt and cook until translucent.
  14. Empty the contents of the frypan into the bowl with the other cooked vegetables.

For the agro dolce sauce

  1. Add the sugar to the frypan (already coated with the caramelised flavours from the vegetables).
  2. Heat it very gently until it begins to melt and bubble. Add the vinegar and evaporate.
  3. Incorporate the cooked vegetables into the frypan with the agro dolce sauce.
  4. Add ground pepper, check for salt and add more if necessary. Gently toss all of the ingredients over low heat for 2-3 minutes to blend the flavours.
  5. Remove the caponata from the pan and cool before placing it into one or more containers.

Ò¿Ó
It should hold well in the refrigerator–and I know it will be even better tomorrow when the flavors have melded  more.  I’m looking forward to this with some griddled king klip tomorrow.

A simple supper

When I did the smoked lamb and goat shanks for the Fourth of July I deliberately added some extras, even after I had allowed for the appetites of my guests.  What was left after our dinner was not “leftover” but was planned (even though I had nothing specific in mind just then) as future food since I thought that these would lend themselves well to improvisation.

I sliced some of the meat very thinly from the cold shanks and used it in a salad.  The goat meat was especially good here, but the lamb made a nice salad addition too.  There was still enough for one all-meat meal, or two meals if supplemented with a grain or beans.

Lamb and beans heating in skilletI had envisioned using the rest of the meat with some cannellini beans  to make a kind of mini-cassoulet that would be topped with bread crumbs and baked briefly to meld the just-added seasonings. That was just not on the program!  It’s been so hot lately that I just did not want to have the oven on even with the air conditioning running, so I opted for a “skillet” meal.

My first step was to sauté some chopped onion (1 medium) until soft and starting to brown, then add  garlic (2 large cloves, minced).  Next I added the chopped meat from the lamb and goat shanks.  I had enough for two servings–and I decided to use it all in this concoction as I though I would like two meals from this as it would only improve with reheating. I added about 1 teaspoon of herbs de Provence(seemed rather cassoulet-like) and a healthy dash of crushed red chili peppers for some spice, and about 2 tablespoons of water.  Finally I drained, rinsed and added one can of cannellini (white) beans to the skillet, which I covered and allowed warm over low heat to hydrate the herbs de Provence and the pepper flakes.

Without further ado it was time to eat. With the last of the bottle of wine that was Lamb with white beans and sliced tomatoesserved with the original meal  it was a very satisfying, and easy, meal. There will be one more serving (and that’s not a “leftover” either–maybe that will make it into the baking dish with the bread crumbs and some rosemary added. This could adapt well to any extra pork, beef or chicken that happened to be hanging about the fridge as a leftover.  All this needed was a salad to complete the  meal.  Dessert was just some fresh fruit.

18 July 2011

Just a quick update here.  I’m glad I made two serving of this.  The improvement on re-heating was fantastic.  The smokey flavor came out more–next time I do something like this, I’ll plan to make it one day and reheat it later.  I’d love to try this with goat!

Cold beet soup

I’m back from the Durham Farmers’ Market–it was a great day, even though the market is not in full summer swing yet.  The Piedmont BioFarm’s booth, which was right next to mine, had absolutely gorgeous beets. Unfortunately, they  sold quickly so  I didn’t get any today, but I’m told that there will be more next week, so I’m planning to bring some home with me then.

beets with tops from Johnny's Select Seeds.The sunshine and warm weather made me think about beet soup.  This recipe was given to me years ago by a good friend, and it’s become one of my favorite summer things to have in the refrigerator for hot weather.  It’s cool and refreshing, yet very satisfying.

I first experienced this soup when Casey brought me some, just when it was most needed:  I was moving–in extremely hot, humid weather–from one apartment to another in the same building, so it was mostly carrying boxes and lugging furniture, all very hot sweaty work.  Air conditioning was out of the question with the constant coming and going, with the doors open.

Cooking was also out of the question–mostly for reasons of fatigue, sore muscles, disruption of the kitchen, and the heat, and maybe even a dollop of laziness thrown into the mix.   That soup was the most wonderful treat, particularly under those circumstances; I’ve made it many times since and it’s at least as good, if not even better, when had in much less dire straits.

It’s not a small recipe, but it holds very well in the refrigerator;  a “left-over” taste is not a problem–and I think that the flavors actually blend and grow with standing.  I suppose you could always halve the recipe, but it’s so good that I’ve never done that–I can easily enjoy  it several days in a row!

Šaltibaršciai (Casey’s Cold Beet Soup)

Ingredients

  • 1/2 medium-size onion, finely chopped (preferably Vidalia or Walla Walla sweet onions)
  • 1 tablespoon salt
  • 6-10 (depending on size) boiled, peeled, and grated beetroot
  • 2 cups water in which the beets were boiled.
  • Chopped stems and greens from the beets, steamed 3-5 minutes
  • 2 large cucumbers peeled, seeded, and chopped
  • 2 handfuls of fresh dill, finely chopped
  • 1 bunch of green onions, sliced thinly
  • 5-6 hard-boiled eggs, chopped
  • 1 cup of sour cream
  • 1/2 gallon buttermilk
  • 2 cups water from cooking the beets (cooled)
  • red wine vinegar (0 -4 tablespoons) to taste.

Assembly

  1. In a large bowl, place the 1/2 medium onion and about 1 salt. With the back of a wooden spoon, grind together the onion and the salt to draw out the onion juice. (You really need to do this “muddling” process–you don’t get the same “blend” of the onion flavor if you simply add minced onions.)
  2. Add the remainder of the ingredients to onion in the bowl and stir well.  Adjust the flavor balance with additional salt if needed, and a wine vinegar to taste.  Add more liquid if needed for the consistency you prefer.
  3. Chill thoroughly.  Serve with boiled or steamed potatoes, chilled.  (You want boiling potatoes, not baking potatoes for this; red or Yukon gold work well.)

Wine suggestions, courtesy of Casey, were as follows:

  • Sauvignon Blanc is excellent.  The soup needs a wine with more fruit and not too herbal or grassy.
  • A white Corbières was too herbal–it accentuated the dill in the soup until it was just overwhelming.

I did not try the Corbières; overwhelming dill did not strike my fancy and I trust this recommendation.  I can attest that Sauvignon Blanc is excellent with the soup.  I’ve probably eaten this for breakfast, lunch, and supper, with wine, and without.  It’s well worth the effort of making and it may well improve with standing a few days.

I have to confess that is a spate of utter laziness, I have replaced the potatoes with cubed extra-firm tofu with a very satisfying result.  I have always thought that it’s the eggs and the potatoes that make this such a satisfying, but cool, meal.  And, it a marvelous color, too–definitely shocking pink.  I’ve not tried it with the orange beets, but that might be interesting, too.

Think it looks like a lot? Well, invite a friend. Friends are usually glad to help in cases of an excess food crisis!

A son goût!