Fårikål (Norwegian lamb and cabbage stew)

Cold, rather dreary day so I’m making some warm, cuddly, comfort food from my most recent cookbook, The Kitchen of Light by Andreas Viestad.

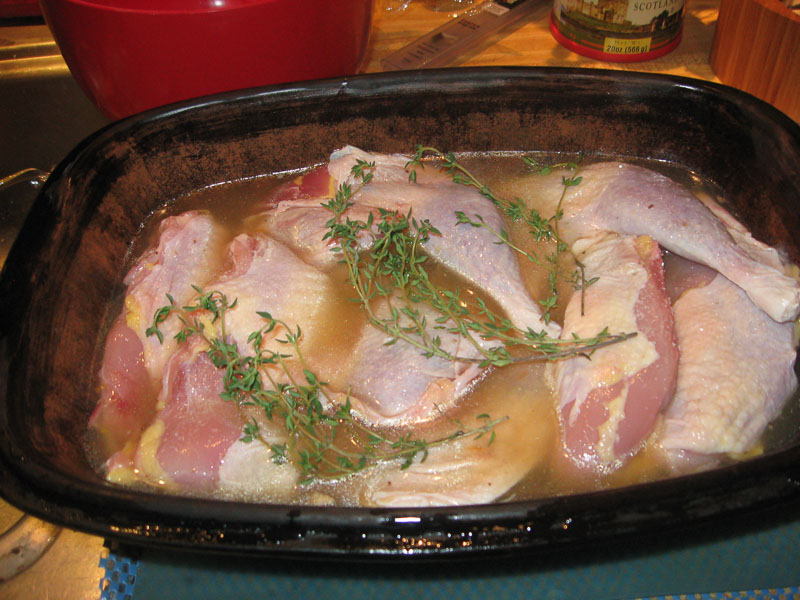
I made the lamb and cabbage stew–well, sort of–I had goat meat in the freezer so I substituted that for lamb.  As I’m writing, I’m smelling it cooking–and practically drooling on my keyboard.

The stew is in the oven in my “small” Dutch oven (did not make the whole recipe). It smells SO good. I’ve been reading posts from a friend on Facebook singing the praises of this stew–reheats well–which means I can make a batch and freeze some.

The seasoning of this stew is bay leaves and black peppercorns–a lot of black peppercorns, cooked with the meat and cabbage.  This surprised me when I read the recipe because I’ve seen sources saying that black peppercorns will be bitter with long cooking, so it’s not usually added until late in cooking, though this is not dry heat, so that may make a big difference. This recipe calls for 1 to 2 tablespoons of black peppercorns.  (From tasting so far, I think I’m going to want to add more black peppercorns.)

Product.DisplayNameReally good, fresh-ground black pepper is one of my favorite spices.  I’ve gotten hooked on the India Special Extra Bold Tellicherry  and that’s what I’m using in this recipe.  Regular Tellicherry or Malabar pepper should also work.

Fårikål (Norwegian lamb and cabbage stew)

This recipe is adapted  from The Kitchen of Light (Andreas Viestad)–It’s easily adapted for single-serving cooking, but also suitable for making the full recipe and reheating/freezing.

Ingredients

  • 6 pounds of bone-in lamb shoulder, trimmed and cut into 1-1/2-inch pieces.
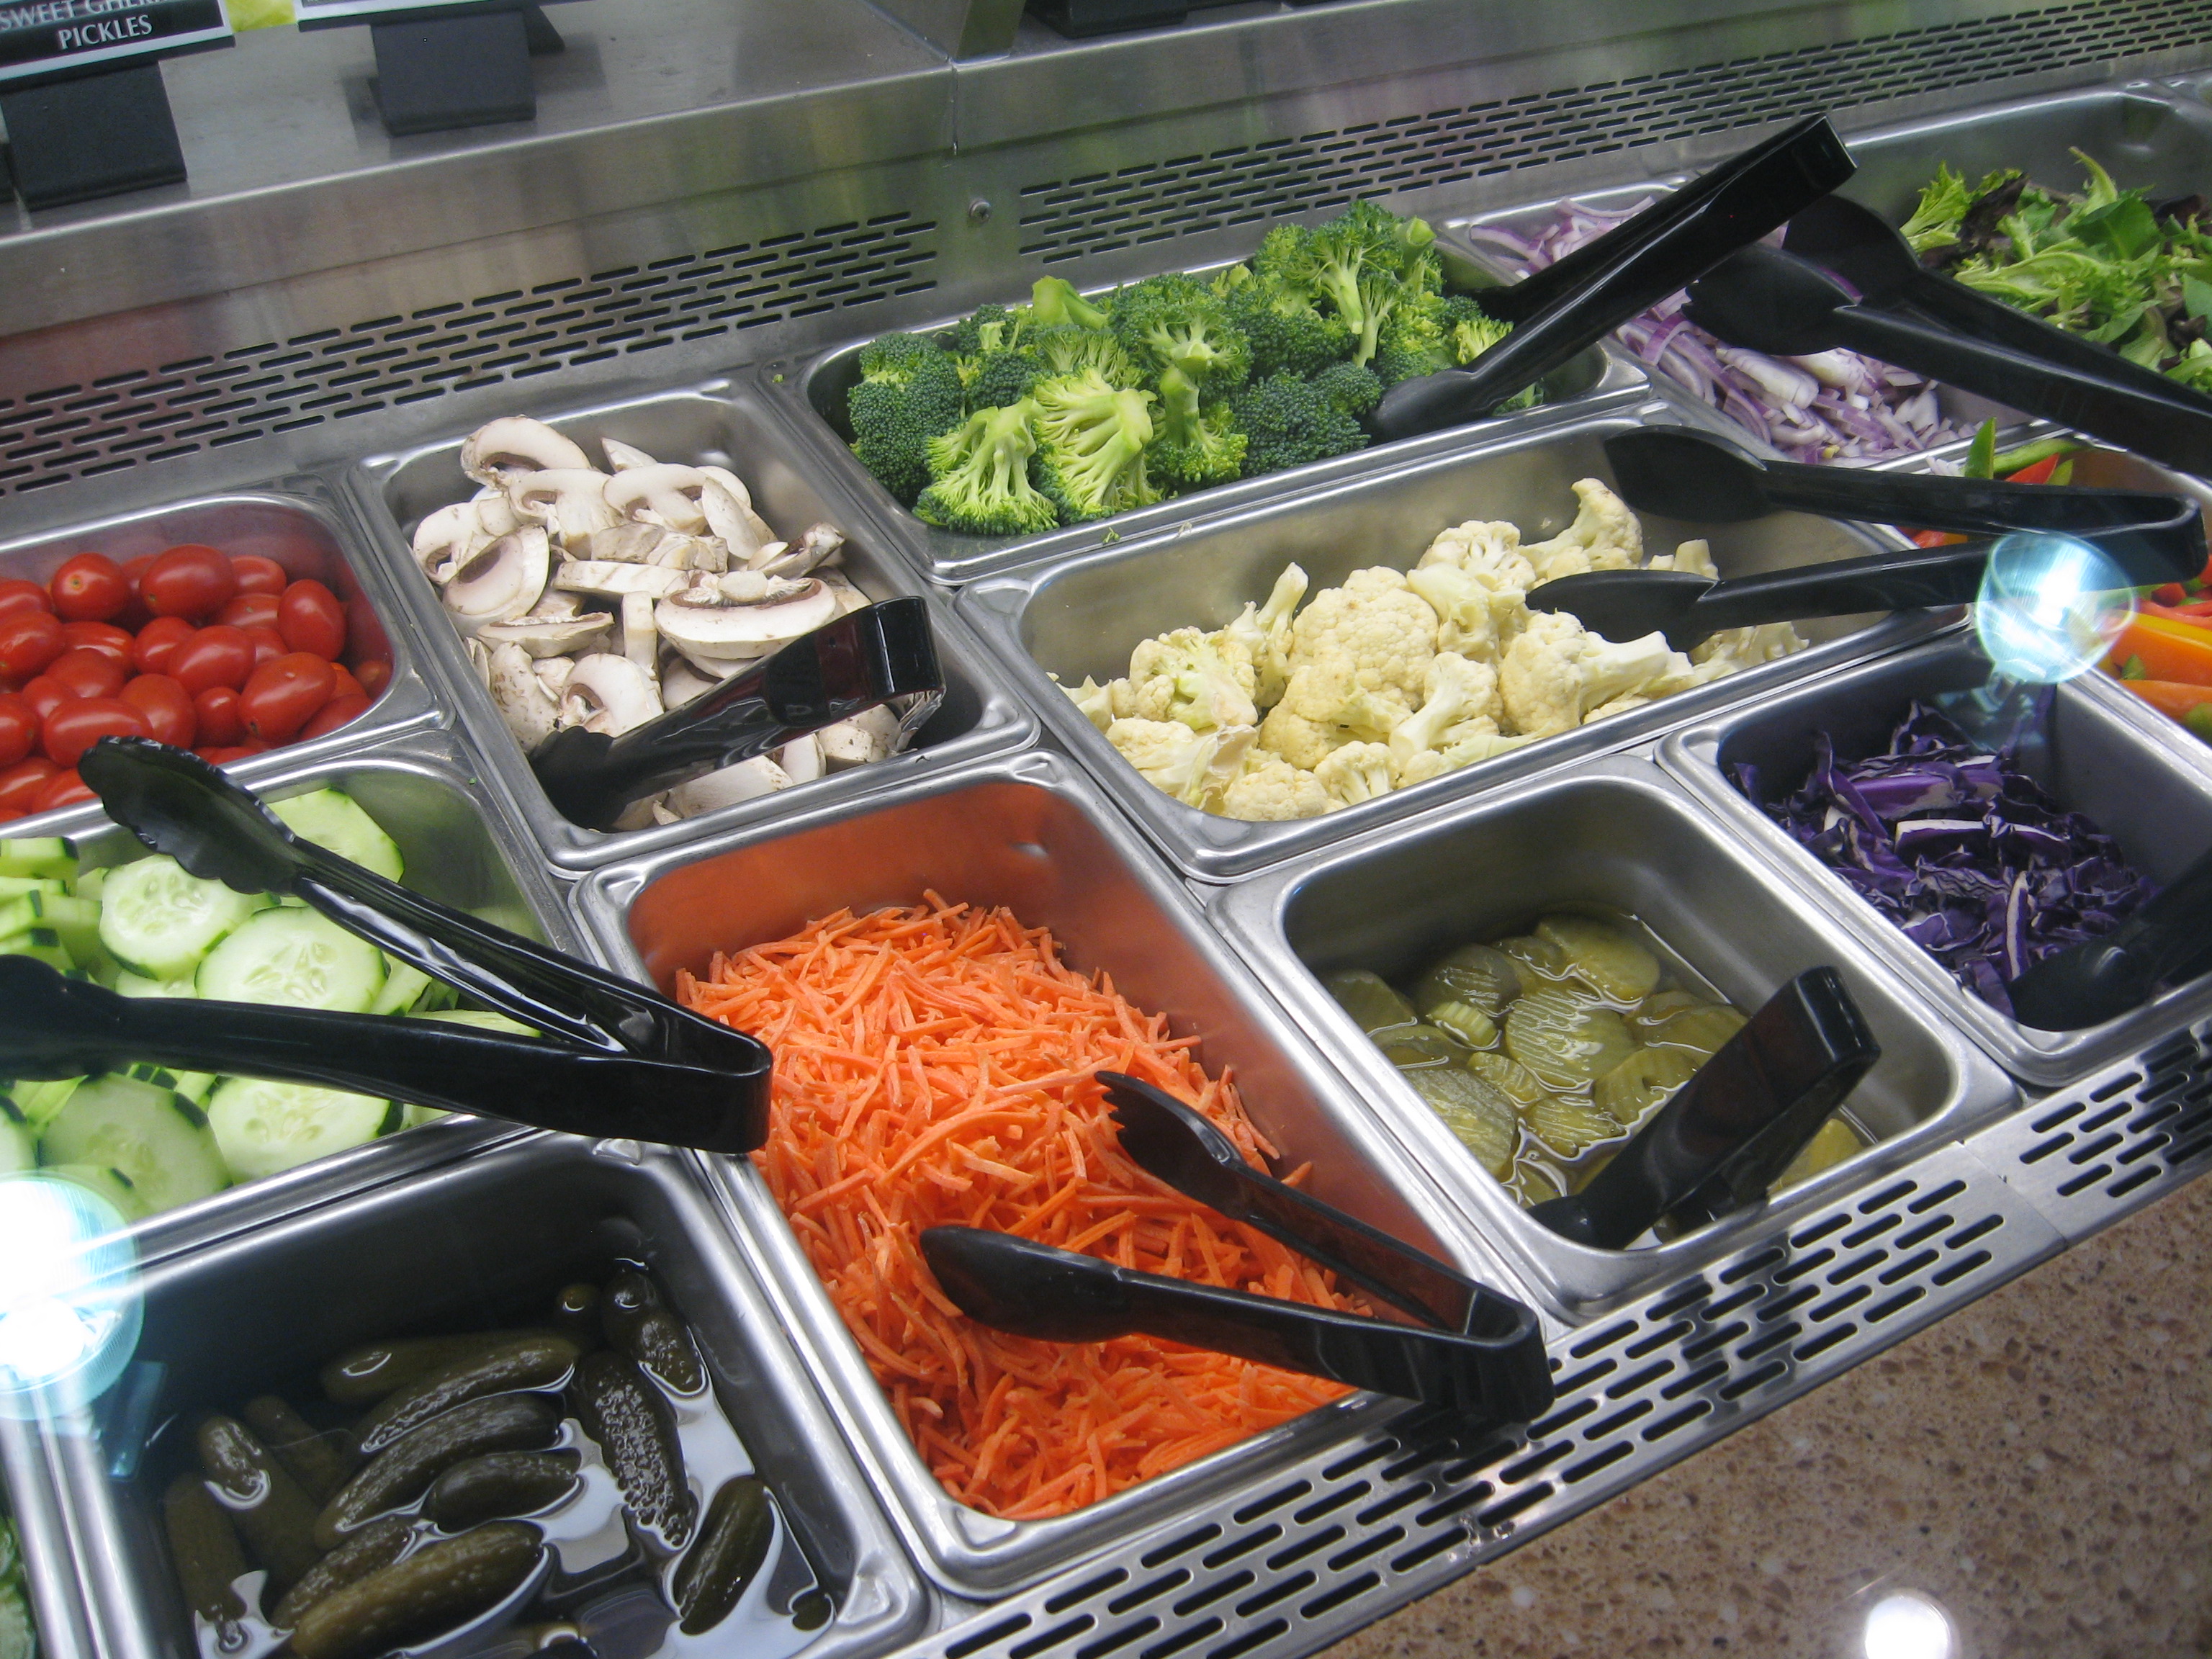
  • 4 pounds of green cabbage, shredded
  • 1 to 2 tablespoons black peppercorns
  • 2 bay leaves
  • 3 tablespoons unsalted butter
  • 1 tablespoon all-purpose flour
  • 4 cups cold water
  • fine sea salt (to taste)

Preparation

  • Layer the meat and cabbage in a large pot
  • Add black peppercorns, bay leaves, butter, and sprinkle in flour
  • Add water
  • Bring to a simmer, covered,
  • Cook about 2 hours over medium-high heat about 2 hours
  • To increase spiciness, add 1 more tablespoon peppercorns and cook an additional 15 minutes
  • Season to taste with salt
plated lamb and cabbage stew

Lamb and cabbage stew (from Wikipedia)

My first adaptation was the use of goat meat since that’s what I had in the freezer–as well as goat brown stock.

The goat meat was excellent, but in the future  I’ll use bone-in lamb shoulder chops, cut into appropriate-sized chunks.  My other adaptation of this recipe was to put it in the oven to cook at 300°F until the meat was very tender. It’s unlikely that I’ll want to make full quantity  of this recipe–more likely half, which will still give more than one meal, and  some to freeze.

This is NOT a pretty dish.  By the time the meat is really tender, the cabbage is NOT going to be pretty and bright green.  There’s more discussion of this dish on My Little Norway.  I like more peppercorns than that recipe uses–I actually added a lot more–and finished my serving with carefully roasted black peppercorns, coarsely crushed.

This has me looking for other recipes using cabbage–which I think is an under-appreciated winter vegetable. Too often I think it’s thought of as “slaw”.  After reading Viestad’s cookbook and North: The New Nordic Cooking of Iceland  by Gunnar Karl Gislason and Jody Eddy,  I want to explore more Scandinavian cooking.  I found lots more recipes on New Scandinavian Cooking, too–and the manifesto of the “New Nordic Cuisine”.

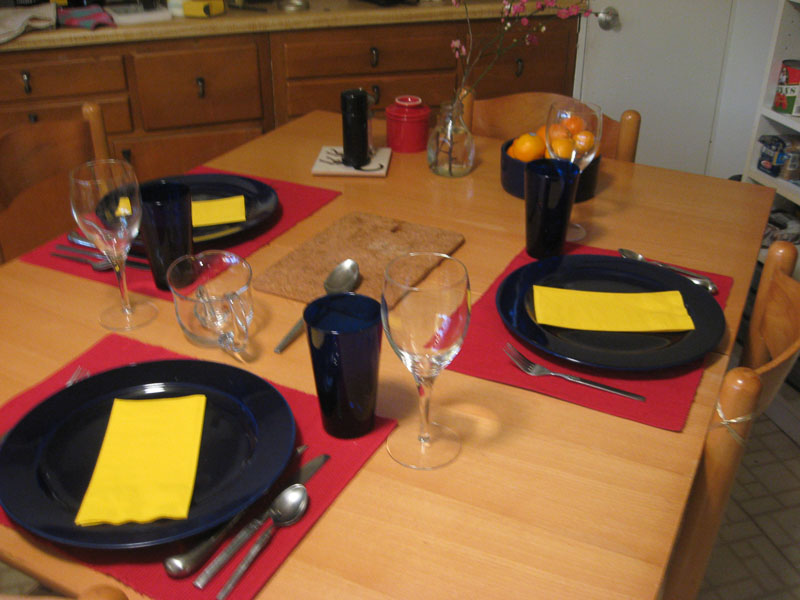
For a beverage with this dish? Well, a porter would be excellent. If I were doing wine, I think I’d look for something really robust–something that has at least some alicante bouchet in it, or maybe a Minervois–I think this calls for some research!

A son goût!


A “roast” beef sandwich

Sandwiches are not just something to be thrown together without thought–definitely NOT two thin slices of baloney and Wonder bread!  They are a special kind  of meal–sometimes comfort food (like grilled cheese sandwiches) and sometimes even need planning when cooking for one person.  I’m always on the lookout for good “recipes”–or maybe inspirations–for sandwiches–particularly roast beef.

As much as I like cooking for one, there are a few drawbacks. One is that  realistically you can’t do real roast beef.  One of the things I miss is a good roast beef sandwich–it’s just not the same when the roast beef comes from the deli–no matter how good the deli.

image from Lemony Thyme

roast beef sandwich

One of the ways to satisfy my craving for roast beef sandwiches is with the planned  “leftovers” from my  thick-cut  steak–intentional leftovers of nice rare, pink, juicy  steak to slice  thinly and make a sandwich.  Then the fun begins–it’s a happening.

  •  Start with good bread (my oat bread , if possible),
  • Add some  flavorful, spicy greens:  radish sprouts or possibly arugula, or endive.
  • Maybe tomato,  if in season.
  • Cheese:  something “bleu”– gorgonzola dolce, Cabrales,  or Danablu–is one of my favorites with beef, though nothing wrong with a good cheddar or Swiss.
  • Maybe some thinly sliced red onion (or Walla Walla, Maui, or Vidalia,   sweet onions, if those just happen to be lying around).
  • Maybe a good “smear” of horseradish or horseradish sauce, instead of onion.
  • Finally,  a thin film of butter, preferably European style cultured (salted or unsalted)!
  • The final touch would be a sprinkle of fleur de sel.

Now choose a beverage–beer, cider, or even a glass of wine. Enjoy.

Signs of spring

Shad Roe Sac

pair of shad roe

Sometimes it’s a bit dangerous for me to venture into the grocery store–I happen on to something that I hadn’t planned to buy. That happens especially with some seasonal specialties that appear without warning because you never know quite when they are going to be available.

So we’ve had groundhog day, and we’re looking toward the vernal equinox (20th of March, I believe)–all suggesting that spring is on the way. I have a particular sign of spring that I’m always looking for: shad roe. Today I made its unpredictable appearance at my local Harris Teeter fish market. I never know quite how I’m going to fix it once I get it home–but it usually comes down to something with brown butter and some other seasonings like lemon, or something very simple so that the focus is the shad rod itself.

Whilst skulking about on the web, I found this delightful post on The Garum Factory about its history and preparation that I want to reblog –I couldn’t do it  better.  This looks like a great way to prepare it. Another post worth reading if you’re new to shad roe is from the second lunch.

Now off to put my shad roe in the salt water!  I’m now ready to think that spring really is on the way!

George Washington Ate Here – Shad Roe with Brown Butter, Capers and Ginger from The Garum Factory appears below.

Jody and Ken's avatarThe Garum Factory

You will never see it on a restaurant menu.  The TV Food Network is unlikely to devote an hour to its history and preparation.  It is one of the great forgotten foods of American culinary culture.  I’m talking about the shad.  The sole remnant of its once mighty role in the diet of Americans is its roe, and for a certain segment of avid pescavores it’s the line in the sand between winter and spring.  This week we’re going where food blogs don’t usually tread – Shad Roe with Brown Butter, Capers and Ginger.   Believe me, it’s worth it.

There is a story–a fish story?–proffered by historian Henry Emerson Wildes in his book Valley Forge about the importance of shad to the revolutionary war effort.  In the spring of 1778 the tattered and hungry Continental Army was encamped in Valley Forge, Pennsylvania, where it had been since the onset of…

View original post 1,902 more words

A good home-cooked steak

Steak is not something that I order when I splurge for a meal in a fine restaurant; it’s too easy to do at home and good for single-serving cooking since it’s portioned when it comes home, and it’s easy to cook.

A good thick-cut, home-cooked steak is one of the things that I don’t mind having left over, since it’s usable as “roast beef” for a yummy sandwich.  (No, the roast beef from the deli simply does not do it.) My favorite way to cook the steak is from Cook’s Illustrated, 01 May 2007–it does take a little time and minimal effort, but it’s well worth it.

steaks in butcher caseMy usual choice of steak is a strip, or New York strip, cut 1-1/2 to 1-3/4 inches thick, with fat cap intact.  If I don’t find one lolling about   in the butcher case (you won’t likely find this in the pre-packaged section)  ask to have it cut the way you want it; my local Harris Teeter will cut to order but generally has thick-cut steaks in the butcher case.

This works fine with rib eye or with filet mignon, as long as it is thick-cut. Personally, I prefer strip or rib-eye to filet. Even with rib eye, it’s still not a substitute for real prime rib roast, but a good “second” so that I plan to have “leftovers”.

Ingredients

  • 1 boneless steak (1 1/2 to 1 3/4 inches thick (about 1 pound), strip or rib eye
  • Kosher salt and fresh ground black pepper
  • 1 tablespoon vegetable oil for searing

Preparation

  1. Adjust oven rack to  mid-position and pre-heat oven to 275 °F .
  2. Pat steaks dry with paper towel and season liberally with salt and freshly ground black pepper.
  3. Place steak on wire rack set in rimmed pan and place in oven.  (Steak does need to be raised rather in contact with pan).
  4. Cook until instant-read thermometer inserted in center of steak registers 90 to 95°F for rare to medium-rare, 20 to 25 minutes  (or 100 to 105°F  for medium, 25 to 30 minutes).
  5. Heat oil in  heavy-bottomed skillet over high heat until smoking.
  6. Place steak in the skillet and sear until well-browned and nicely crusty–about 1-1/2 to 2 minutes, lifting once halfway through to redistribute fat under the steak.
  7. Using tongs, turn steak and cook until well browned on the other side, about 2 to 2-1/2 minutes.
  8. Use tongs to stand steak on the sides and sear on all sides. (This really is worth the effort–and it really does not take long.
  9. Transfer to cooling rack, tent with foil, and let rest for about 10 minutes–this also is really worth the wait.
  10. You can prepare a quick pan sauce while the steak is resting, or simply add a pat of herb butter, horseradish,  or some blue cheese crumbles to the warm steak.

Add some simple sides like salad or baked potato. Now pour yourself a another glass of that luscious  red wine that was  breathing while you were cooking, and enjoy.

A son goût!

Grilled cheese sandwiches

A grilled cheese sandwich is often a quick meal, and perhaps the ultimate in comfort food–with or without the tomato soup.  I love grilled cheese sandwiches and want to pass on this link for any of you who also love grilled cheese sandwiches.

It’s very easy to make a “plain” grilled cheese sandwich, but you can do so much more with them.  I found some wonderful suggestions at Spoon, Fork, Bacon. If you love grilled cheese here is a great place to find some exciting ideas.

Hot & sour soup

Swanson hot and sour brothOccasionally  my curiosity gets the better of me while I’m meandering through the supermarket and I bring home something that I usually would not buy.  This time is was a box of Swanson’s Chinese Hot & Sour Flavor Infused Broth.  Usually the “flavor infused” would be a signal to walk on by. Since I do use Swanson’s chicken and beef broths and stocks, I stopped and looked at the ingredients. I was pleasantly surprised when I didn’t feel as if I were in the chemistry lab stockroom, so I bought it.

I do really like hot and sour soup–it’s my usual test of a Chinese restaurant–usually disappointing since my standard was set in Hong Kong!  I don’t see another trip to Hong Kong in the future, so I thought I’d try it.  My expectations were not really high as I opened the box and tasted it, but it was better than I’d thought–the hot and the sour were pretty well-balanced.  It’s main problem was that it tasted boxed–in other words, it needed some brightening up–like most boxed or canned stocks or broths.

Armed with my box of broth, I decided that although I wanted hot and sour flavor, I didn’t want to buy esoteric ingredients that I might not use again for a while just to try it out.  I thought maybe I could do something that was in the “spirit” of hot and sour soup with what I found in the fridge and pantry without a trip to the Asian market. So no tree ears or lily buds, and not even bamboo shoots.

vegetables on salad bar at Harris Teeter

prepared veggies

I found a basket of sliced mushrooms  in the fridge,  shelled edamame and collard greens in the freezer, water chestnuts in the pantry, and some rotisserie chicken and some pork in the fridge that needed given a re-do.  My only addition was a very large handful of julienned carrots (from the salad bar of my local Harris Teeter).

Since this was one of those OMG-I-don’t-have-time-to-cook occasions, I got out the rice cooker (cum slow-cooker) and added the hot and sour “flavor-infused” broth.  I sautéed  the mushrooms in just a bit of peanut oil until browned and gave the carrots a brief swish through the pan with the mushrooms, deglazed the skillet with a bit of the broth, and poured that into the slow-cooker. I added the edamame, collard greens, and the water chestnuts and set it for two hours.

When the collard greens and edamame were done (about 2 hours) I added the chicken and  pork  to heat through.  At the same time I added a piece of fresh ginger root and a small clove of garlic to “freshen” the flavors up a bit.

Obviously not a traditional hot and sour soup, but it was a good test of the “flavor infused” broth, and pretty tasty with the chicken and pork to add some richness, and the textural variety of the mushrooms, greens and water chestnuts.  A garnish  of green onions when served finished it off nicely. (I didn’t add the eggs, either.)

Verdict on the broth–not bad–actually much better than I expected– but if I’m going to make traditional real Chinese hot and sour soup (with tree ears and lily buds) I will start with my own stock–besides, I really like my hot and sour soup with pork. But if it’s just hot and sour I want, I might use another box of “flavor infused” broth!

A son goût!

Rice-cooker pasta with tomato sauce

Some days  a big serving of pasta with a simple tomato sauce is really necessary–it’s kind of attitude adjustment on a plate. On some of those days, it has to be really hands-off since I’m slaving at the computer with a deadline and just can’t be mucking about in the kitchen even though I want something to eat.

One of my favorite “comfort-food” sauces is the very simple one from Marcella Hazan’s Essentials of Classic Italian Cooking–“Tomato Sauce with Onions and Butter” (p. 152).  Not even any garlic.

Krups rice cooker IMG_3796Even though it’s not complicated to make, I wanted it even easier since I had to meet indexing deadline.  I decided to try it in the rice cooker since that’s work well for other pasta dishes.  (I’m NOT kidding–you can cook  pasta in the rice cooker, been doing it ever since I first made mac ‘n’ cheese that way from the recipe that was included with the Krups rice cooker).  This is one where I don’t mind having “leftovers”.

Pasta with tomato sauce

Ingredients

  • 1 14.5 ounce (411 gm) can of diced tomatoes (no added salt)
  • 1 small onion, diced fine
  • 2 tablespoons of butter (also good with olive oil, if you want to avoid the butter–or for a change)
  • salt to taste
  • grated parmigiano-reggiano (for the table)
  • 100 grams pasta of your choice
  • 200 (about 1 cup or 250 mL) water.

Preparation

  • Microwave the onion with the butter until the onion is soft and translucent. eat
  • Add the onions, butter, tomatoes (undrained), salt, and pasta to the rice cooker.
  • Turn on rice cooker and continue working until you smell it–about 15 to 20 minutes, and with a little minor adjustment, it should be ready to eat.

<><>||<><>

The Krups rice cooker (with slow-cooking and steaming functions as well) is not one of the fancy “fuzzy logic” ones.  Just simple physics of boiling water–it turns itself to warm when the temperature starts to rise when the water has been absorbed and the temperature goes above 212°F.  Simple–and easy to manipulate when you understand how it works.

For this rice cooker, the ratio of liquid to pasta needs to be 2.5:1 for al dente pasta. If it’s not quite there, just add about 1/2 cup more liquid and turn it back on.  When the rice cooker switches to warm function, the pasta will be fairly dry since this depends on all the liquid being absorbed.  If you’re hanging about in the kitchen, peek in about 15 minutes later and check the pasta and the consistency of the sauce. –

I usually  add a bit less liquid –maybe 50 mL short–let the cooker switch to warm, and then add just a bit more liquid, stirring the pasta, to thin the sauce a little, give it a few minutes to heat, and  then eat!

I used spaghetti for this, but broke it in half since full length won’t fit in the rice cooker.  So far this has worked for all the pasta types I’ve tried–penne, conchiglie, farfalle, fusilli, gemelli, macaroni, orzo, and, now spaghetti.  (I’ve only tried “flat” pasta (read “noodles”) once and that has been the only time the pasta stuck together, though that might have been lack of oil during the cooking–or the difference in flour and eggs in the pasta.

It may not be fancy, but….a son goût!

Trying a new recipe….

As much as I’ve talked about improvisation in the kitchen when you’re doing single-serving cooking, I do occasionally like to have a recipe, at least for starters.  Trying to cut a recipe serving six or eight to one-person size is really frustrating.  The major ingredients are not that hard to do–it’s the seasonings that are hardest.  You’ve a much smaller quantity so you do need to cut them, but usually NOT by the same proportions as the main ingredients, so I was excited to see that the editors at America’s Test Kitchen had come out with Cooking for Two 2013, in addition to the Cooking for Two 2011.

In perusing  these (Kindle editions), I though the recipes looked like a good starting place for single-serving cooking: many looked as if the second serving would freeze well, and that’s a bonus. (If you’ve read much at all here, you’ll know I don’t “do” leftovers, nor do I do the cook-one-thing-and-eat-it-all-week scene.) For me, having one serving to eat now, and one in the freezer is good. Other recipes looked as if I could prepare a single chop or chicken breast, with the full recipe, freeze that, and then just add the meat later after thawing the base.

One of the appealing things about the recipes in these books is that they are not terribly involved–like weeknight suppers, and not all-weekend cooking marathons–and shouldn’r leave you with a sink overflowing with dishes, pots and pans.  Definitely worth a try since I’ve always had good results with recipes from Cook’s Illustrated and Cook’s Country.

When making a recipe for the first time, I do follow it–otherwise how would I know how I need to change it?  For my first exploration from the 2013 Cooking for Two I picked a dish that I though sounded tasty and fun, and that the second serving could be put in the freezer: “Moroccan-Style Quinoa with Chickpeas and Kale”.  I like quinoa, I like chickpeas, and kale so this seemed a good one to try.  I honestly did follow the recipe.  Really I did, despite some temptations to tweak the seasonings…like put in extra garlic–that sort of thing.

I’m going (since I’ve given you the attribution above) to reproduce the recipe here with a little adaptation (because I don’t want to key in the entire thing).  It was easy to follow, and –very little cleanup afterwards–all good points.

Moroccan-Style Quinoa with Chickpeas and Kale

  • 2 tablespoons olive oil
  • 1 small onion, chopped fine
  • 1 carrot, peeled and cut into 1/4-inch pieces
  • 2 garlic cloves, minced
  • 1/4 teaspoon ground coriander
  • 1/8 teaspoon red pepper flakes
  • 1/2 cup quinoa, rinsed (if not prewashed)
  • 1-1/2 cups vegetable broth
  • 3/4 can of chickpeas, rinsed
  • 2 tablespoons golden raisins
  • salt and pepper
  • 6 ounces kale, stemmed and chopped into 1-inch pieces
  • 2 tablespoons pine nuts, toasted
  • 1/4 teaspoon lemon zest plus 1 teaspoon juice
  • 2 tablespoons crumbled feta cheese
  1. Heat 1 tablespoon oil in medium saucepan over medium heat until shimmering. Add onions, carrot and cook until onion softens. Stir in garlic,  coriander, pepper flakes and cook until fragrant. Add quinoa and cook stirring often until lightly toasted.
  2. Stir in broth, chickpeas, raisins, 1/8 teaspoon salt.  Place kale (still wet from washing) on top and bring to a simmer.  Cover, reduce heat to low, and simmer until quinoa to  is transparent and tender (18 to 20) minutes.
  3. Off heat, add the remaining 1 tablespoon oil, pine nuts, lemon zest and juice. Sprinkle with feta, season as needed with salt and pepper to taste.  Serve.

-<>^<>-

I’m likely to make this again, because it did go together easily, and cleaning up afterward was easy; but there will have to be some serious modification! The quinoa and chickpeas part of it is okay–except for being  very bland–and I really, honestly did follow the quantities given in the recipe so I’d know. Well, now I do!

I’m not really familiar with Moroccan style seasonings, but I don’t think that this was it.  Even with the added lemon zest and juice, garlic, red pepper flakes, raisins, and coriander, it’s definitely not even approaching complexity. It’s missing something.

Then there was the kale. The recipe didn’t say anything about what kind of kale.  When I went to the  market, I did look for Toscano (Lancinato, Nero) or Russian red kale, but I could find only the curly, redbor kale; I picked out the smallest, youngest looking leaves in the bin. But it still wasn’t what this dish needed–at least for me. The kale completely overwhelmed the flavor of the rest of the dish–I had kale-flavored quinoa and chickpeas.  For me it  just did not fit with the quinoa and chickpeas.

I liked the idea of a one-dish meal (since it’s something I’ve posted about here a number of times), but I’ll not do it with that particular kale again.  I think I’m more likely to do spinach, or maybe arugula, though I might try it with Toscano or Lancinato kale, hoping that would be a bit milder.  (No pictures either–even with the smaller leaves, the kale was a rather icky green by the time it was tender.)

My other frustration with the recipe–supposedly for two–was that the servings were huge–I  have at least two more  servings sitting in the fridge now, even after having had a very reasonable portion for supper. Another piece of information for when I try another of the “for-two” recipes.

I know that when writing recipes public consumption, you do have to be moderate with seasonings, but this was downright bland, not something that I expect from recipes from this source–I’ll be looking out for that with other recipes. I guess I was expecting to taste and think that I’d need more garlic, or maybe more red pepper flakes next time, but I wasn’t expecting what I got from this.

You think I sound frustrated?

You’re right–because I have come to expect better from the recipes from American’s Test Kitchen–and now I have two more servings to try to make more palatable. I’ll try to add more seasoning when I reheat, but I don’t want the quinoa to be total mush.

I will do the quinoa and chickpeas combo again, but likely replacing the vegetable broth with at least part chicken broth, definitely increasing the coriander, red pepper, lemon juice and zest, and figuring out some other spices to add for more complexity–while trying to still keep it simple. (That’s my rationalization for going in search of a Moroccan cookbook now.)

Bottom line for me, it’s a starter–now to see where I can go with it. But, I’ll be trying another recipe from the book….but I’ll definitely feel free to make adjustments right from the start on a few things.

Potato and cabbage soup

I like soup for a meal–if it’s a good hearty soup with lots of veggies and maybe some meat in it. All it takes is cold weather and I’m especially interested in soup. Well, we’ve got the cold weather right now and it’s apparently going to last a while, too. I’ve a small “dinner” ham–I’ve sliced part of it to use for sandwiches, and cubed part–some will go in mac ‘n’ cheese (in the rice cooker), and it seemed that part of it would be good for soup–some to eat now and some to freeze for later meals.

Looking in the fridge, I discovered a head of cabbage and some red potatoes, and, of course, ham.

  • a medium yellow onion, chopped and lightly browned in a scant tablespoon of bacon fat (or oil).
  • Two good serving of ham, in 1/2-inch cubes, browned.
  • Garlic, about 6 good-size cloves, coarsely chopped, and cooked with the ham and onion until it starts to smell fragrant.
  • several healthy shakes of hot red pepper flakes added and “toasted” with the ham an onions.
  • about 1/2 teaspoon of kala jeera (black cumin) added to toast just a bit with the contents of the pan.
  • Two bay leaves added to the pan.
  • Three cups water to degaze the good brown fond from the bottom of the pan (add more later if needed when all the ingredients are in the pot). Bring to a simmer.
  • Three medium red potatoes cut into 1/2- to 3/4-inch cubes and added to the pot.
  • Cabbage, 1/2 small head cut into 3/4-inch pieces, or shredded if you prefer, added to the simmering pot. Add more water if needed to just barely cover.
  • Put the pot into a 250°F oven, and ignore for about 2 hours (I was working on an index and didn’t want to have to mind the pot on the stovetop).
cabbage, potato, and ham soup

meal in a bowl

Since cabbage keeps so well, I almost always have it in the crisper, and potatoes, too. I’ve done similar soups  (starting with the onions, potatoes, and cabbage–varying the seasoning, of course) with various sausages–kielbasa being a particular favorite. I’ve used leftover roast, steak, chicken, or chops in similar soups as well. If the meat is already cooked, I’ll use broth (vegetable, chicken, or beef) instead of water.

The kala jeera has a rather flowery flavor (and you want to use it in small amounts as it could be a bit overwhelming, but the hint of the floweriness was a nice contrast to the smokiness of the ham and the earthiness of the cabbage.

Roast pheasant for dinner

Two Whole Pheasants- Pheasant MeatOn a recent troll of the after-holiday, year-end goodies at my local Harris Teeter, which includes the free-standing freezer in the meat department (as well as the carts at the front of the store), I found pheasants on sale so I decided we (neighbors and friends) needed to have pheasant–especially since at least one had not tasted pheasant.

This is a first for me–I’ve never cooked farm-raised pheasant before; I’ve always cooked the wild birds that we got by hunting. Those we always braised since they could be old and tough.  I went to the McFarlane website Pheasant for Dinner to see what information I could find. I guess these are not likely to be either old  or tough, so I thought about roasting–then I decided that cooked in my Romertopf might be best since pheasants–even farm raised don’t have a lot of fat on them.  I decided that brown basmati rice would cook at the same time under the cut up birds; kind of self-seasoning with the pheasant juices–and whatever else I decided on.

Pheasant dinnerSince this was my first crack at farm-raised birds, I decided to seek expert consultation–from Mike Thomas in the meat department at Harris Teeter, thinking it likely that he’d be able to tell me more about the birds and how they would cook.  He agreed that the Romertopf should be a good way–so that decision was made.

As for seasoning, I was still debating. I wanted tangerines, but couldn’t find them. Tangelos? Well, maybe.  The meat of the tangelos was not very tasty, so I  got Mandarin oranges as well, but use only the tangelos as the mandarin oranges were too sweet.

I originally planned to do fingerling potatoes in the Romertopf with the birds, but I couldn’t get my head around orange and potato together, so I changed to brown basmati rice instead since it could also cook right with the birds in the Romertopf.

My next decision was whole or cut up. I finally decided that cut up would be best–so that I could use the carcasses to make some stock for cooking the rice. So get out the knives! I found a good demonstration on cutting up a pheasant at the McFarlane website–as I thought it’s like disjointing a chicken.  Since it’s not something I do all that often when doing single-serving cooking, it did take a bit, but I got them cut up.  I left bones in–even in the breasts since I think there is a lot of flavor in meat on the bone.

Pheasant dinner-2

into the oven

The backs, wings, necks, and other miscellaneous pieces, with carrot, onion, and bay leaves went into the stockpot (after browning). Simmered and skimmed I had a good start on the rice.

I minced two medium onions, four large cloves of garlic, and sautéed these with the rice before adding it to the soaked Romertopf with the rinsed basmati rice (two cups) with stock.  I added the zest of two tangelos to the rice. I pulled the meat from the stock bones and the giblets, chopped them finely, and added those to the rice–kind of a “dirty” rice here. That plus the 4 cups of stock went into the soaked Romertopf with the pheasant pieces on top, and into a cold oven, as usual with the Romertopf.

For a sauce, I modeled it after the one used for duck with fresh figs; I reduced the remaining pheasant stock and the juice of one tangelo slowly to about 1-1/2 cups–it’s not intended to be thick–more “au jus”. It needed a bit of sweetness despite the tangelo juice. After tasting both thyme honey and leatherwood honey, I opted for the leatherwood, since there was thyme with the bird and the leatherwood added a “dark” contrast to the tangelo and the meatiness of the stock.

(It looked great when I opened the Romertopf, but I was too intent on eating to stop and take pictures.)

My friends brought some awesome roasted Brussels sprouts (with bacon and garlic) to accompany the pheasant–a good meal, with good company!

<>^<>

I used the ratio suggested for the brown basmati rice, but it was just a bit soupy. Next time I’ll use 1 part rice to 1.5 water. Otherwise I was pretty happy with the results–we certainly made a dent it the rice and the pheasant.

The farm-raised pheasants are more chicken-like than wild-pheasant-like–a little disappointing if you are used to the wild ones. I’d cook them again–if I find them on sale, but I’d really rather have the wild ones, though I certainly wouldn’t have been roasting them.

Not knowing the flavor of the farm-raised birds made choosing a wine a bit difficult. We drank a 2012 Ravenswood “Besieged” with it, and it worked well. This limited release is a blend containing 35% Carignane, 20% Petite Sirah, 18% Zinfandel, 13% Mourvedre, 9% Alicante Bouschet, and 5% Barbera. (This was a wine that I stumbled upon while doing my shopping one Saturday at the local Harris Teeter. I’m a definite Alicante Bouschet fan and this blend was very mellow, and fruity so I did something that I don’t do often–I bought a half case of it–and I think I’m going to wish I had more of it.